

Purpose
Agent plugins are bundles of customizations you can install from plugin marketplaces. They extend BoldCreate with combinations of slash commands, skills, agents, hooks, and MCP servers, while working alongside your existing customizations.
Key Benefits: - Simplify Configuration — Install complete workflows in one action - Standardize Practices — Enforce consistent coding standards across your team - Share Knowledge — Distribute expertise and best practices organization-wide
What Plugins Provide
Agent plugins can include the following components:
Slash Commands Chat commands prefixed with / for specific tasks (like /test-report or /deploy)
Skills Instructions, scripts, and resources that load on-demand for specific tasks
Custom Agents Specialized AI personas with preconfigured tools for domain-specific tasks
Hooks Automation scripts that execute at specific lifecycle points like SessionStart or PostToolUse
When to Use Agent Plugins
Team Standardization — Ensure consistent tooling across projects. Uses workspace settings to recommend the same plugins for all team members.
Quality Enforcement — Automate validation, formatting, and testing. Hooks can run these checks at key points in your workflow to maintain standards.
Knowledge Sharing — Make domain expertise available to everyone. Packaged skills and agents democratize specialized knowledge across teams.
Onboarding — Give new team members immediate access to required tools. New hires can install recommended plugins and be productive from day one.
Enabling Agent Plugins
Step 1: Discover Available Plugins
Follow these steps to find available agent plugins:
-
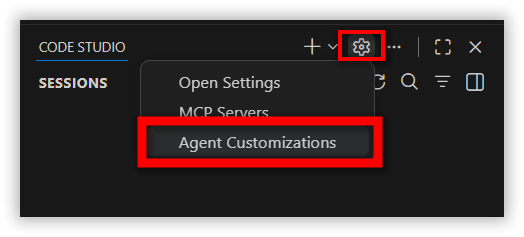
Select the settings icon in the Extensions sidebar and choose Agent Customizations.
-
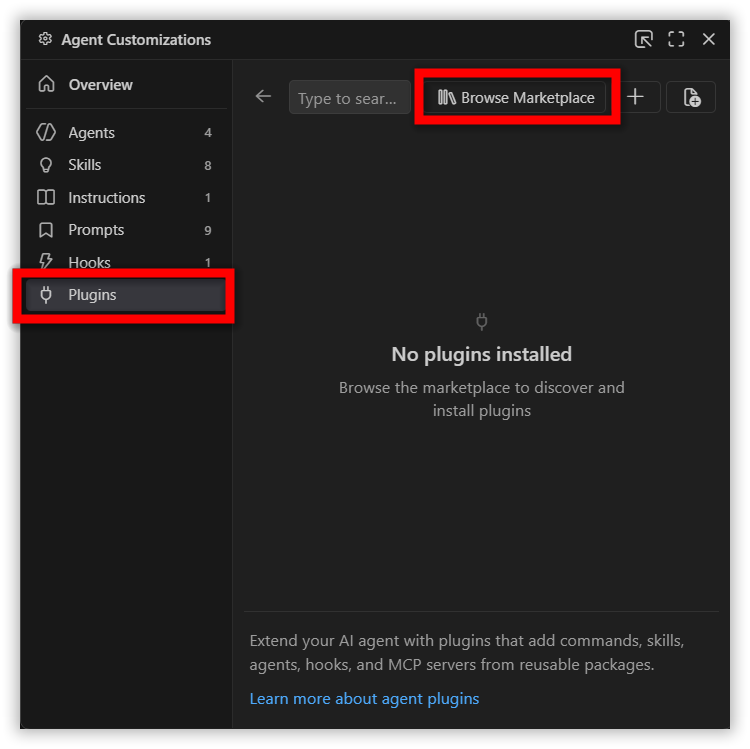
Select Plugins from the left menu, then click Browse Marketplace to view the list of agent plugins available
-
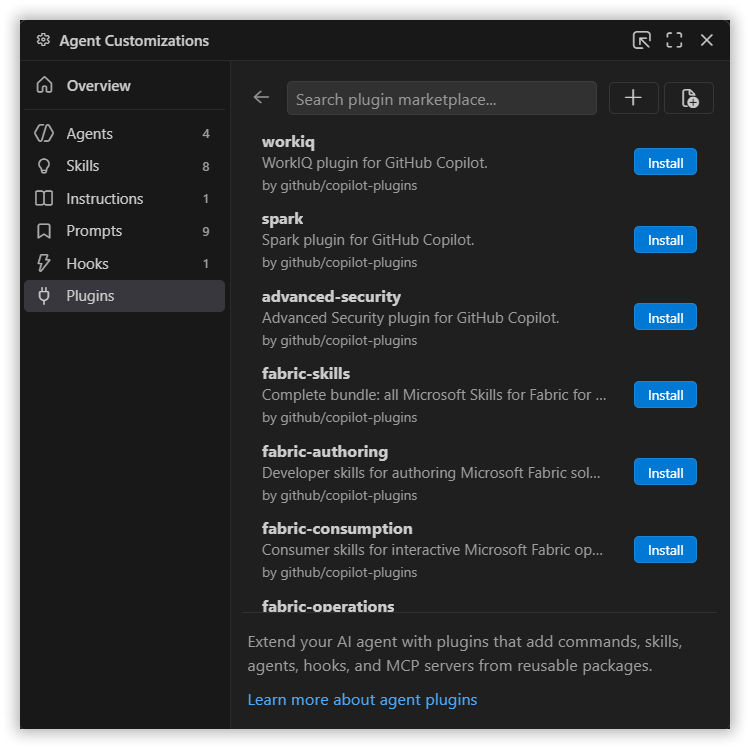
Browse the available plugins from your configured marketplaces.
-
Review each plugin’s description, author information, and version number before installation.
Step 2: Install a Plugin
Option 1: Install from Marketplace
To install a plugin from a marketplace:
-
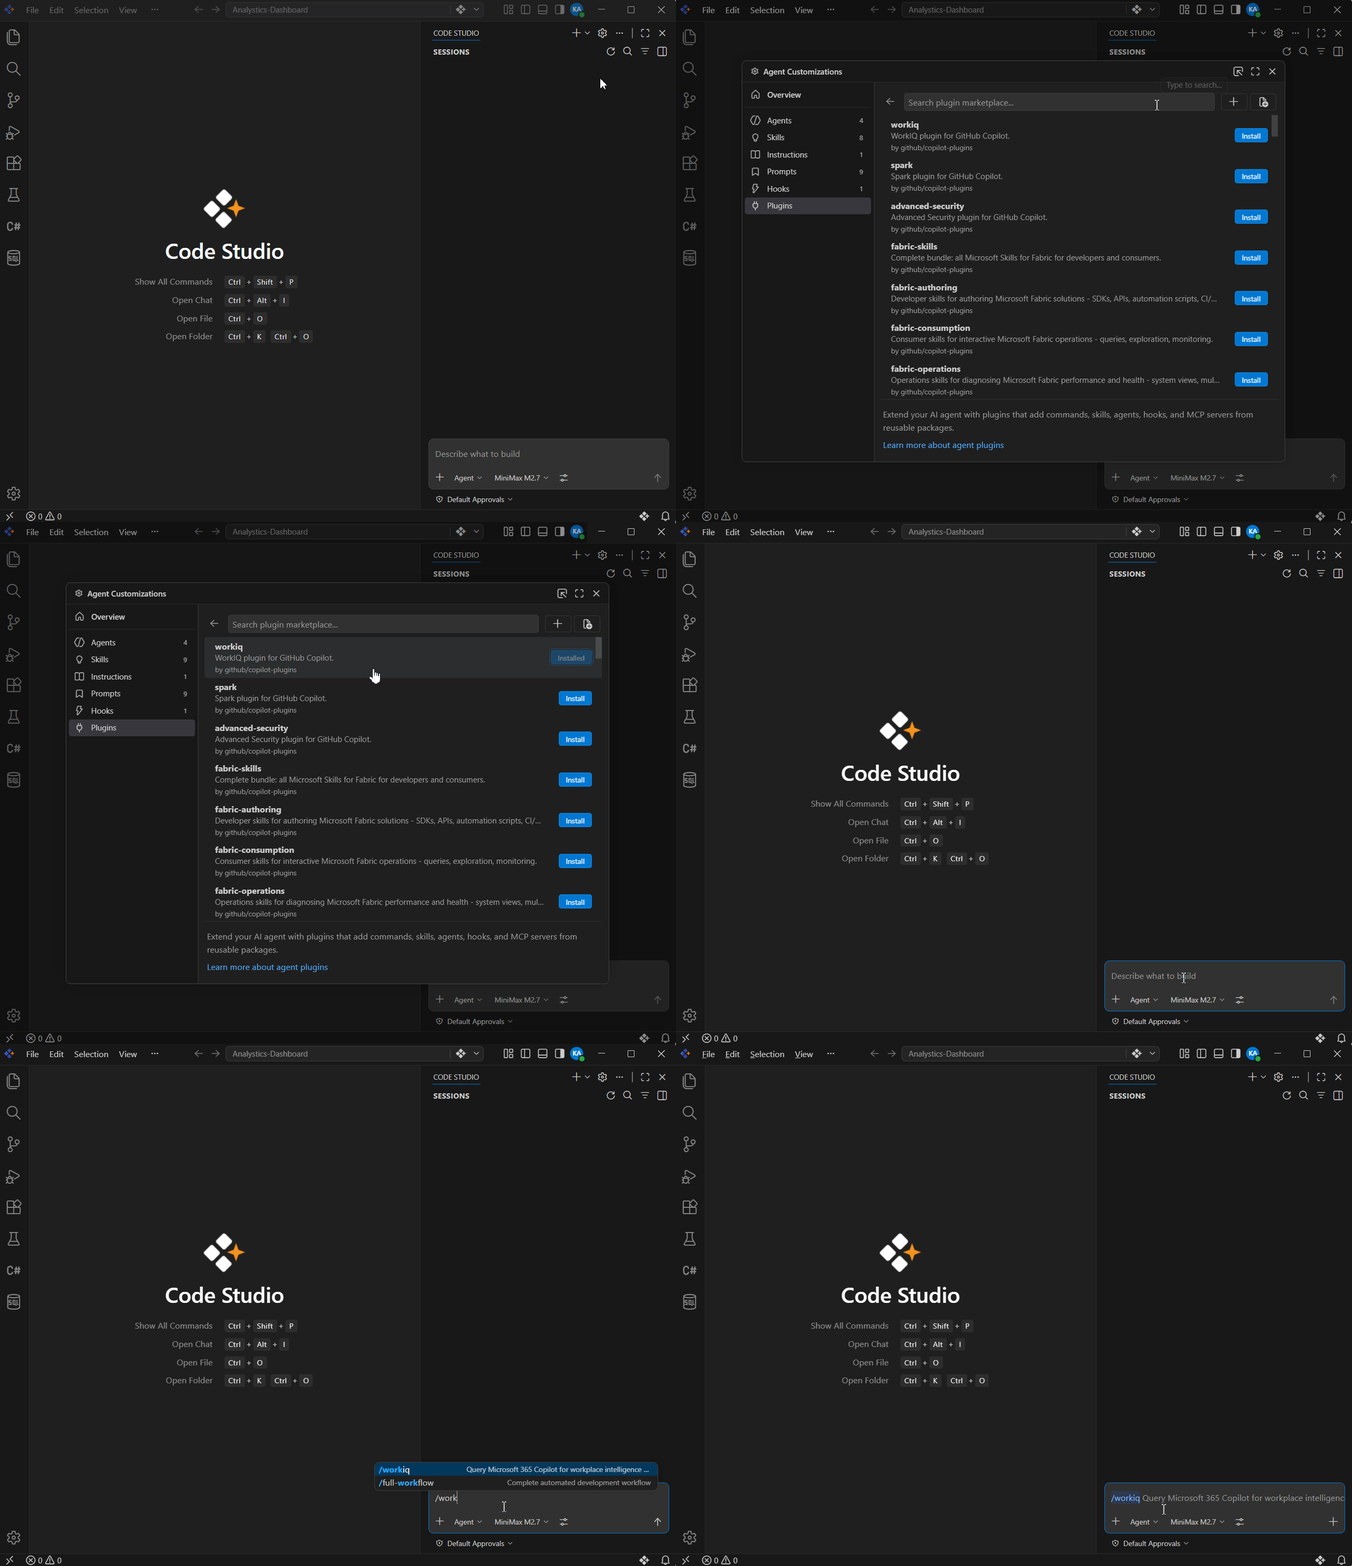
Click the Install button to add it to your user profile.
-
BoldCreate automatically downloads and registers the plugin.
Option 2: Install from a Git Repository
To install a plugin that is not available in a marketplace:
-
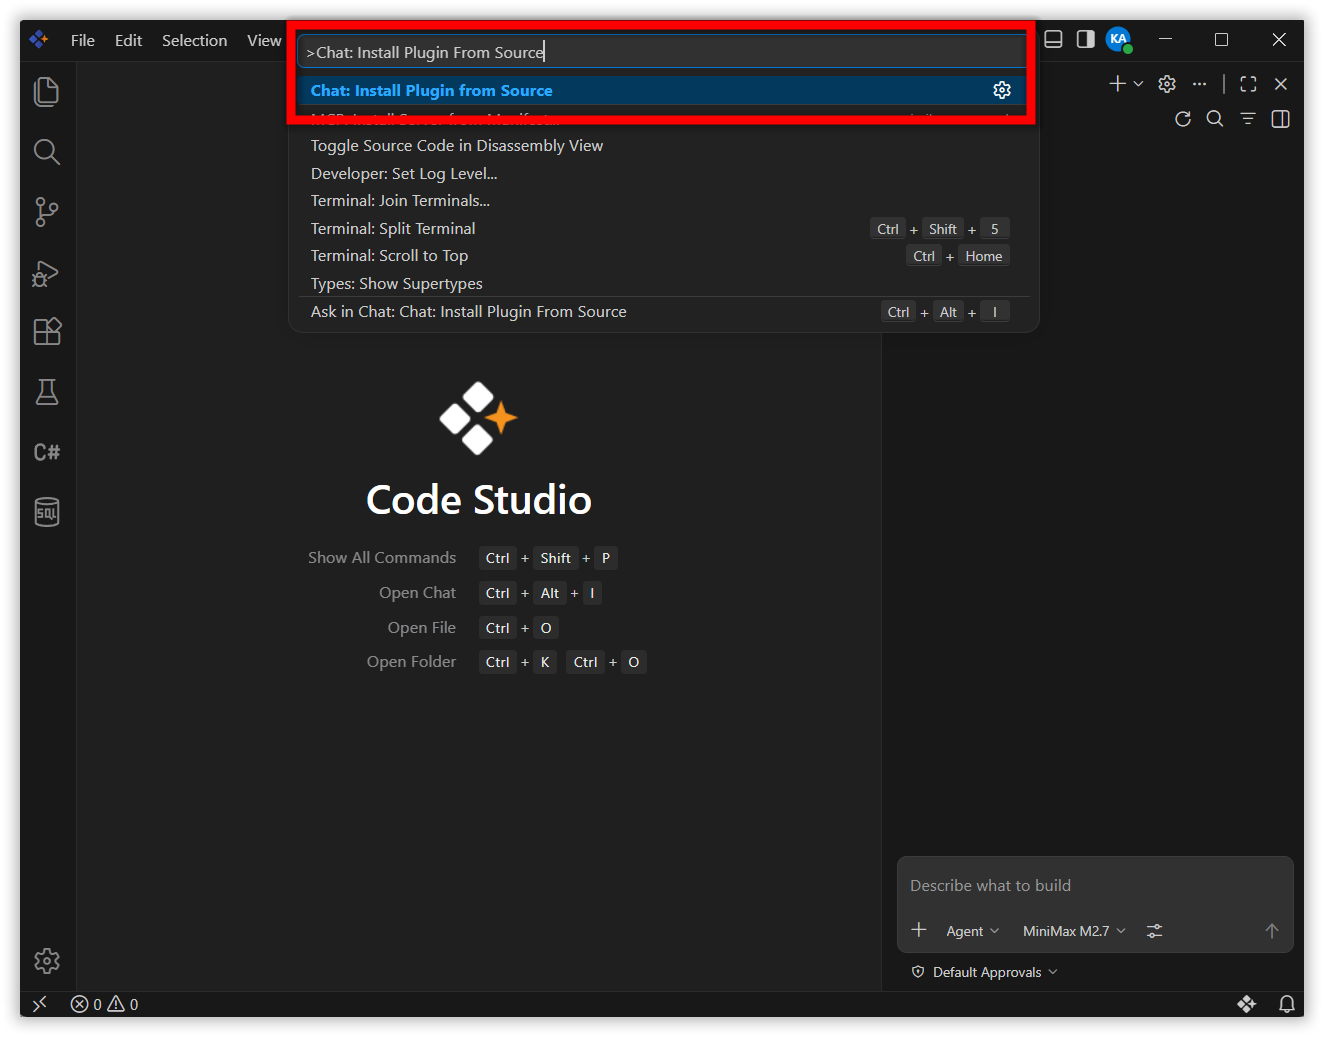
Open the Command Palette by pressing
Ctrl+Shift+P(Windows/Linux) orCmd+Shift+P(macOS). -
Run the command Chat: Install Plugin From Source.
-
Enter the Git repository UL (for example,
https://github.com/yourorg/custom-plugin).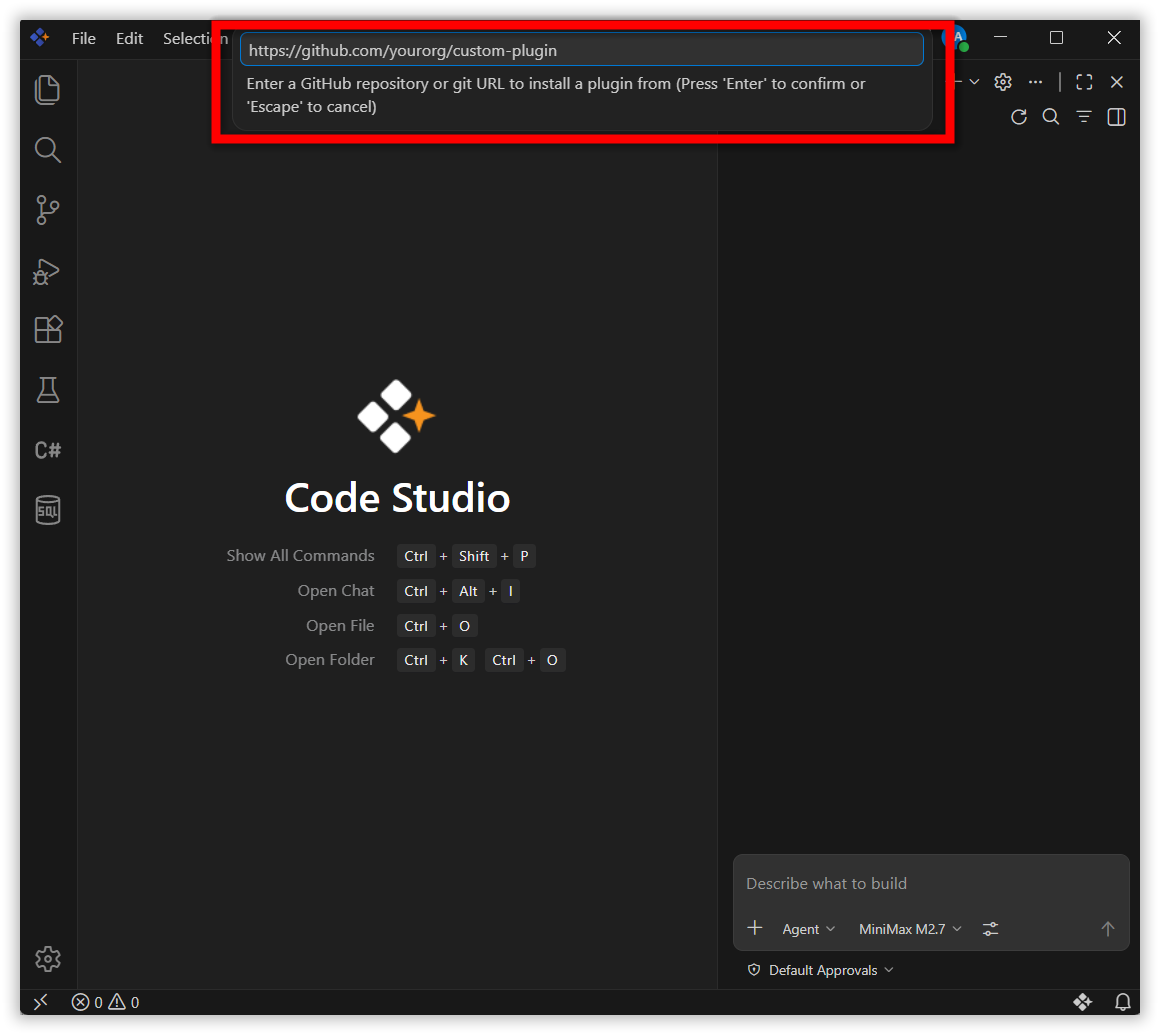
-
BoldCreate automatically clones the repository and installs the plugin.
Step 3: Manage Installed Plugins
To manage your installed plugins:
-
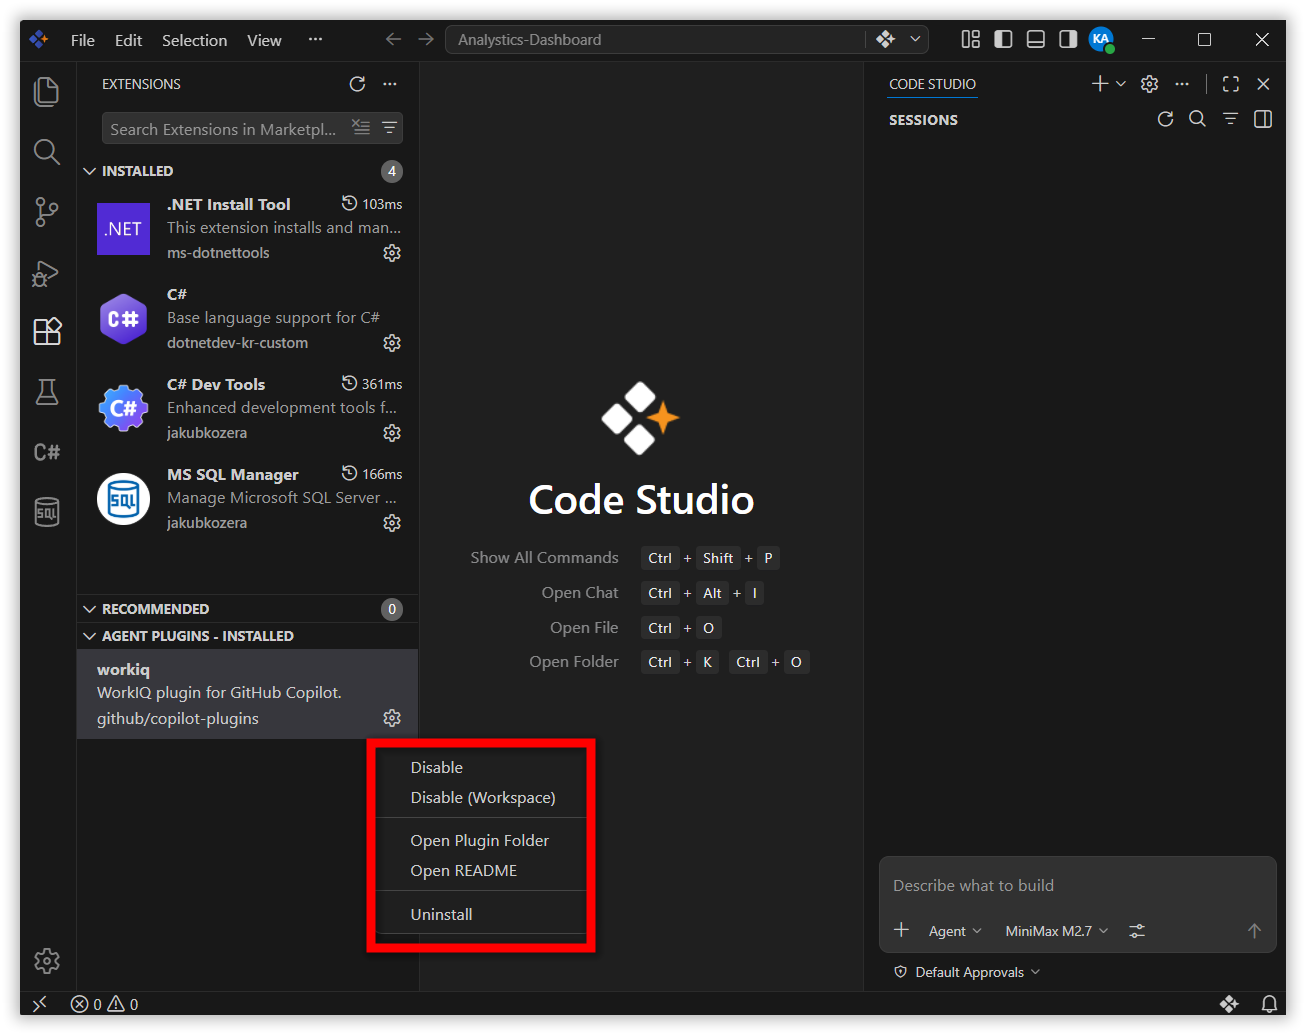
Navigate to Agent Plugins - Installed in the Extensions sidebar.
-
From this view, you can perform the following actions:
- View all installed plugins and their metadata.
- Enable or disable plugins globally or per-workspace.
- Uninstall plugins that you no longer need. Check for available updates.
Step 4: Update Plugins
BoldCreate provides two methods to check for plugin updates:
-
Automatic Updates: BoldCreate checks for updates automatically every 24 hours if the
extensions.autoUpdatesetting is enabled. -
On-Demand Updates: Press
Ctrl+Shift+P(orCmd+Shift+Pon macOS) and run Extensions: Check for Extension Updates.
Managing Plugin State
To enable or disable a plugin:
-
Open the Extensions view by pressing
Ctrl+Shift+X. -
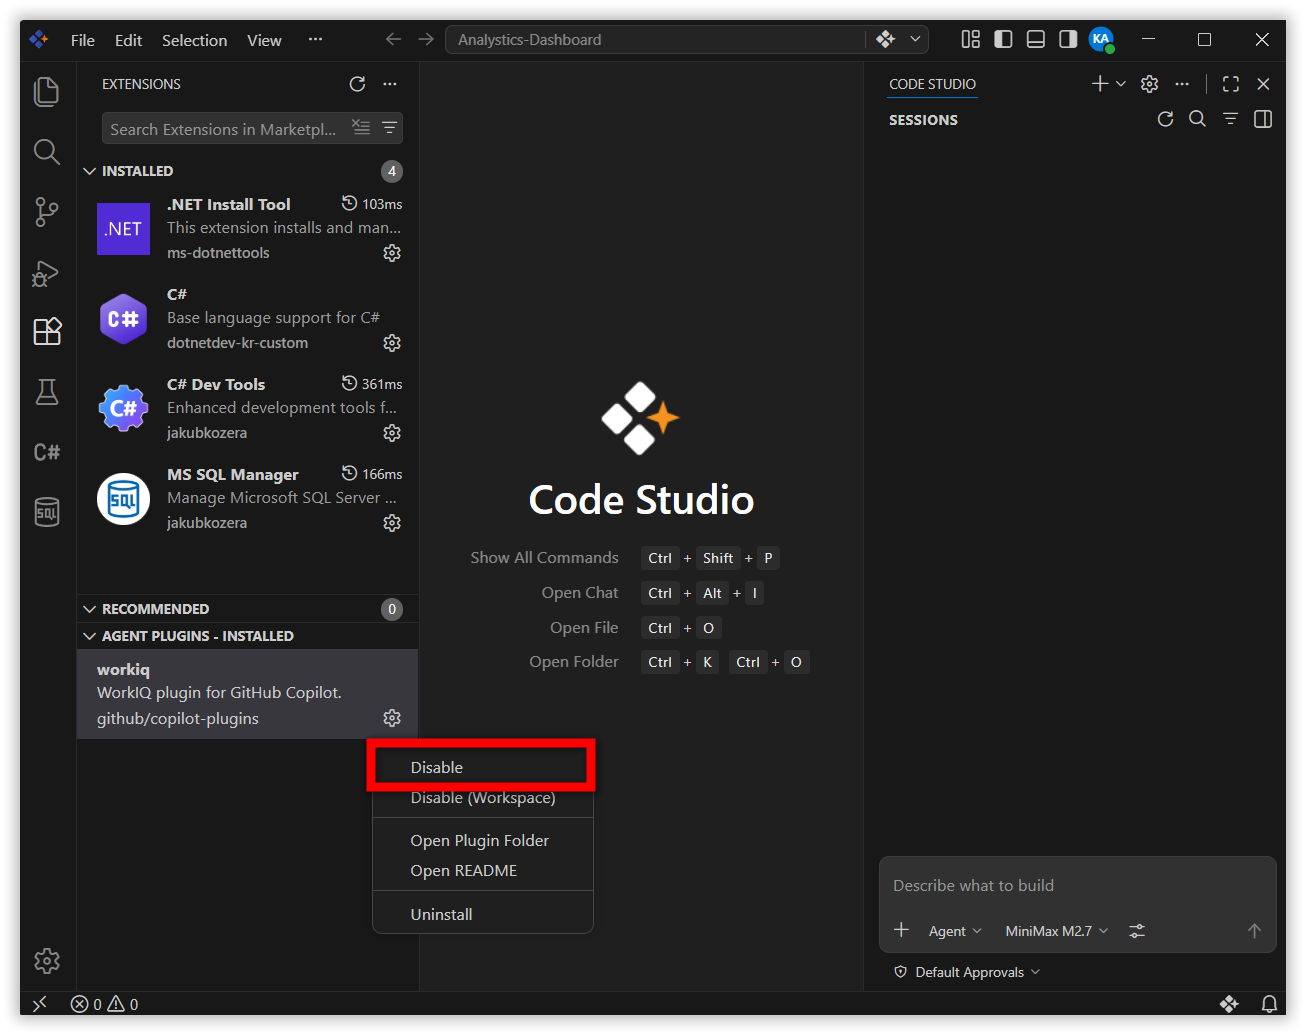
Navigate to Agent Plugins - Installed.
-
Right-click the plugin you want to manage and select Enable or Disable.
Effects of Disabling a Plugin
When you disable a plugin, the following components become inactive:
-
Plugin skills, agents, and slash commands are hidden from view.
-
Plugin hooks do not execute.
-
Plugin MCP servers are stopped.
Note: Disabling a plugin does not uninstall it. You can re-enable it at any time.
Understanding How Plugins Become Available
Once you install a plugin, BoldCreate processes the plugin’s configuration and makes its components available for use. Here is what happens behind the scenes:
Plugin Processing
A typical plugin contains the following components: plugin.json (manifest), agents/ (custom agents), skills/ (reusable skills), hooks/ (lifecycle automation), and .mcp.json .
When you install a plugin, BoldCreate performs the following steps:
-
Configuration Reading: BoldCreate reads the plugin’s
plugin.jsonfile to understand the plugin’s structure and components. -
Component Registration: The plugin’s AI components (agents, skills, and slash commands) are registered and made available for use in your chats.
-
Hook Setup: Any automation scripts (hooks) are configured to execute at specific moments during your AI interactions.
Where New Plugin Features Appear
After installation, you will notice the new plugin capabilities in the following locations:
-
Skills: New skills appear in the “Configure Skills” menu when you click it in the chat interface.
-
Custom Agents: Plugin agents become available when you switch between different AI agents.
-
Slash Commands: New slash commands (for example,
/analyzeor/format) work immediately when you type them in chat.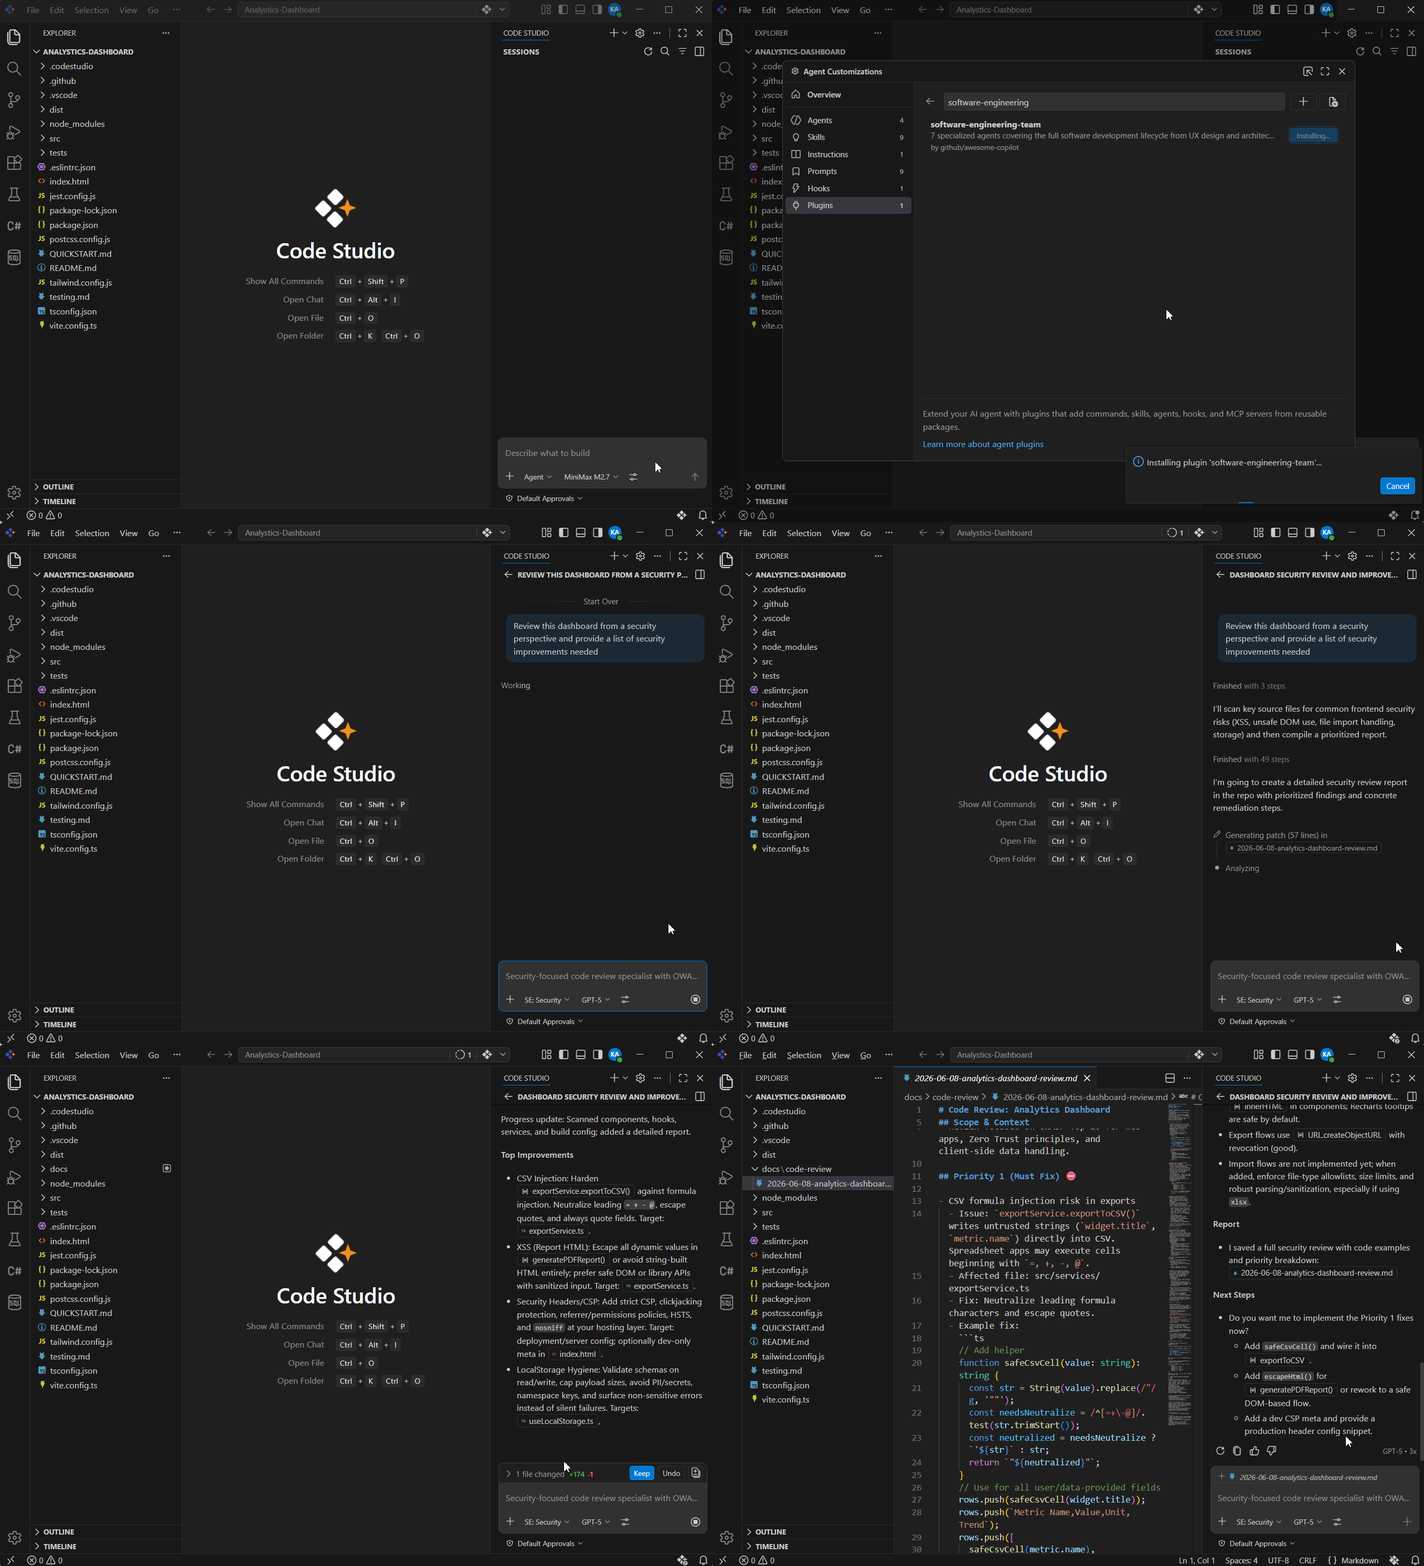
Essential Best Practices
-
Review Before Installing
- Check publisher reputation and credentials
- Read documentation to understand capabilities and required access
- Test in a separate workspace before using in production
- Ask: What will it do? What access does it need? Is the source trusted?
-
Stay Updated
- Enable extensions.autoUpdate for automatic security patches Or manually check for updates via the Command Palette
- Test plugins briefly after updates to ensure compatibility
-
Monitor Security
- Understand what each hook does and when it runs
- Review scripts to verify they match documented behavior
- Disable unnecessary hooks to minimize security exposure
- Use permission levels appropriately (allow/ask/deny)
-
Document & Share With Your Team
- Create a
PLUGINS.mdfile in your project repository listing all recommended plugins. - Share this file with all team members so everyone uses the same tools consistently.
- Create a
Related Features
For more information on features that work with agent plugins, refer to the following:
-
Agent Skills: Learn how to create reusable, specialized tasks for agents.
-
Custom Agents: Understand how to build domain-specific AI personas.
-
MCP Servers: Discover how to integrate mcp tools and data sources.