

Purpose
Custom Instructions allow you to define guidelines and rules that automatically influence how the AI generates code and handles development tasks in BoldCreate.
They serve the following key purposes:
- Provide durable, project-specific guidance that the assistant follows automatically in every relevant interaction.
- Reduce repeated context and instructions by specifying them once in a Markdown file instead of including them in every chat prompt.
- Cut down on repetitive chat instructions by setting default behavior, coding style, preferred tools, naming conventions, project context, architecture rules, and more.
- Give you the flexibility to manually attach instructions to a specific chat prompt when needed, while still benefiting from persistent repo-level defaults.
Types of Instruction Files
There are two types of instruction files:
1. Project-wise Instructions
- Apply rules to the entire project.
- Once configured, the AI assistant automatically follows these guidelines for all chats and code contexts in the repo.
- use this when you want one consistent set of standards across the whole project.
- File Type:
codestudio-instructions.md - Location:
.codestudio/codestudio-instructions.md(at the project root)
2. Path-specific Instructions
- Apply rules only when certain files or folders are in context.
- Useful when different parts of your project (e.g., frontend vs backend) need different coding standards.
- File Type:
*.instructions.md - Location:
.codestudio/instructions/- Example:
.codestudio/instructions/python.instructions.md - Example:
.codestudio/instructions/frontend.instructions.md
- Example:
When to use Custom Instructions
Use Custom Instructions when you want to:
- Set clear, permanent coding rules for the project (naming conventions, formatting style, folder structure, file organization)
- Make sure the AI always follows the same standards in every chat and code suggestion, without explaining the rules again and again
- Enforce important non-functional requirements automatically, such as:
- Security rules (never use inline scripts, always sanitize inputs, prefer prepared statements…)
- Performance best practices (avoid nested loops in hot paths, prefer memoization…)
- Accessibility guidelines (always add alt text, use semantic HTML…)
Enabling Custom Instruction Files
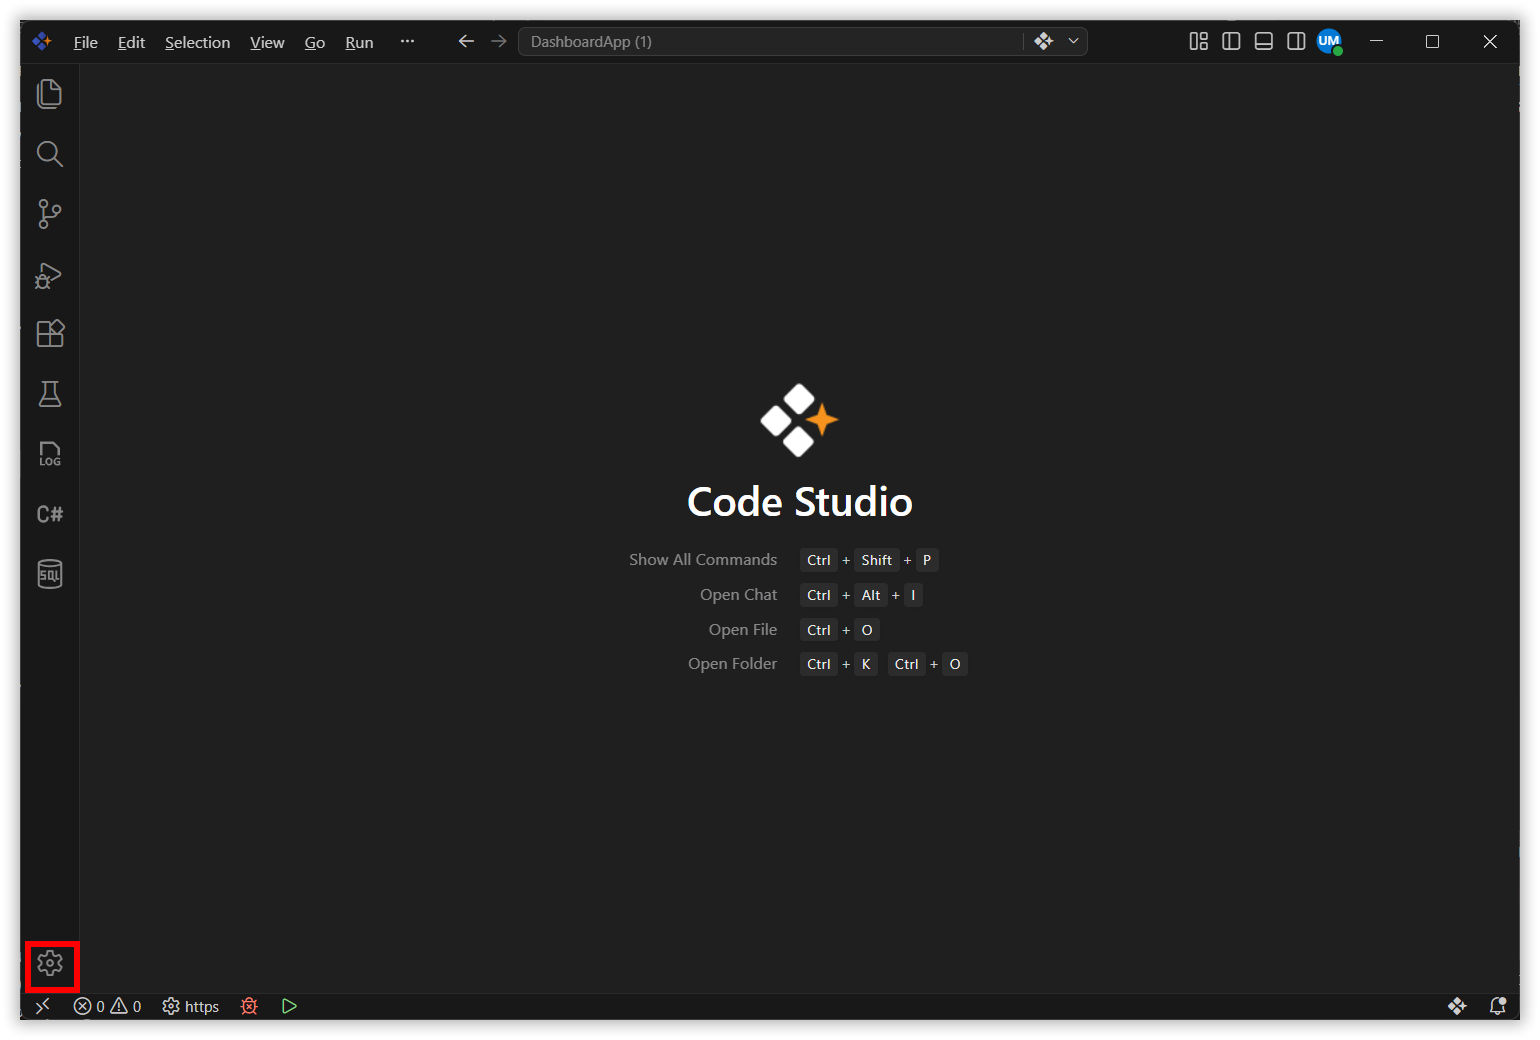
Step 1: Open settings at the bottom left in BoldCreate.
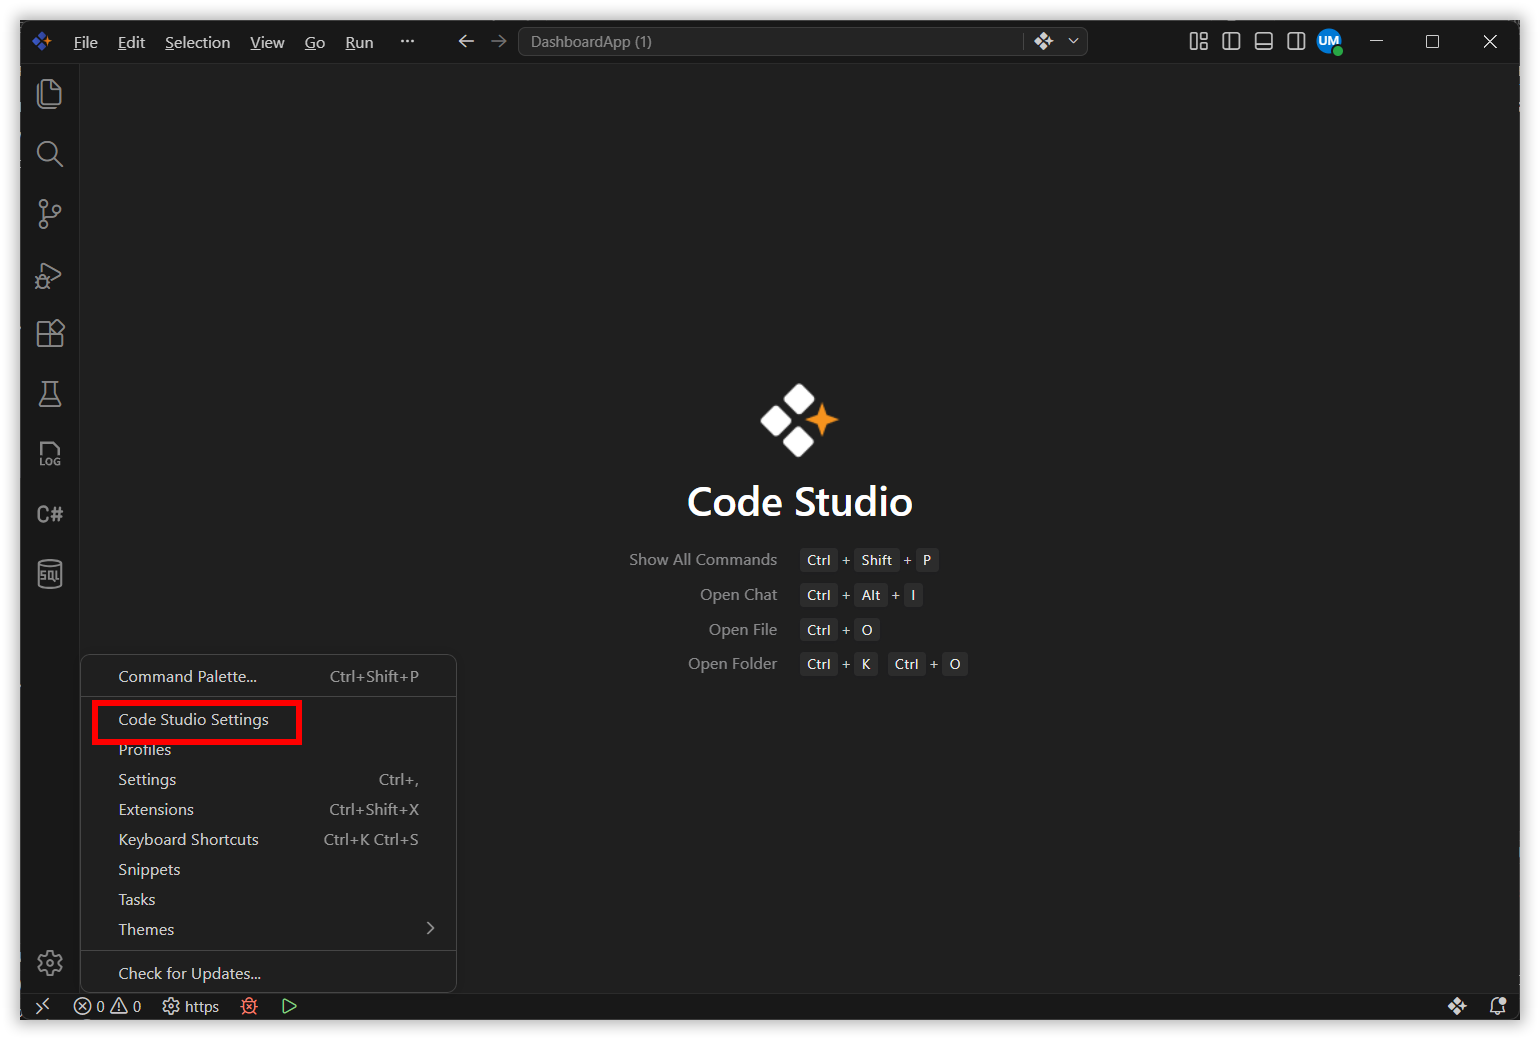
Step 2: Select BoldCreate Settings in the pop-up options.
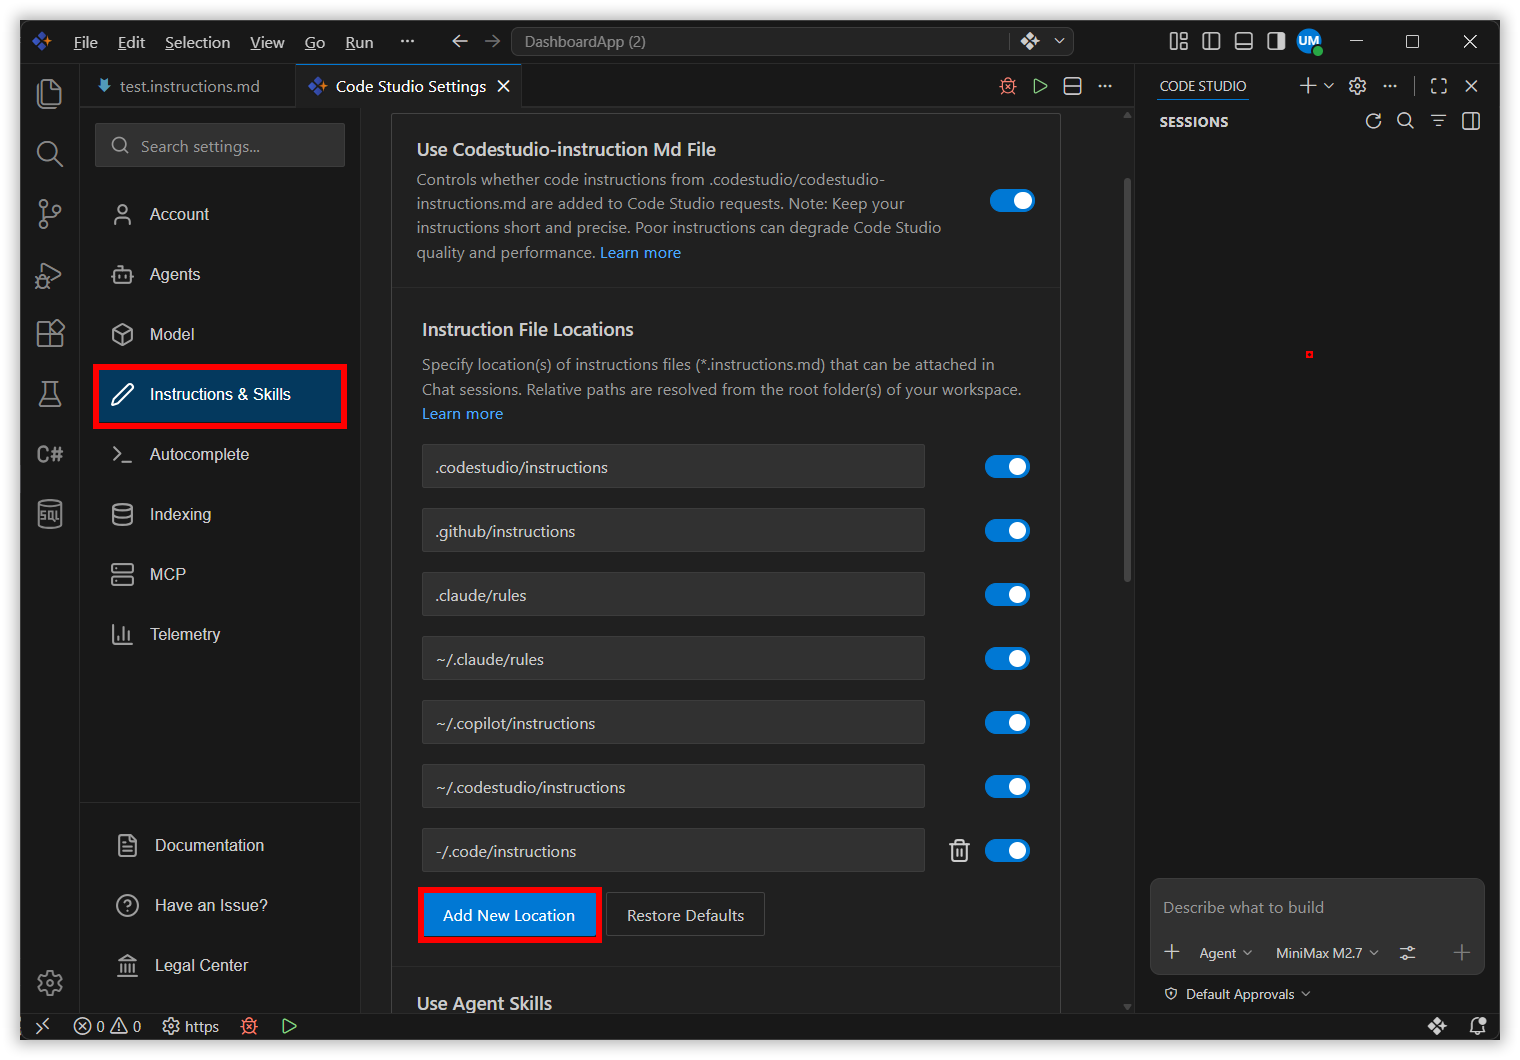
Step 3: Click Instructions & Skills in the settings options.
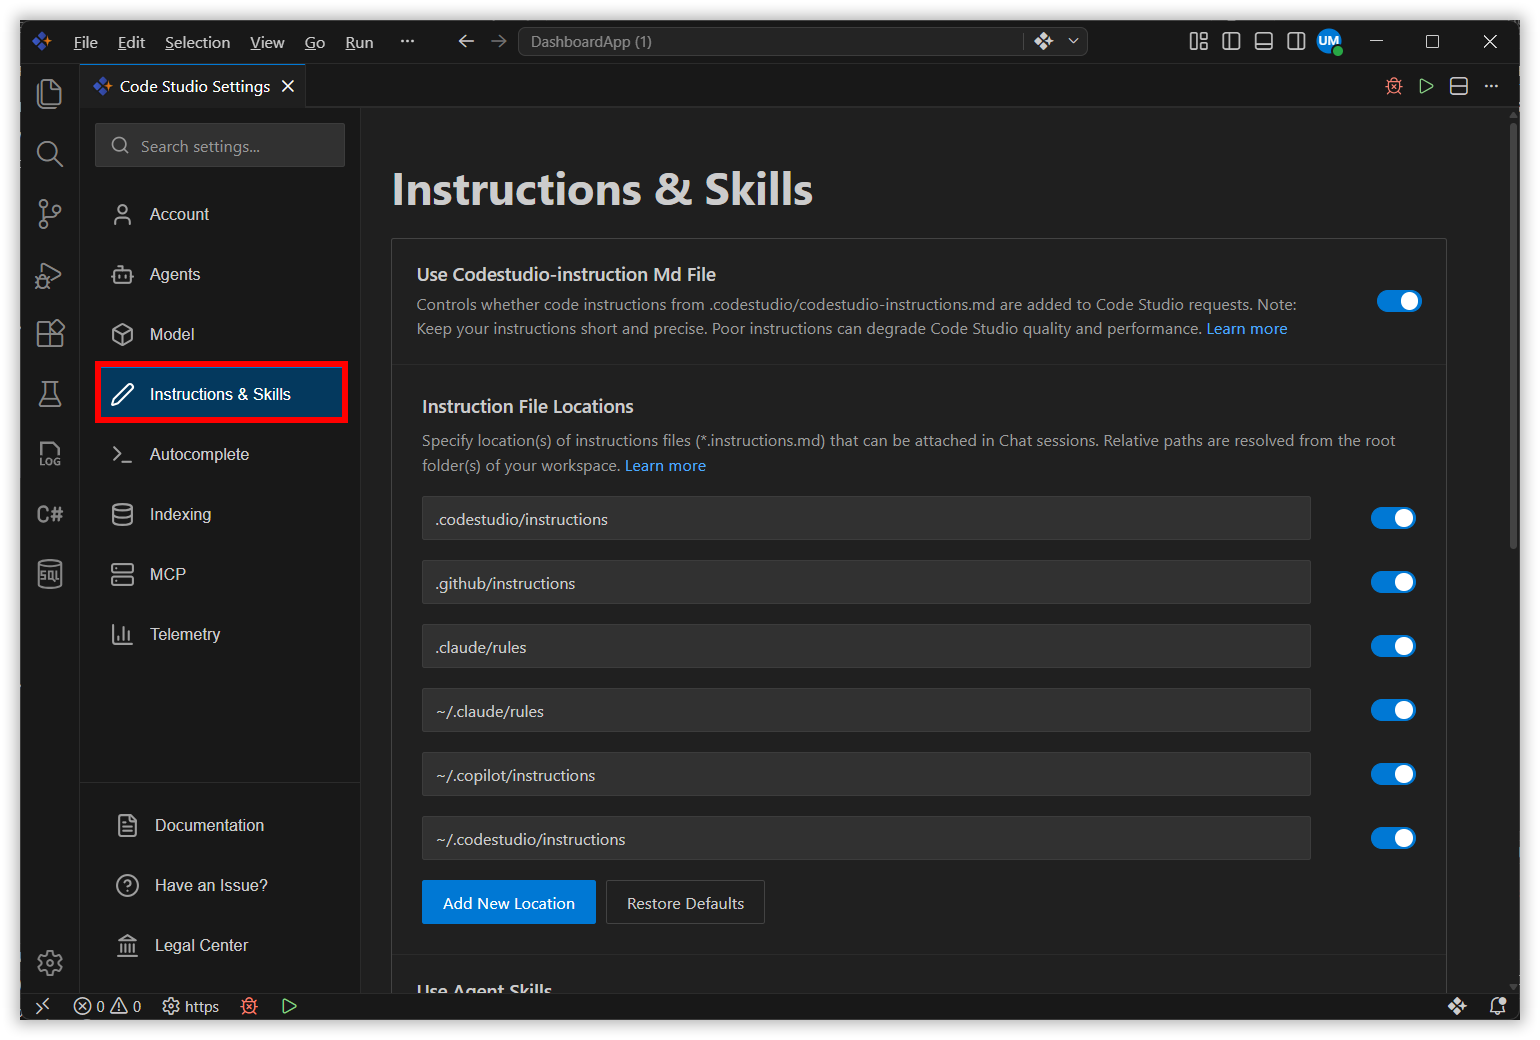
You will see three options:
-
Option 1: Project-wise instructions
- Use this option when you want one set of rules for the entire project.
- Switch ON the repo path to enable the file.
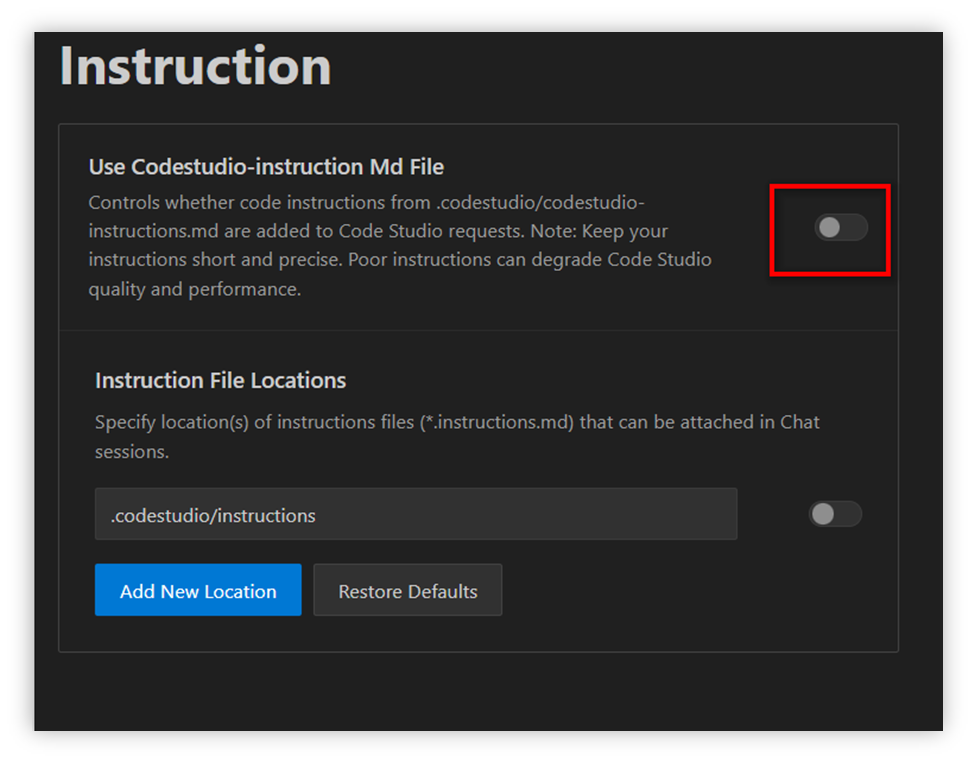
- Once enabled, the AI assistant will automatically apply these instructions to all chats and code contexts in your project.
-
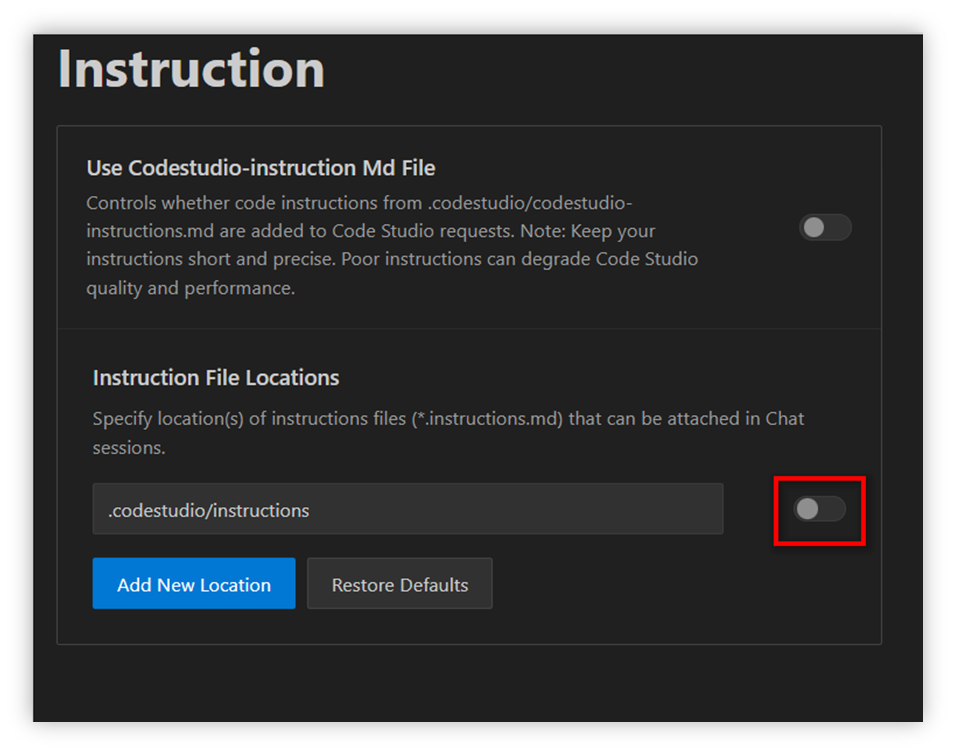
Option 2: Path-specific instructions
- Use this option when you want different rules for different file types or folders.
- Switch ON the repo path to enable the file.
-
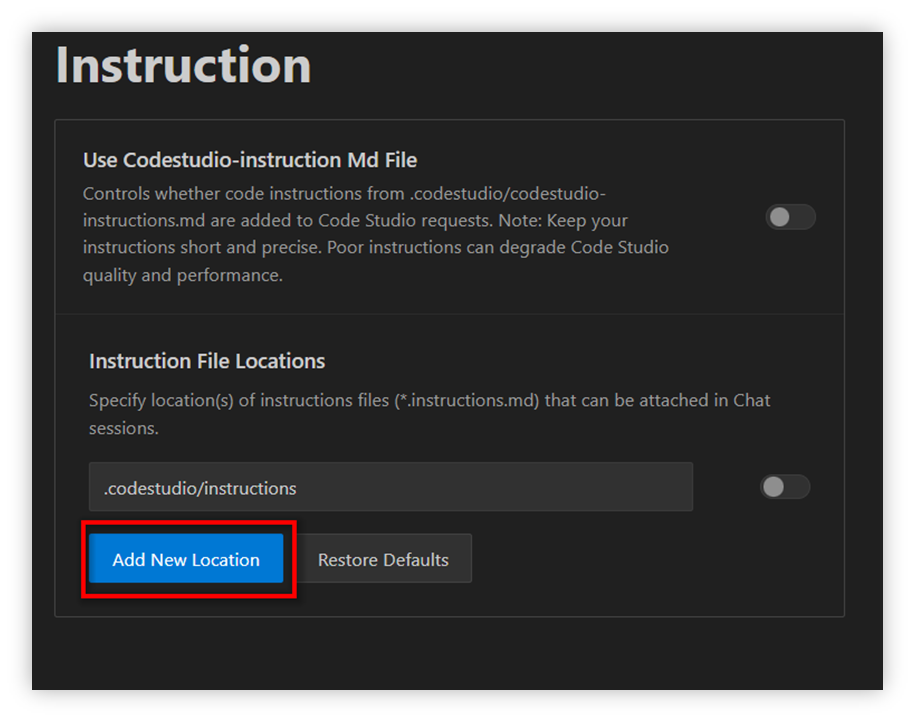
Option 3: Add New Path-specific Location
- Click the Add New Location in the instruction settings page.
- You can add a new custom file path and switch ON the path specific settings.
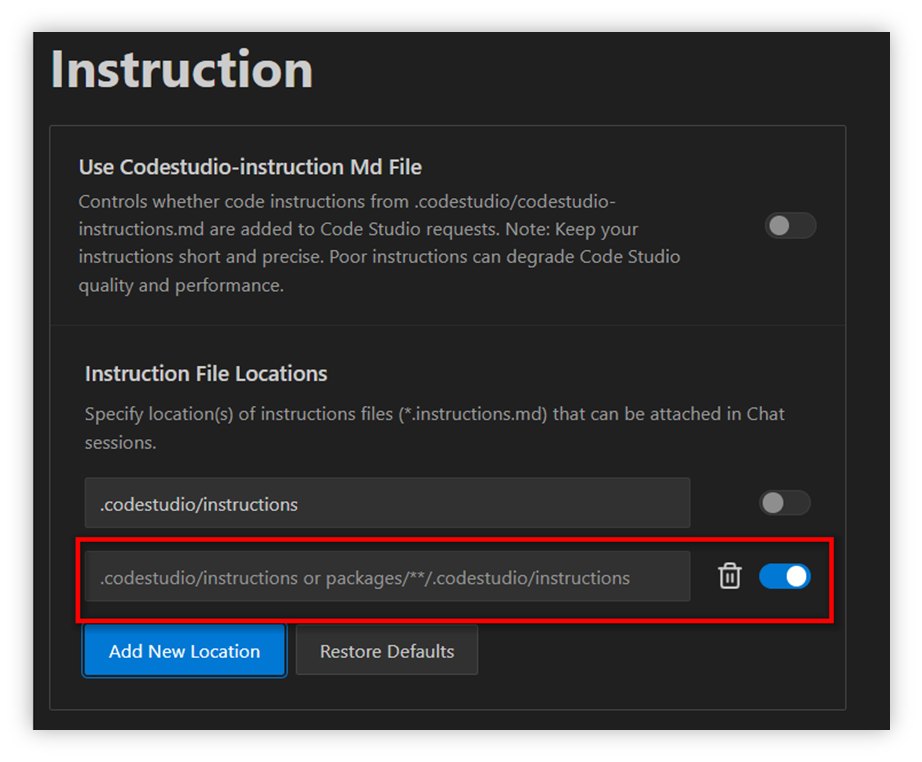
- Use this option when you want to create a new instruction file for a custom path.
How to Configure Project-wise Instruction File
Step 1: Open the codestudio-instructions.md file.
-
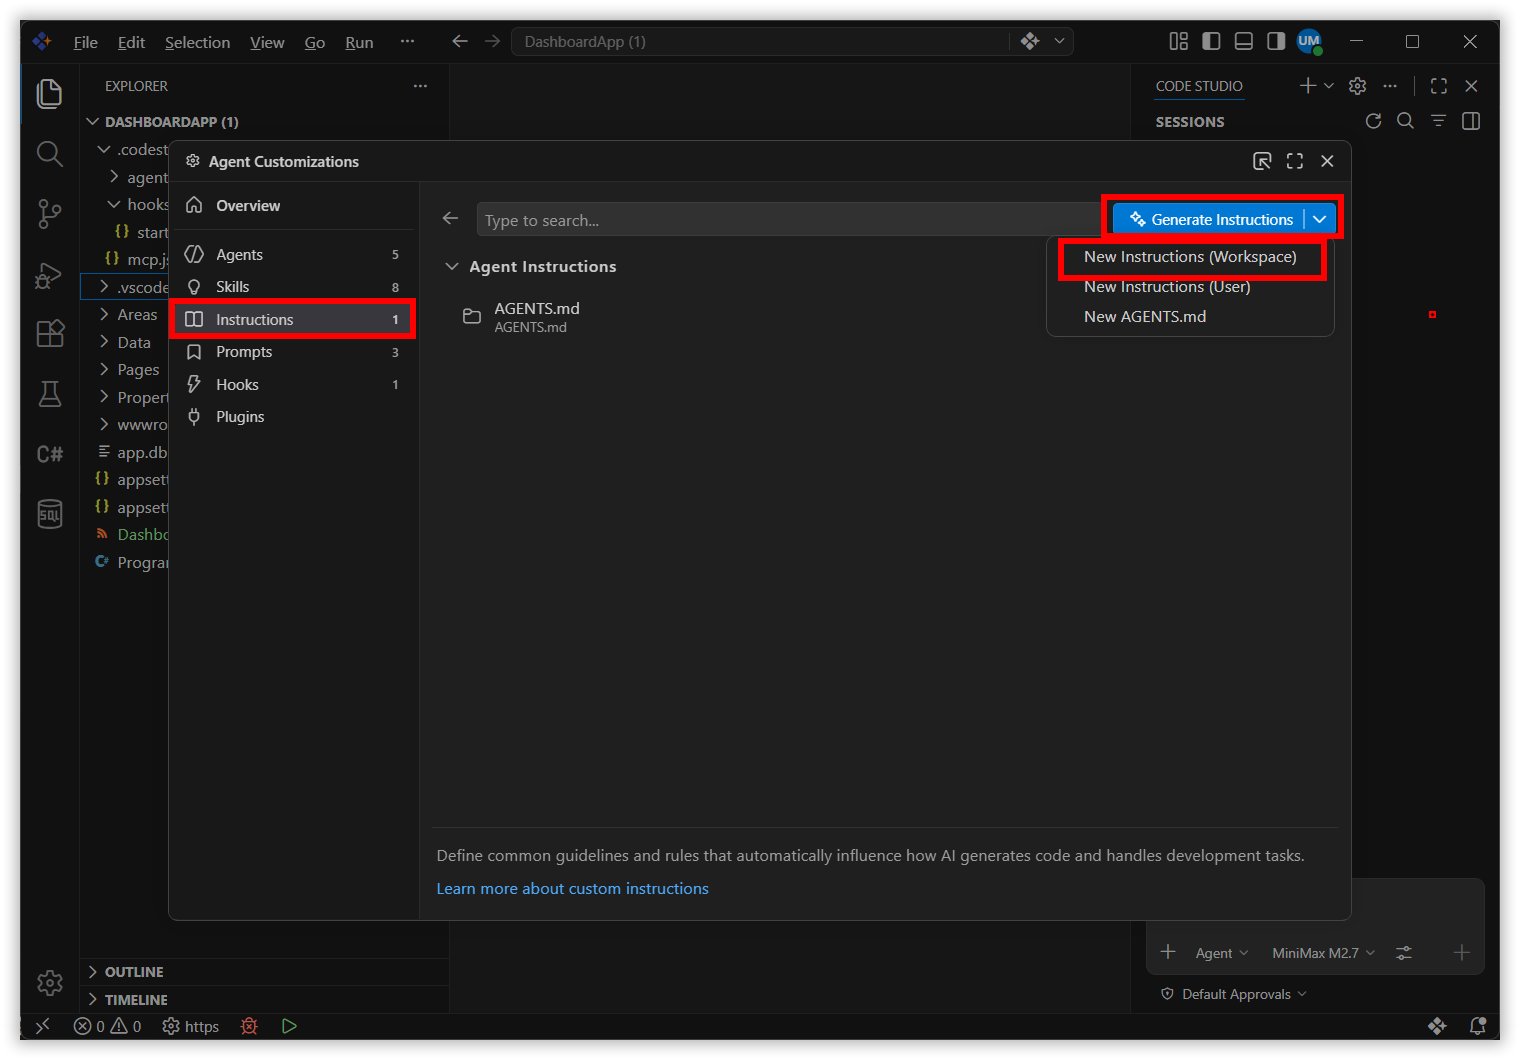
Open your project in Code studio. Click the settings option at the top in the chat and select agent customizations.
-
Click the “Generate instructions” and select New instruction(workspace) in the pop up.
Step 2: Now BoldCreate will automatically create and open codestudio-instructions.md.
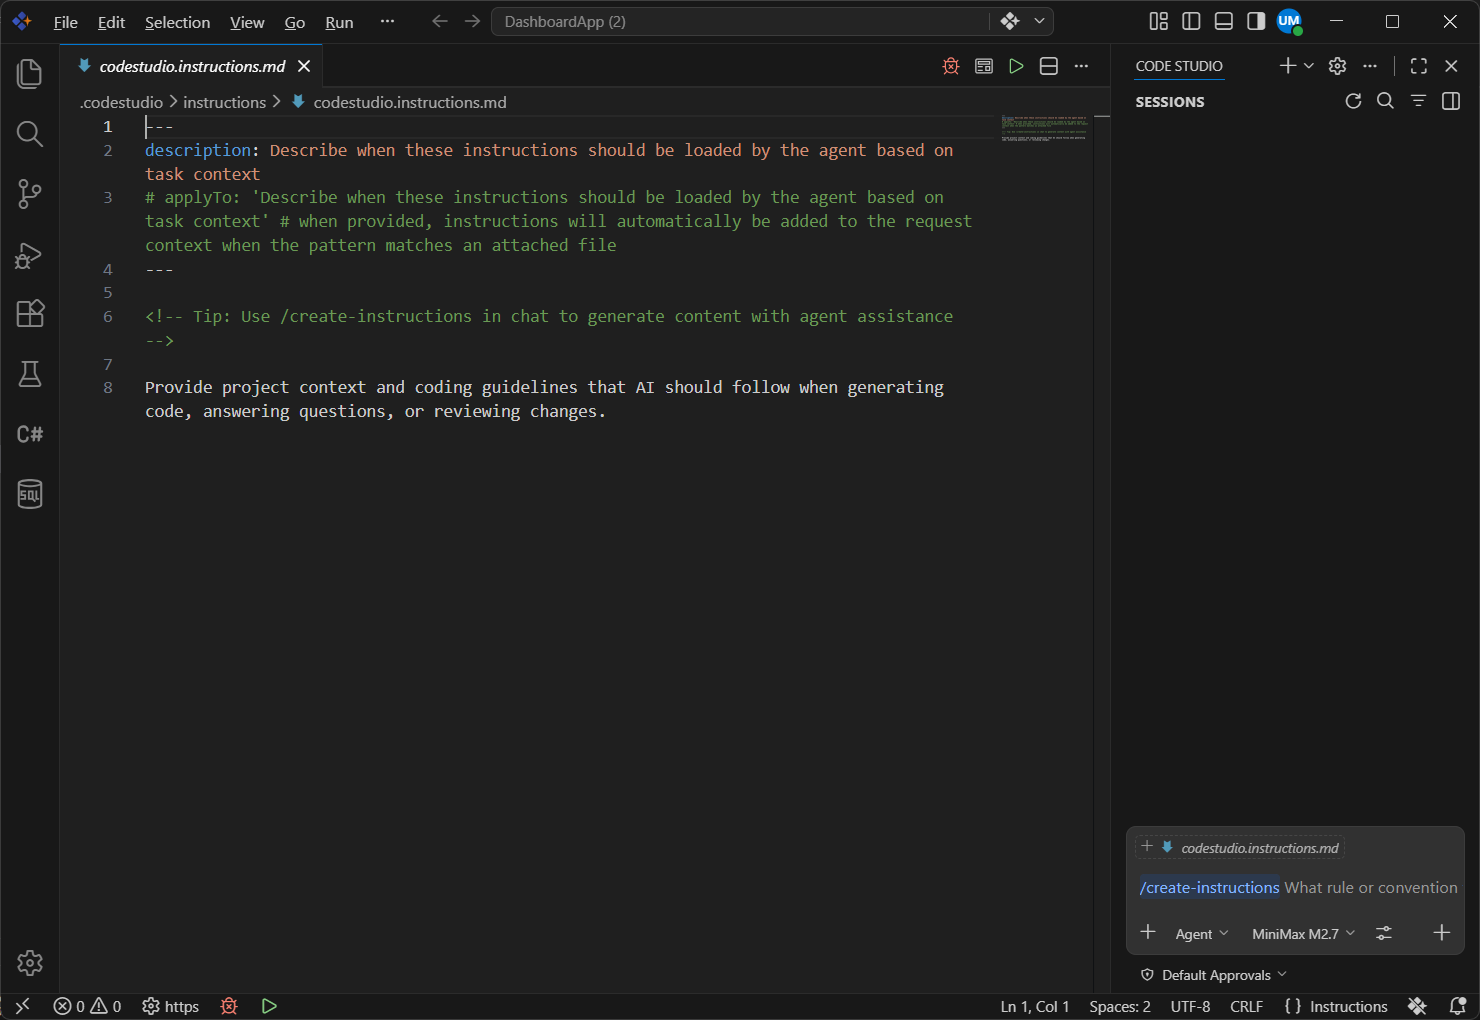
Step 3: Customize the file to fit your project needs.
Step 4: Open chat view and send a message. Now the instruction file will be referenced automatically.
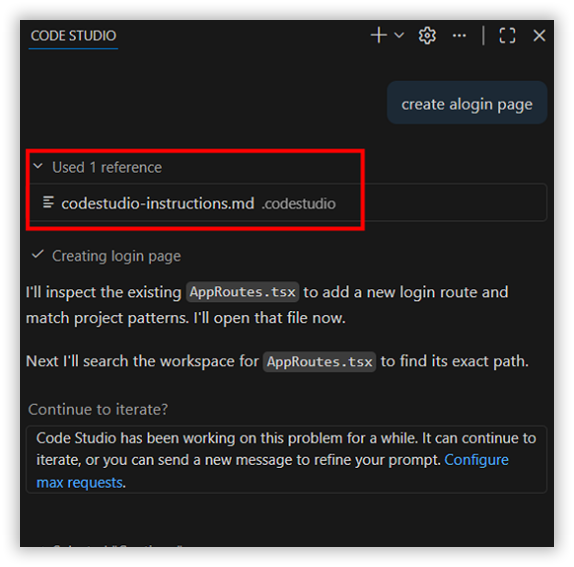
How to Configure Path-specific Instruction File
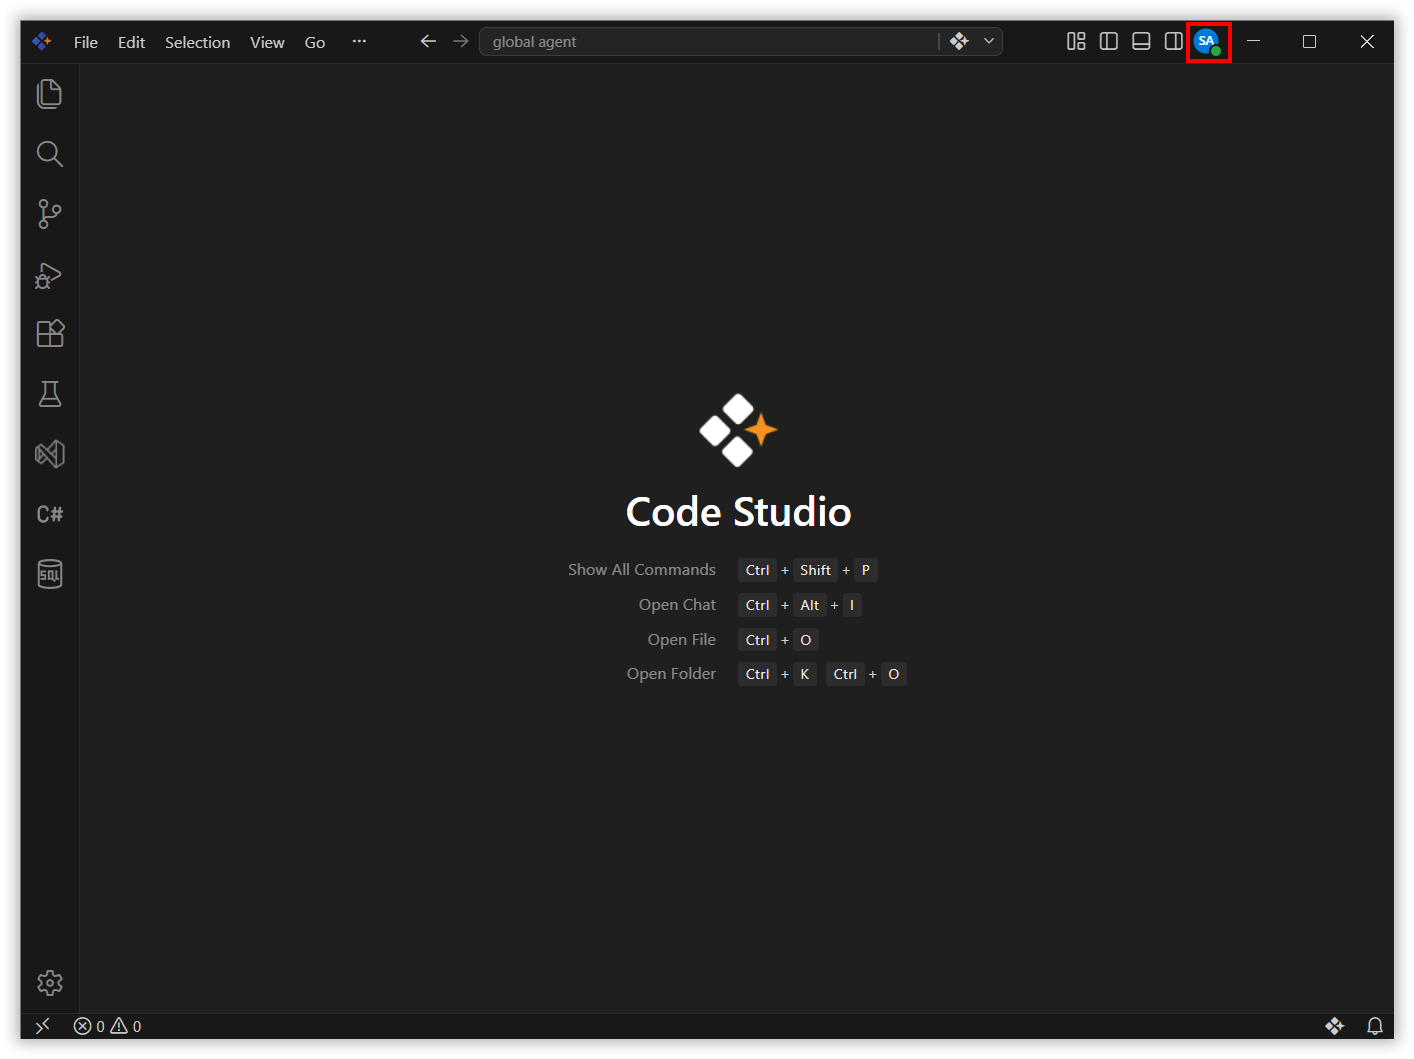
Step 1: Click Settings from the top right and click Open settings
Step 2: Click Instruction & SKills and select Add Location
Step 2: Enter Name for Instruction File.

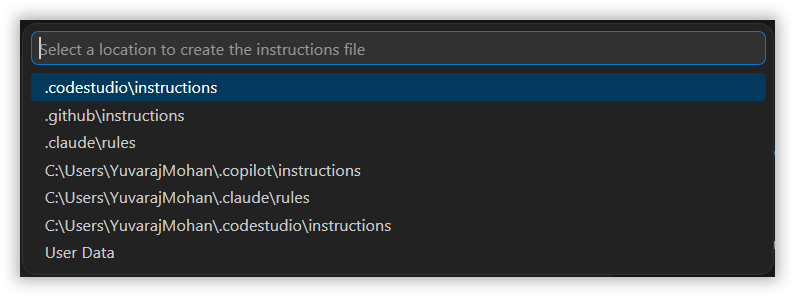
Step 3: Choose where to save your file
-
There are two options to save your instruction. You can choose any one of them based on your preference.
-
Option 1: Workspace:
- Save to
.codestudio/instructions/folder in your project. - Use when: Sharing with your team while committing your source.
- Location:
YOUR-PROJECT/.codestudio/instructions instruction-name.instructions.md.
- Save to
-
Option 2: User Profile:
- Saves to: Your user profile folder.
- Use when: Using across multiple projects.
- Benefit: Available in all workspaces.
-
Select your preferred location and click to Continue.
-
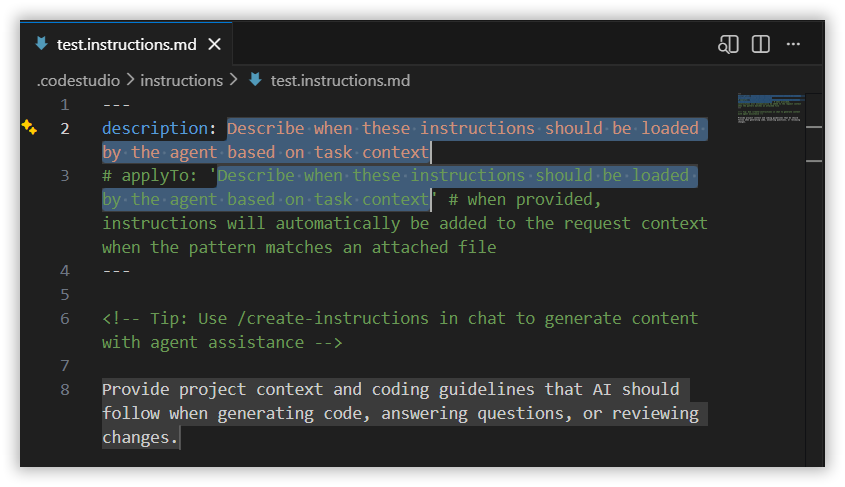
Step 4: Name your instruction file
- For example, here the instruction file name entered is
test.instructions.md.

Step 5: The new file will be open automatically for editing.
Step 6: Target the path-specific instructions file
-
For example, here target the
test.instructions.mdfile. -
There are two options to target your path specific instruction. You can choose any one of them based on your preference.
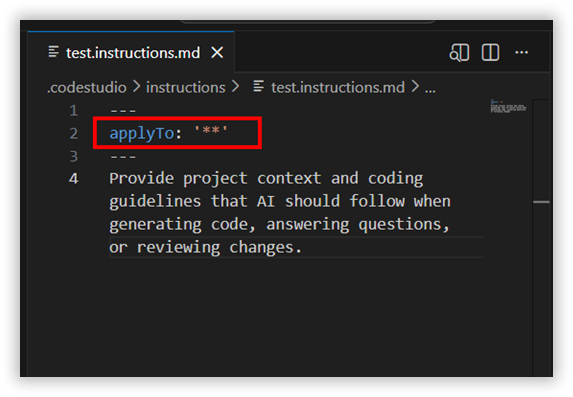
Option 1: Global Path Targeting
-
Definition:
applyTo: '**' -
Applies rules globally to all files in the project.
-
Best when you want rules to apply across every file types
(e.g.,.ts, .scss, .js, .html). -
Steps to target the global path:
- Step 1: Use path Like
'**'
- Step 2: Add instructions in the test-instructions.md.
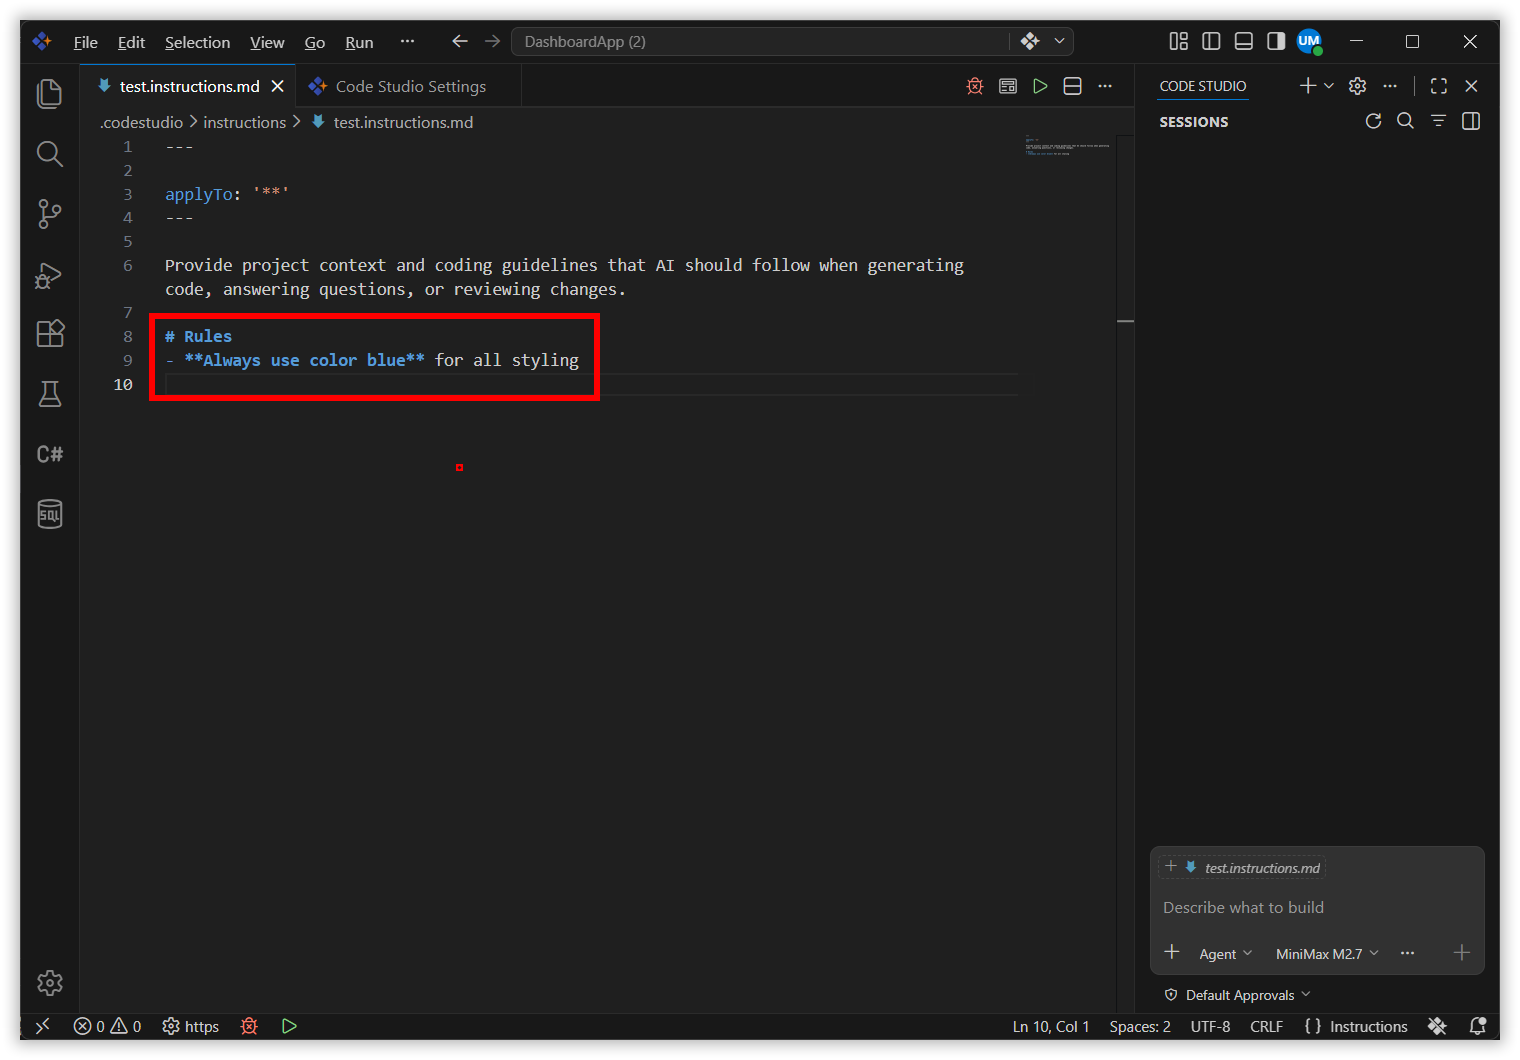
- Step 3: Open chat and send message your instruction will come in the used reference.
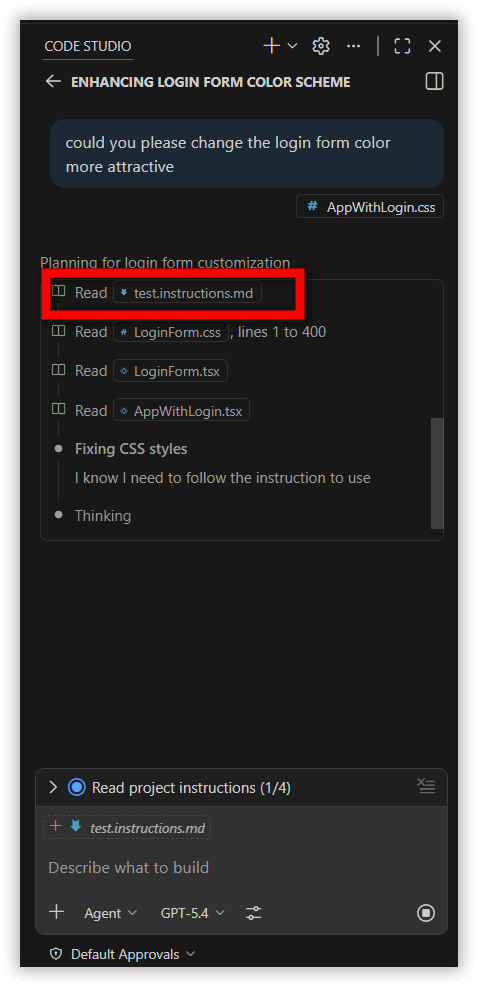
- Step 1: Use path Like
Option 2: Pattern-specific Targeting
-
Definition:
applyTo: **/*.scssor other patterns. for example(**/*.ts, **/*.css) -
Applies rules only to files matching the given pattern (e.g., “Use **/*.scss if you only want rules applied to SCSS files”).
-
Best for adding rules to certain file types or directories.
-
Steps to target the pattern specific path
- Step 1: Use any specific path like
‘**/*.scss’.
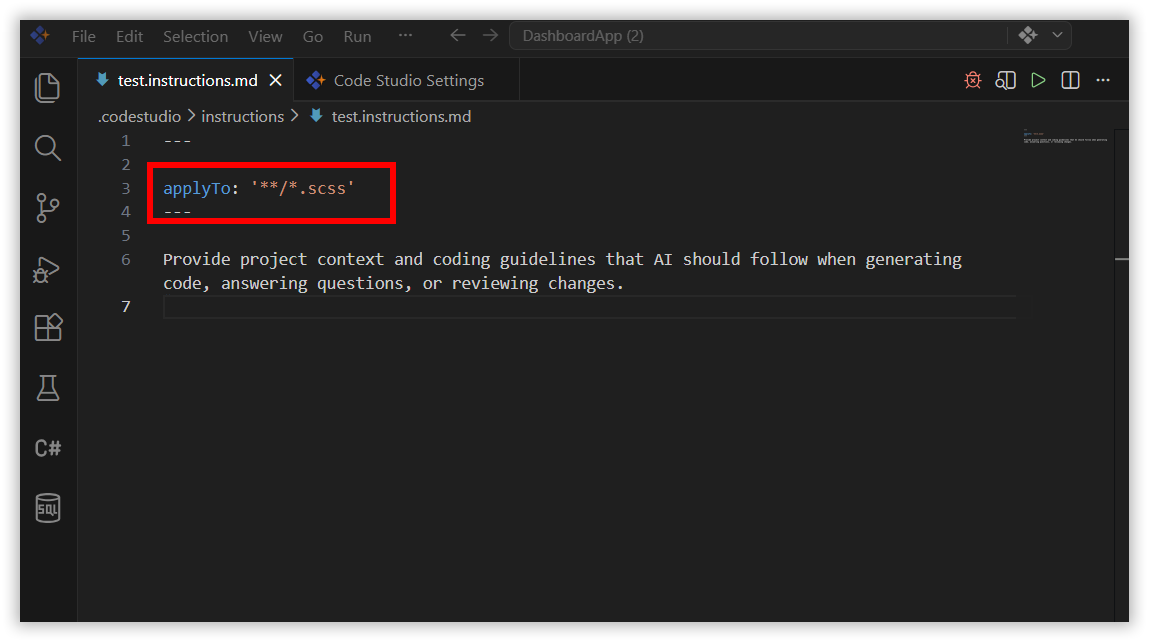
- Step 2: Add instructions in the test-instructions.md.
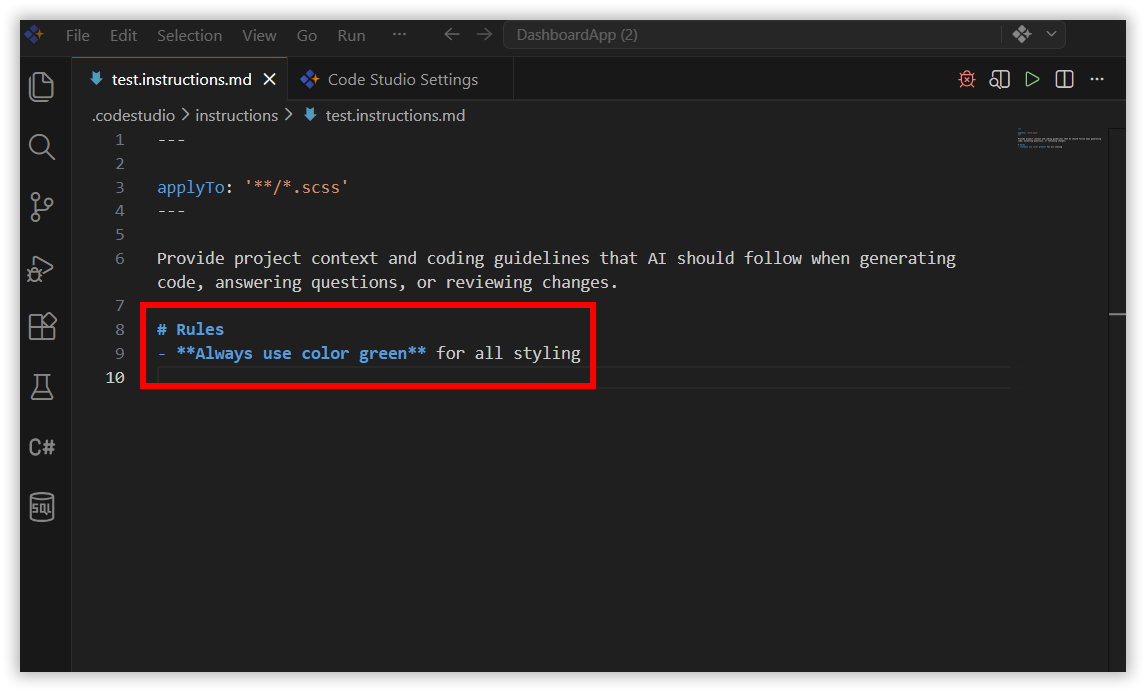
- Step 3: Include the file in the chat context which you want to edit.
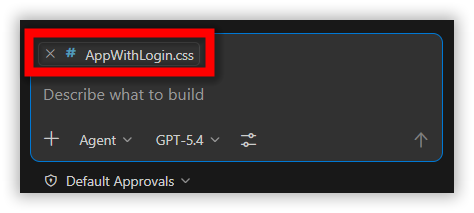
- Step 4: Open chat and send message your instruction file will come in the used reference.
- Step 1: Use any specific path like
Custom Instructions Example
The following examples show how custom instructions can be used.
---
applyTo: "docs/**/*.md"
---
# Technical Documentation Style Guide

## Writing Principles
- Communicate concepts with clarity and precision.
- Prioritize simplicity over complexity whenever possible.
- Maintain uniform structure across all documentation pages.
- Provide practical examples to reinforce understanding.

## Tone & Style
* Use a professional and friendly tone.
* Prefer short, direct sentences.
* Avoid filler words and unnecessary explanations.
* Focus on actionable information that helps readers immediately.

## Formatting Standards
- Use descriptive headings to break content into logical sections.
- Use numbered lists for step‑by‑step instructions.
- Highlight important terms with **bold** formatting.
- Use inline code formatting (`example`) for commands, arguments, and filenames.

## Code & Examples
- Include language‑specific code fences for syntax highlighting.
- Add comments in examples to clarify purpose.
- Provide both input and expected output wherever relevant.
- Keep code examples minimal, runnable, and directly associated with the topic.

## Links & References
- Link to related guides, API references, and external standards.
- Use descriptive link text instead of generic labels like “here”.
- Ensure all referenced content is up‑to‑date.