
What you’ll learn
- How to sign in for the first time
- How to check that everything works
- How to have your first chat
- How to get a one-time answer with print mode
- How to leave the chat
This guide takes about 10 minutes. It assumes you have already installed BoldCreate CLI.
Step 1: Sign in
Run:
boldcreate loginYour browser opens. Sign in with your account, then close the tab when it shows Signed in to BoldCreate. The terminal confirms:
Signed in as <your name> <your email> (production).You only need to do this once. BoldCreate remembers your sign-in.
Tip: If the browser does not open, copy the link printed in the terminal and open it in a browser on the same computer. For other sign-in options, see Signing in.
Step 2: Check that everything works
Show your account and settings:
boldcreate statusList the AI models you can use:
boldcreate --list-modelsEach line shows a model ID, its name, and its context size. A * marks the gateway default model. Use a model ID with --model.
Send a small test request. Replace <MODEL_ID> with an ID from the list:
boldcreate status --check --model <MODEL_ID>The last line should say that the gateway accepted the credentials.
Step 3: Start your first chat
-
Go to a project folder:
macOS:
cd ~/code/my-projectWindows (PowerShell):
cd $HOME\code\my-project -
Start the chat:
boldcreate -
Type a question and press Enter, for example:
What does this project do?
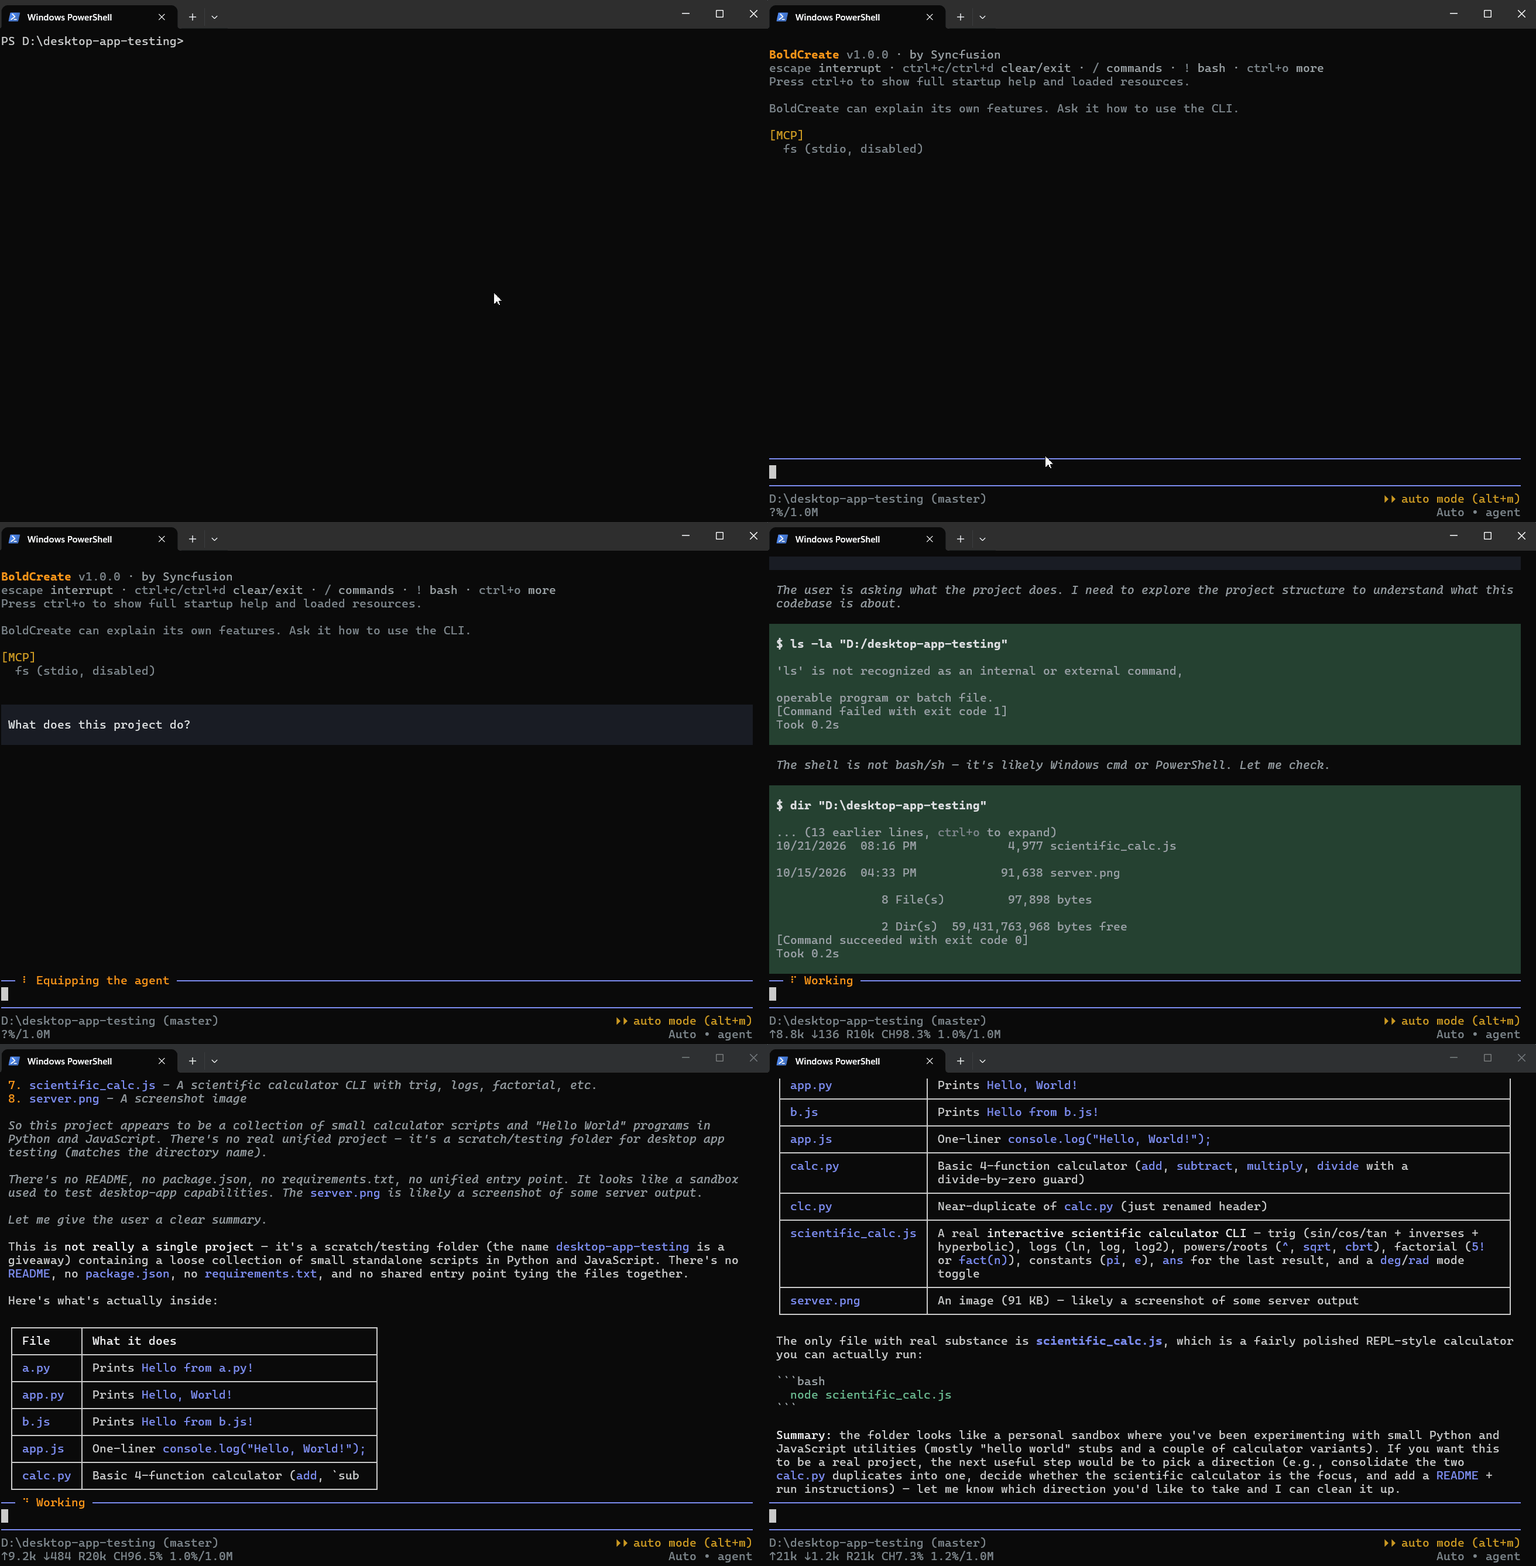
The assistant reads your files and answers. The chat header shows the BoldCreate name, version, and shortcut hints. The status line shows the folder, approval mode, model, reasoning effort, and token usage.
Try typing / to see commands, /hotkeys to see shortcuts, or press Esc to stop a long response.
Note: By default, the assistant edits files and runs commands without asking. To be asked first, type
/mode manual. See Approvals and safety.
Tip: You can include your first request on the command line:
boldcreate "explain the build steps".
Step 4: Leave the chat
Use any of these:
- Press Ctrl+D when the input box is empty.
- Type
/quitand press Enter. - Press Ctrl+C twice.
Your conversation is saved. To continue it later from the same folder:
boldcreate -cStep 5: Get a one-time answer
Print mode runs once, prints the answer, and returns to your terminal:
boldcreate -p "summarize README.md"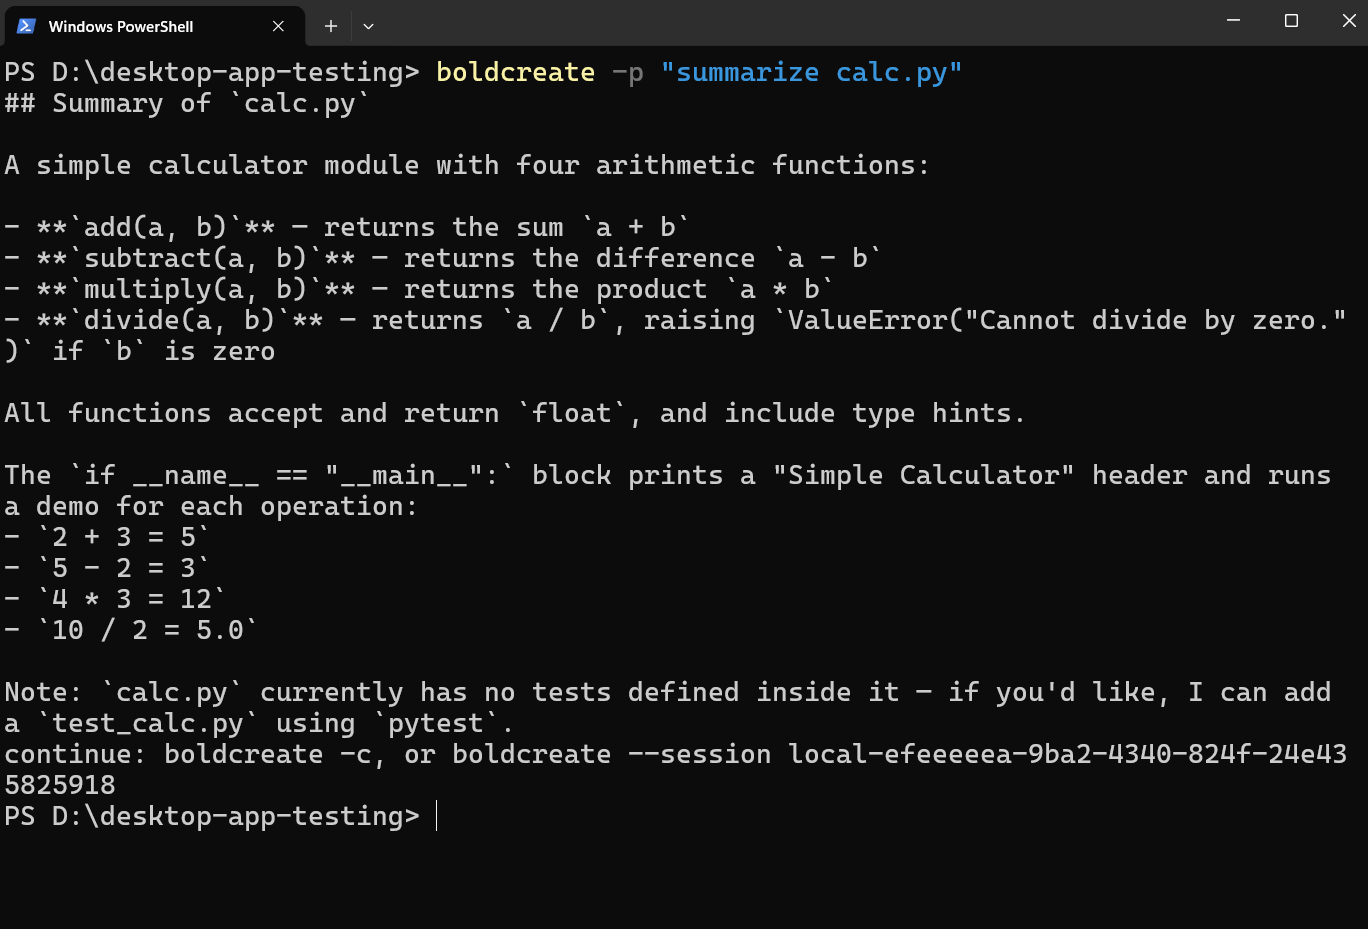
The answer is printed, followed by a line telling you how to continue:
continue: boldcreate -c, or boldcreate --session <session id>See Print mode and automation for scripts, JSON output, and CI use.
Common mistakes
| Mistake | What to do |
|---|---|
Running boldcreate before signing in | In chat, a sign-in menu opens automatically. In print mode, run boldcreate login. |
Starting boldcreate in your home folder | Start it in the project folder you want the assistant to work on. |
status --check says it needs a model | Add --model <MODEL_ID>. |