
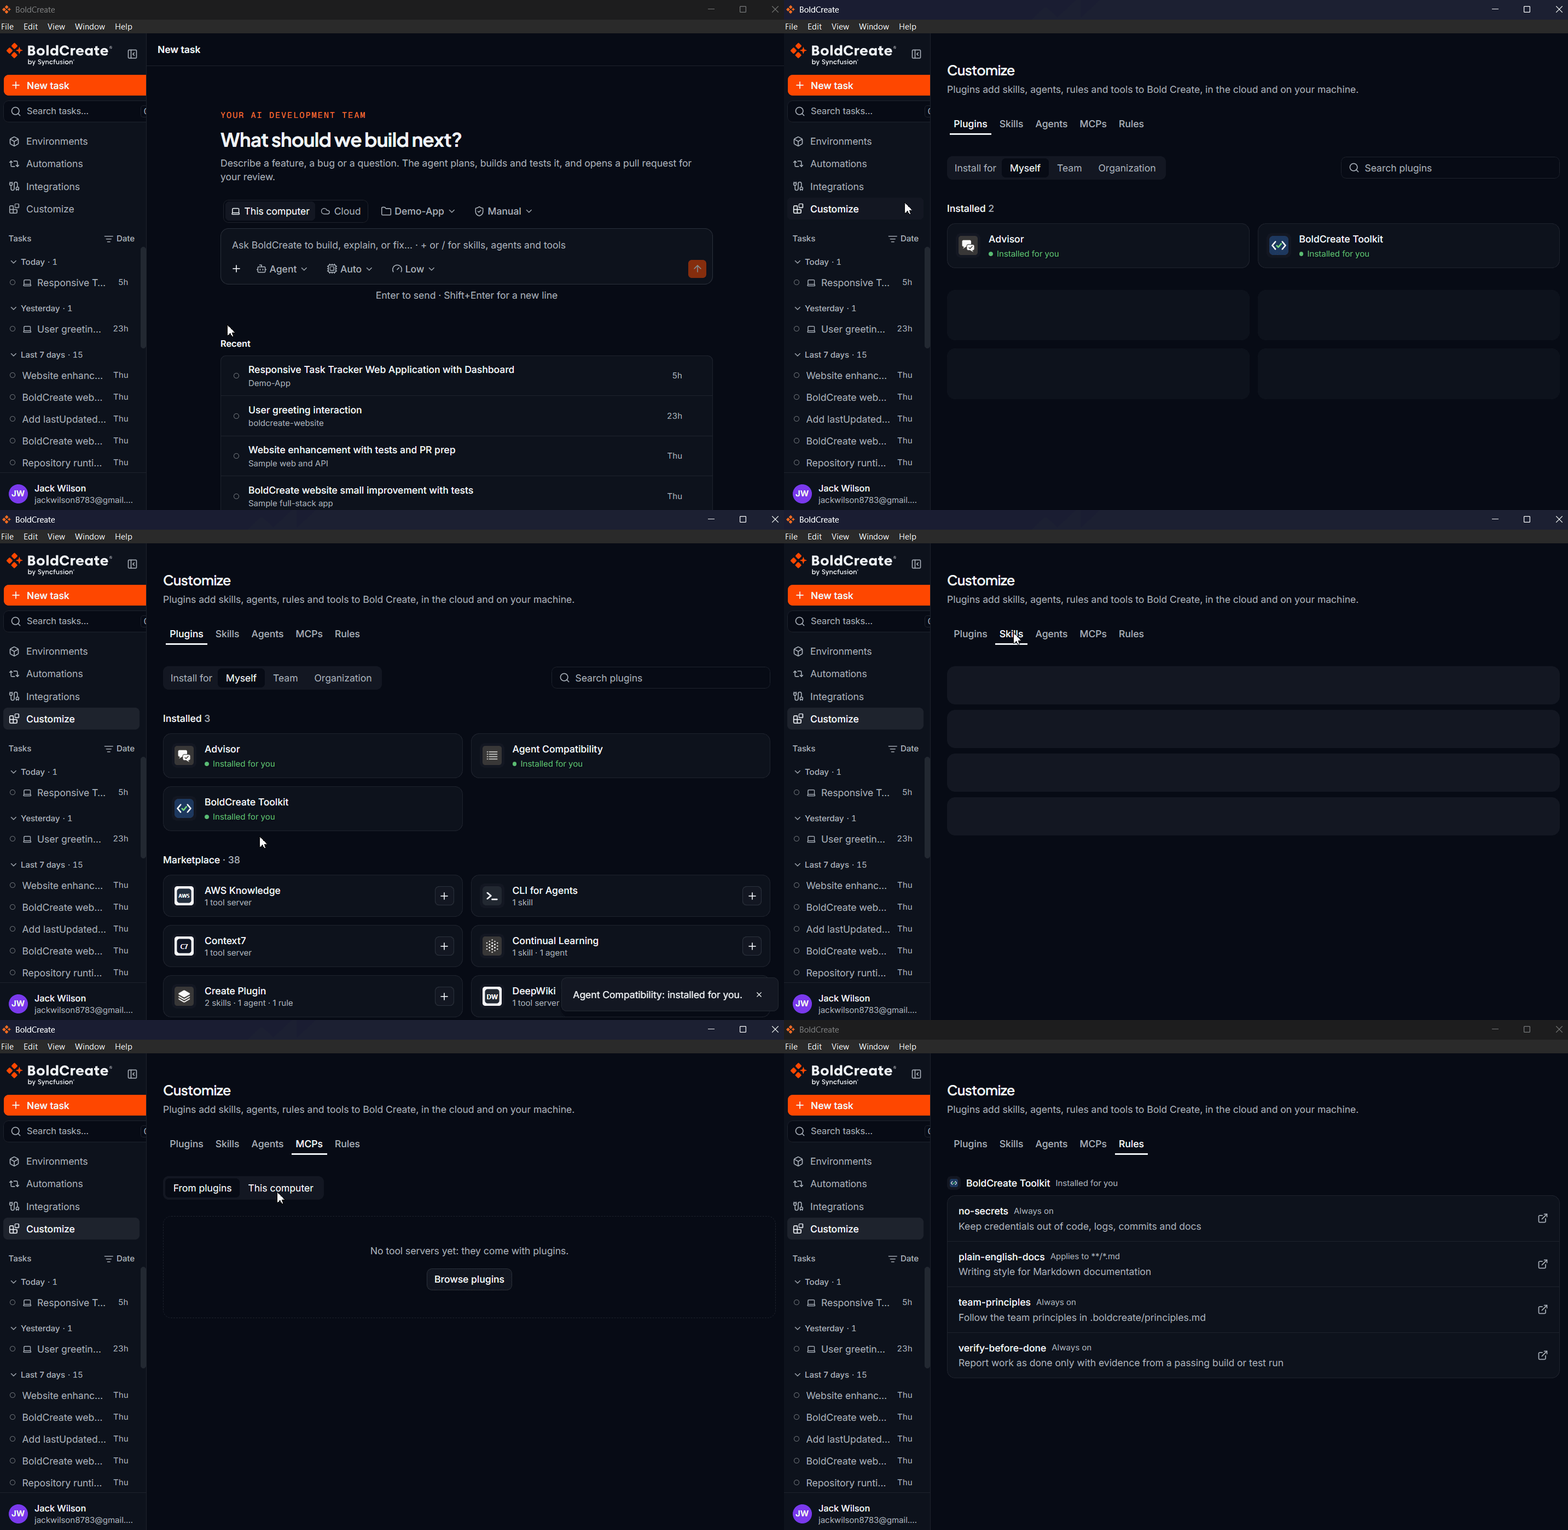
This guide shows you how to use the Customize page in the Bold Create desktop app. You will learn how to add plugins, and how to use the skills, agents and tools they bring in your chats.
Words you will see
| Word | What it means |
|---|---|
| Task (or thread) | A chat with the Bold Create agent. |
| Cloud task | A task that runs on Bold Create’s servers, on a repository or environment. |
| Local task | A task that runs on your computer, in a folder you choose (“This computer”). |
| Plugin | A package that adds abilities to the agent. One plugin can contain skills, agents, rules and tool servers. |
| Skill | Written instructions for one kind of job, for example “write a release note”. The agent follows them. |
| Agent | A helper with its own instructions and focus, for example a “reviewer”. |
| Rule | A guideline the agent follows, for example “always write tests”. |
| Tool server (MCP server) | A service that gives the agent extra tools, for example reading GitHub issues. “MCP” is the name of the standard these servers use. |
| Marketplace | The list of plugins you can install. |
Open the Customize page
-
Open the Bold Create desktop app and sign in.
-
In the left sidebar, click Customize.
-
At the top you will see five tabs: Plugins, Skills, Agents, MCPs and Rules.
-
If you see “Plugins are not available yet”, plugins are not set up for your organization. Ask your admin. You can still add your own tool servers (see section 8).
Install a plugin
-
Open the Plugins tab.
-
Find a plugin under Marketplace. You can type its name in Search plugins.
-
Each card shows what the plugin brings, for example
2 skills · 1 agent · 1 ruleor1 tool server. -
Click the + button on the card.
-
A message confirms it, for example “GitHub: installed for you.” The plugin now appears under Installed.
Who gets the plugin (“Install for”)
Above the list you may see Install for: Myself · Team · Organization. Choose it before you click +.
| Choice | Who gets the plugin | Who can choose it |
|---|---|---|
| Myself | Only you | Everyone |
| Team | Everyone in your team | Admins and team leads |
| Organization | Everyone in your organization | Admins only |
If you only see Myself options (or no switch at all), you can install plugins only for yourself. That is normal.
Tip: The choice goes back to Myself when you leave the Plugins tab. Check it again before each install.
See a plugin’s details
Click any plugin card to open its page. It shows the version, what it brings (“Brings”), when it was updated, “Your install”, and a list of its Agents, Skills, Rules and Tool servers.
You can also install from this page with Install ▾ → For myself / For my team / For my organization.
When does a new plugin start working?
This is important:
- Start a new task after you install a plugin. Tasks that were already open keep the plugins they had when they started.
- In a brand-new task the plugin is copied in the background. If the first message does not use it, send your request again in a second message.
Sign in to a tool server (“Connect”)
Some tool servers need your account, for example GitHub or Notion. Their status shows Needs sign-in and a Connect button.
- Click Connect on the installed card, the plugin page, the MCPs tab, or in the chat.
- Your web browser opens. Sign in and approve the access.
- The browser shows “Connected”. Go back to the app.
- The app shows “Signed in. Its tools reach your next message.”
The tools work from your next message, also in a task that is already open.
| Status you see | What to do |
|---|---|
| Ready | Nothing. It works. |
| Needs sign-in | Click Connect. |
| Waiting for an admin | An admin must finish its setup. Ask your admin. |
If the sign-in does not finish, you will see “The sign-in was not finished. Try again.” Click Connect again.
See what your plugins brought
| Tab | What it lists |
|---|---|
| Skills | Every skill from your installed plugins |
| Agents | Every agent from your installed plugins |
| MCPs → From plugins | Every tool server from your installed plugins, with its status |
| Rules | Every rule, with when it applies: Always on, Applies to … (certain files), or On request |
Items are grouped by plugin. These tabs only show things that come from plugins. You cannot create skills, agents or rules here.
Turn a tool server off or on
In MCPs → From plugins, use the switch next to a server. It applies only to you, in every task. Skills, agents and rules cannot be switched off one by one. To remove them, uninstall the plugin.
Use plugins in a chat
Open the menu
In the message box, click +, or type / in an empty box. You will see:
- Hand off — give this message to one of your plugins’ agents
- Files — attach files or images
- Skills — the skills you have
- Tools — your tool servers
You can also just type to search skills, agents and tools together. Use the arrow keys and Enter to choose, and Esc to close.
Use a skill
- Open Skills and pick one. It appears as a chip above the box, for example
/release-notes. - Type what you want, for example “for version 2.1”.
- Send. The agent follows that skill.
You can add up to 5 skills to one message.
You don’t always have to pick a skill. The agent knows your installed skills and can use one by itself when your request fits.
Give one message to a plugin agent (“Hand off”)
- Open Hand off and choose an agent. A chip “Hand off to …” appears.
- Type your request and send. That agent handles this message.
Run the whole task as a plugin agent
- In a new task, open the agent picker next to the message box.
- Choose an agent under From plugins.
- The whole task now runs as that agent. When you reopen the task later, the same agent is kept.
The agent picker appears only when there is more than one agent to choose from.
Ask the agent to use a tool server
- Open Tools and pick a server. Its name appears as a chip.
- Send your request. The agent will use that server’s tools for this message.
In the Tools list you can also switch a server on or off, or click Connect. Manage opens the MCPs tab.
The plugins card
Sometimes a small card appears in the chat, for example “Plugins: GitHub · 3 skills · 1 tool server”. It tells you which plugins this task has, and which servers still need you to Connect. Click × to hide it.
Add your own tool server (“This computer”)
You can also add tool servers that run on your computer. They are used only by local tasks, not by cloud tasks.
- Go to Customize → MCPs → This computer.
- In Servers for, choose Every folder, or one of your folders.
- Click Add server and fill in the form:
| Field | What to enter |
|---|---|
| Name | A short name using letters, digits, _ or - (up to 64 characters), for example filesystem. |
| Kind | Command (a program on your computer), HTTP or SSE (a web address). |
| Command (Command kind) | The command that starts the server, for example npx -y @modelcontextprotocol/server-filesystem .. That program must be installed on your computer. |
| Environment (optional) | One KEY=value per line. Write ${MY_KEY} to read a value from your computer’s environment. |
| URL (HTTP / SSE) | The server address, for example https://example.com/mcp. |
| Sign-in (HTTP / SSE) | No sign-in, Sign in (OAuth) (your browser opens after adding), or Headers (API key). |
| Headers | One Name: value per line, for example Authorization: ******. |
-
Click Add server. You will see ” added.”
-
Click Check to see if it connects. A working server shows Connected · N tools.
-
Keep secrets safe. Write keys as
${MY_KEY}instead of typing the real key. The app warns you if you type a secret in plain text. -
Add only servers you trust. A server on your computer can read and change what you give it.
Other buttons
| Button | What it does |
|---|---|
| Edit mcp.json | Opens the settings file in your editor. Save it, then come back to the app. |
| Check | Connects to the servers again and shows their status. |
| Switch | Turns a server on or off for local tasks. |
| Remove | Deletes the server (you confirm first). |
| Sign in / Sign out | For servers that use OAuth. |
Trust a folder
A project folder can contain its own server list. If it starts commands on your computer, those servers show “Off until you trust this folder”.
- Click Trust this folder… and then Trust.
- Do this only if you trust everyone who can change that folder.
Where these settings are saved
| Choice | File |
|---|---|
| Every folder | ~/.boldcreate/mcp.json |
| One folder | <that folder>/.boldcreate/mcp.json |
The Bold Create CLI uses the same files (boldcreate mcp list shows the same servers).
Changes reach new local tasks, and tasks you open again.
Approving tool use
The agent may ask before it uses a tool. You will see a card “Approve: ” with Allow and Deny.
Tools from tool servers are named mcp__<server>__<tool>.
The Manual / Auto button sets this:
- Manual — the agent asks first.
- Auto — the agent goes ahead without asking.
In a local task, the button sits next to the folder picker. In a cloud task, you choose it when you create the task.
If you are not sure what a tool will do, choose Deny and ask the agent to explain first.
Uninstall a plugin
- Open Customize → Plugins and click the plugin.
- Click Uninstall (or Uninstall for team / Uninstall for organization).
- Read the message and confirm.
Good to know:
- You can only uninstall what you are allowed to manage. A plugin your admin installed for everyone has no Uninstall button for you.
- Sign-ins to the plugin’s servers are removed. If you install it again, you must Connect again.
- Tasks that are already open keep the plugin. New tasks no longer have it.
Offline
- Local tasks keep working with the last copy of your plugins’ skills, agents and rules. Their tool servers are not available until you are back online.
- The Customize page needs the internet. If it fails, you will see “Plugins could not be loaded” and a Retry button.
Problems and fixes
| Problem | Try this |
|---|---|
| A new plugin doesn’t show up in the + menu | Wait about 30 seconds and open the menu again. |
| The agent doesn’t use the new plugin | Start a new task. If the first message misses it, send your request again. |
| Tool server says Needs sign-in | Click Connect and finish the sign-in in the browser. |
| Tool server says Waiting for an admin | Ask your admin to finish its setup. |
| I can’t choose Team or Organization | Your role doesn’t allow it. Ask a team lead or admin. |
| There is no Uninstall button | It was installed for your team or organization. Ask whoever manages it. |
| My own server shows Failed | Check the command or URL. A Command server needs its program installed on your computer. |
| My own server shows Off until you trust this folder | Trust the folder (section 8) if you trust its contents. |
| My own server doesn’t work in a cloud task | That’s expected. Servers on “This computer” work only in local tasks. |
| “Plugins are not available yet” | Plugins aren’t set up for your organization. Ask your admin. |