
Overview
The API Keys page allows administrators to manage API keys for programmatic access to the application and its AI models. An API key lets external services and scripts securely call the application’s API without a user sign-in.
The API Keys page is intended for administrators who need to:
- Create API keys for integrating external services with the application.
- Control what each key can access by selecting its scopes.
- Set how long each key remains valid and how frequently it can be used.
- Rotate keys periodically and delete keys that are no longer needed.
- Monitor key status to see which keys are active, revoked, or expired.
Note: The API Keys page is visible only to organization administrators.
Purpose
The API Keys page allows administrators to:
- Create API keys that grant programmatic access to the application’s API.
- Define each key’s scope, limiting it to services such as the LLM Gateway or Cloud Agent.
- Set an expiration period and rate limit for each key.
- Copy and securely store a key secret that is displayed only once.
- Rotate keys with a configurable grace period so old keys continue working during a transition.
- Remove keys that are no longer required.
Note: A maximum of 10 API keys can be created per organization. When the limit is reached, the Create API Key button is disabled and displays a message indicating that only 10 API keys can be created.
API Keys View
-
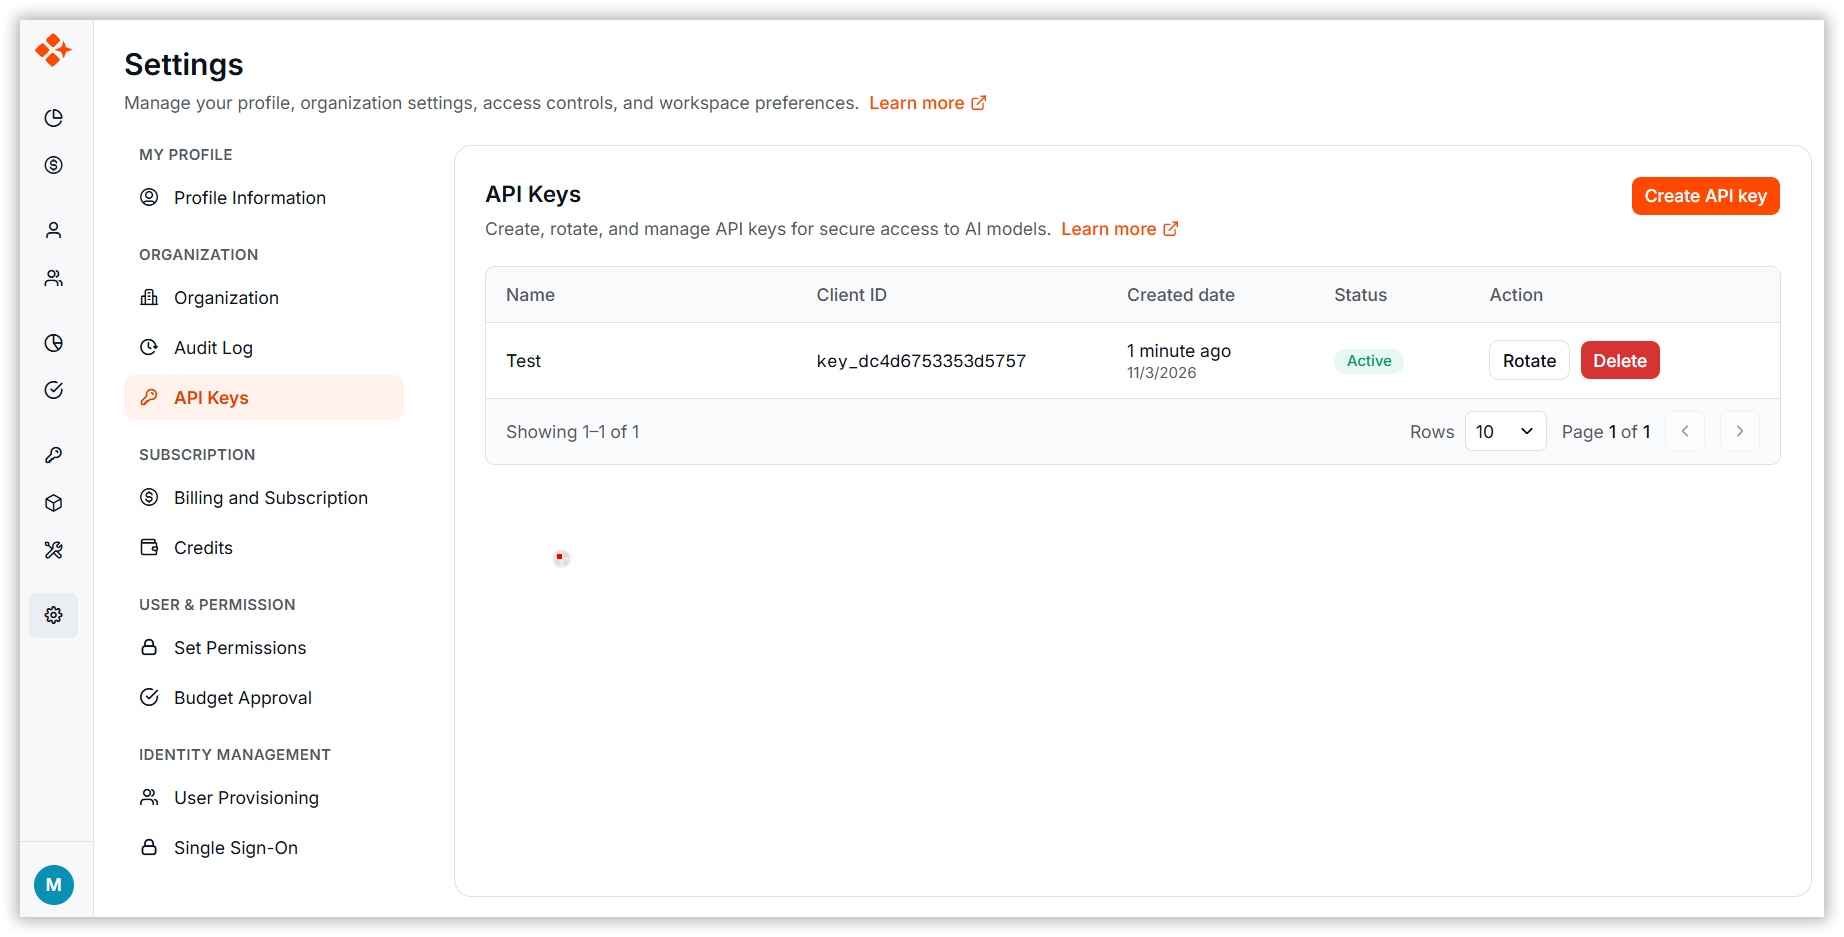
Open API Keys from the left navigation menu.
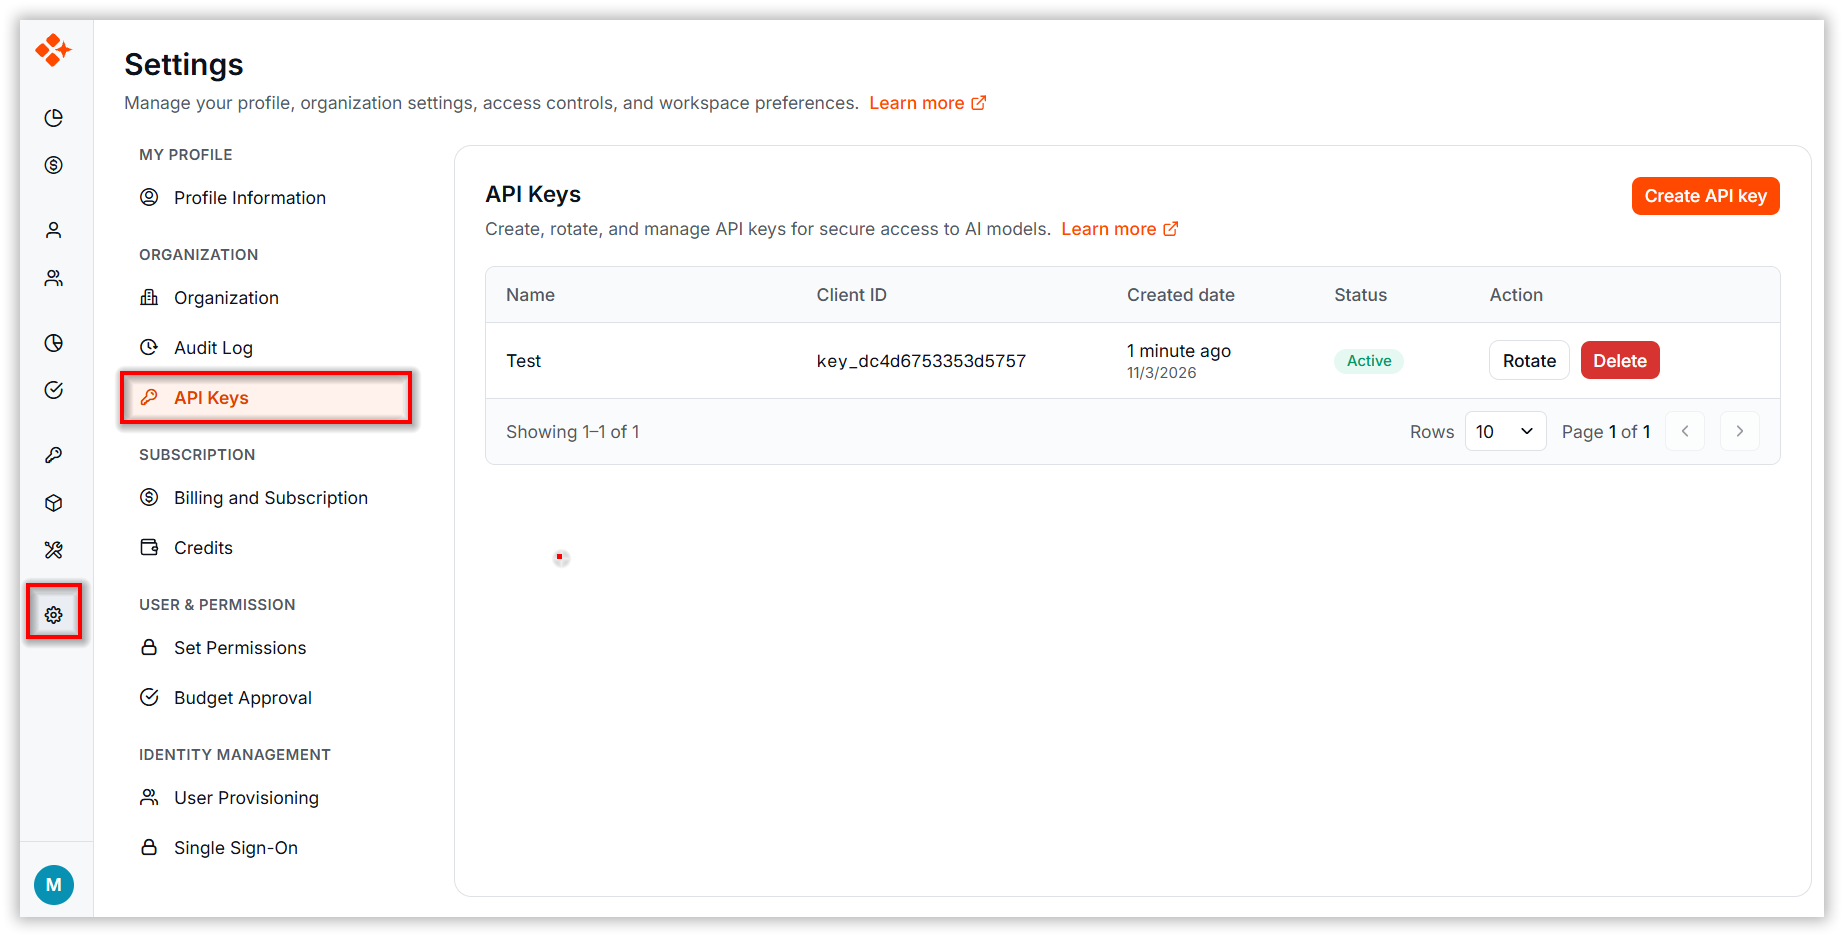
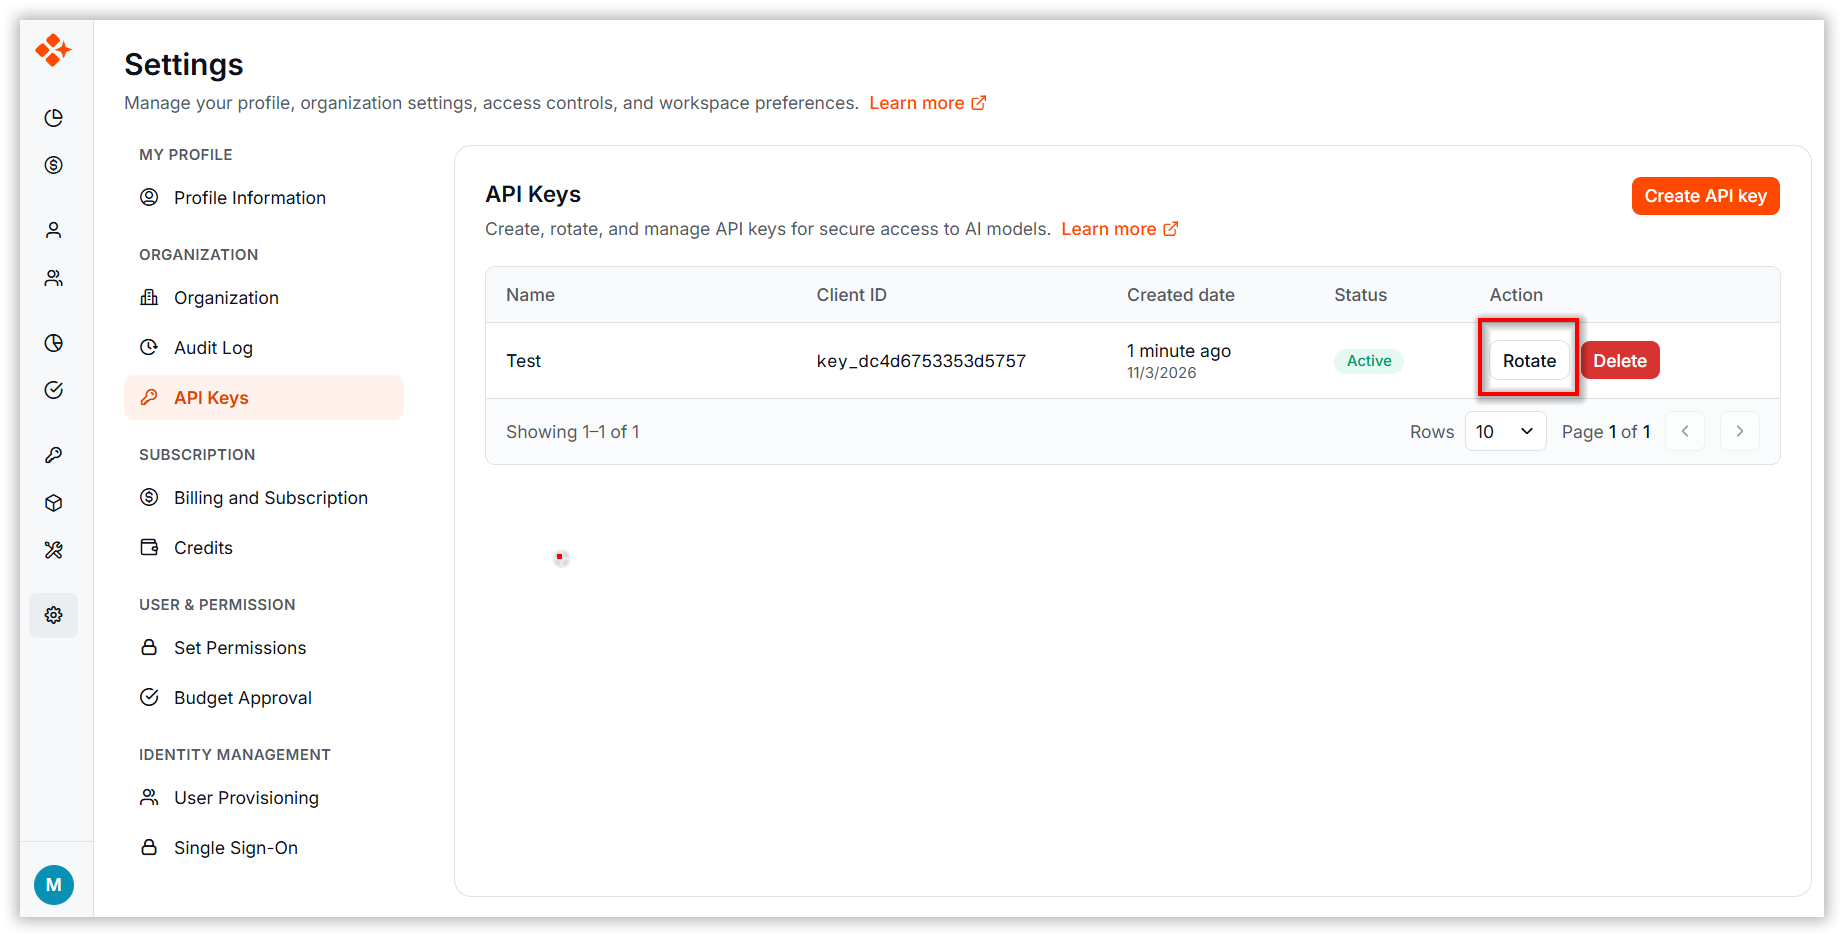
API keys are displayed in a grid with the following information:
-
Name: The name given to the API key when it was created.
-
Client ID: A masked identifier for the key. Only the first and last few characters are shown; hover over the value to display the full client ID.
-
Created Date: When the key was created, shown as a relative time (for example, Today, Yesterday, or 2 weeks ago) along with the date.
-
Status: The current state of the key:
- Active: The key is valid and can be used.
- Revoked: The key has been revoked and can no longer be used.
- Expired: The key has passed its expiration date and can no longer be used.
-
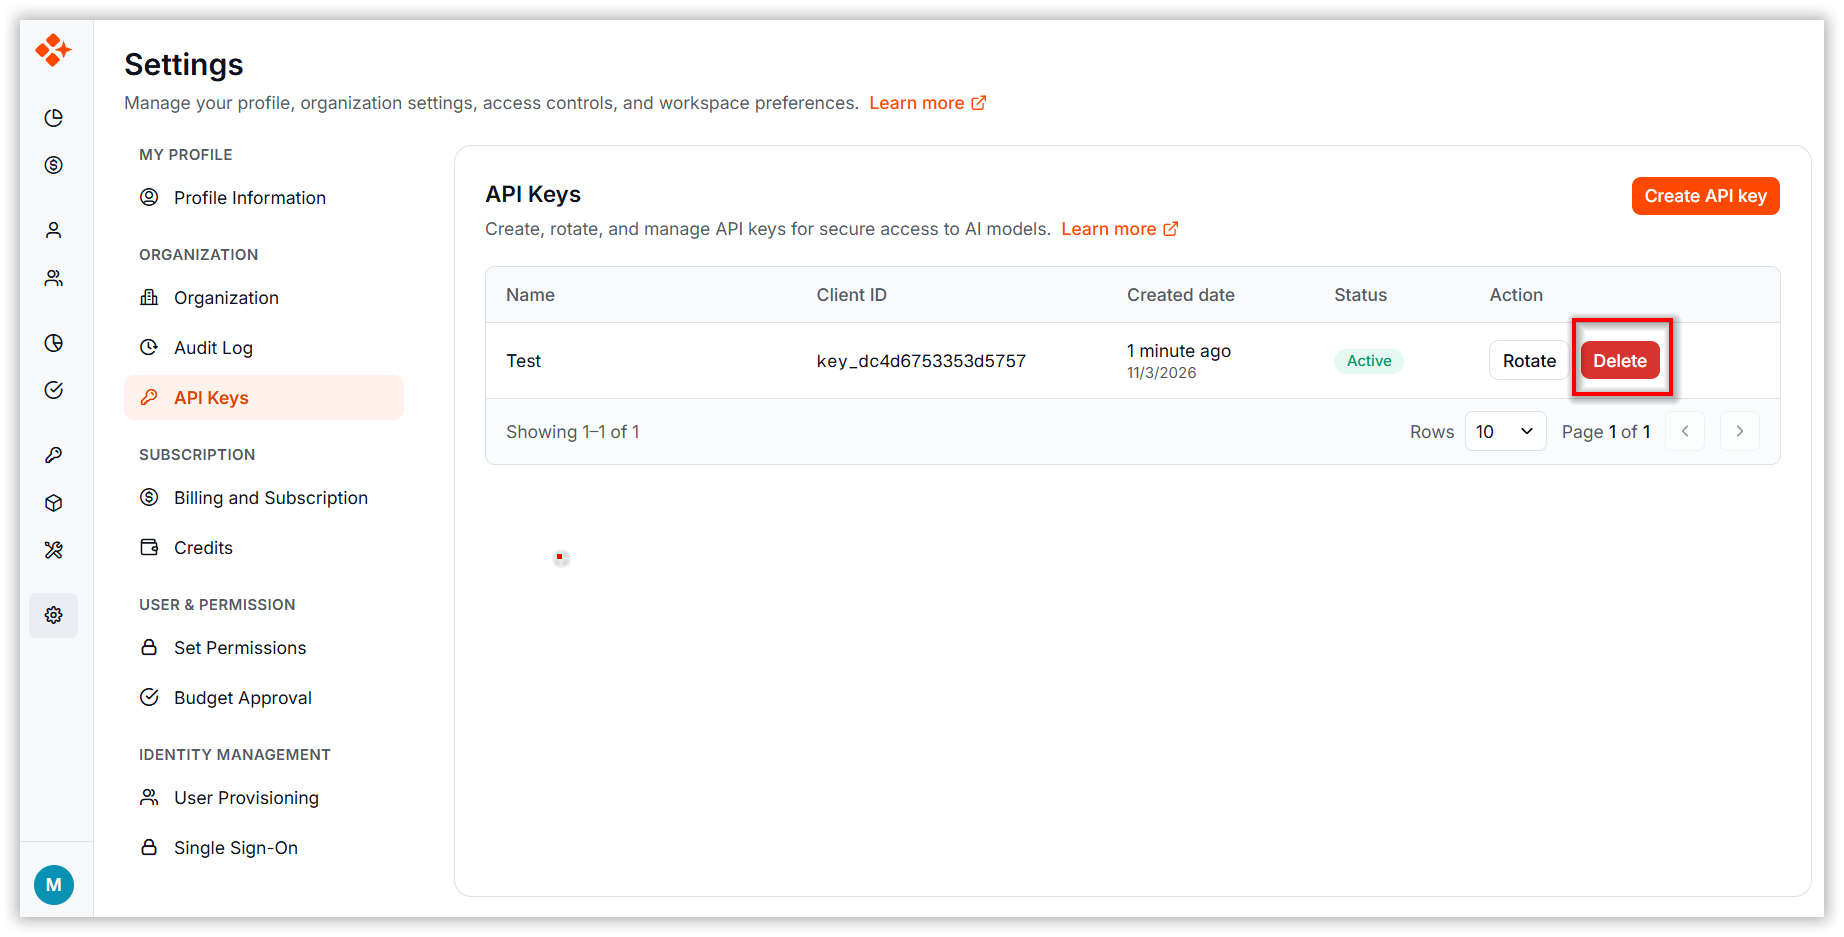
Action: Available row actions:
- Rotate: Opens the Rotate API Key dialog to replace the key’s secret.
- Delete: Opens the Delete API Key confirmation dialog.
If no API keys exist, the page displays No API keys yet with the hint Create an API key to start integrating your services with AI models.
Keys are displayed 10 at a time. Use the pager to navigate between pages when more keys exist.
Creating an API Key
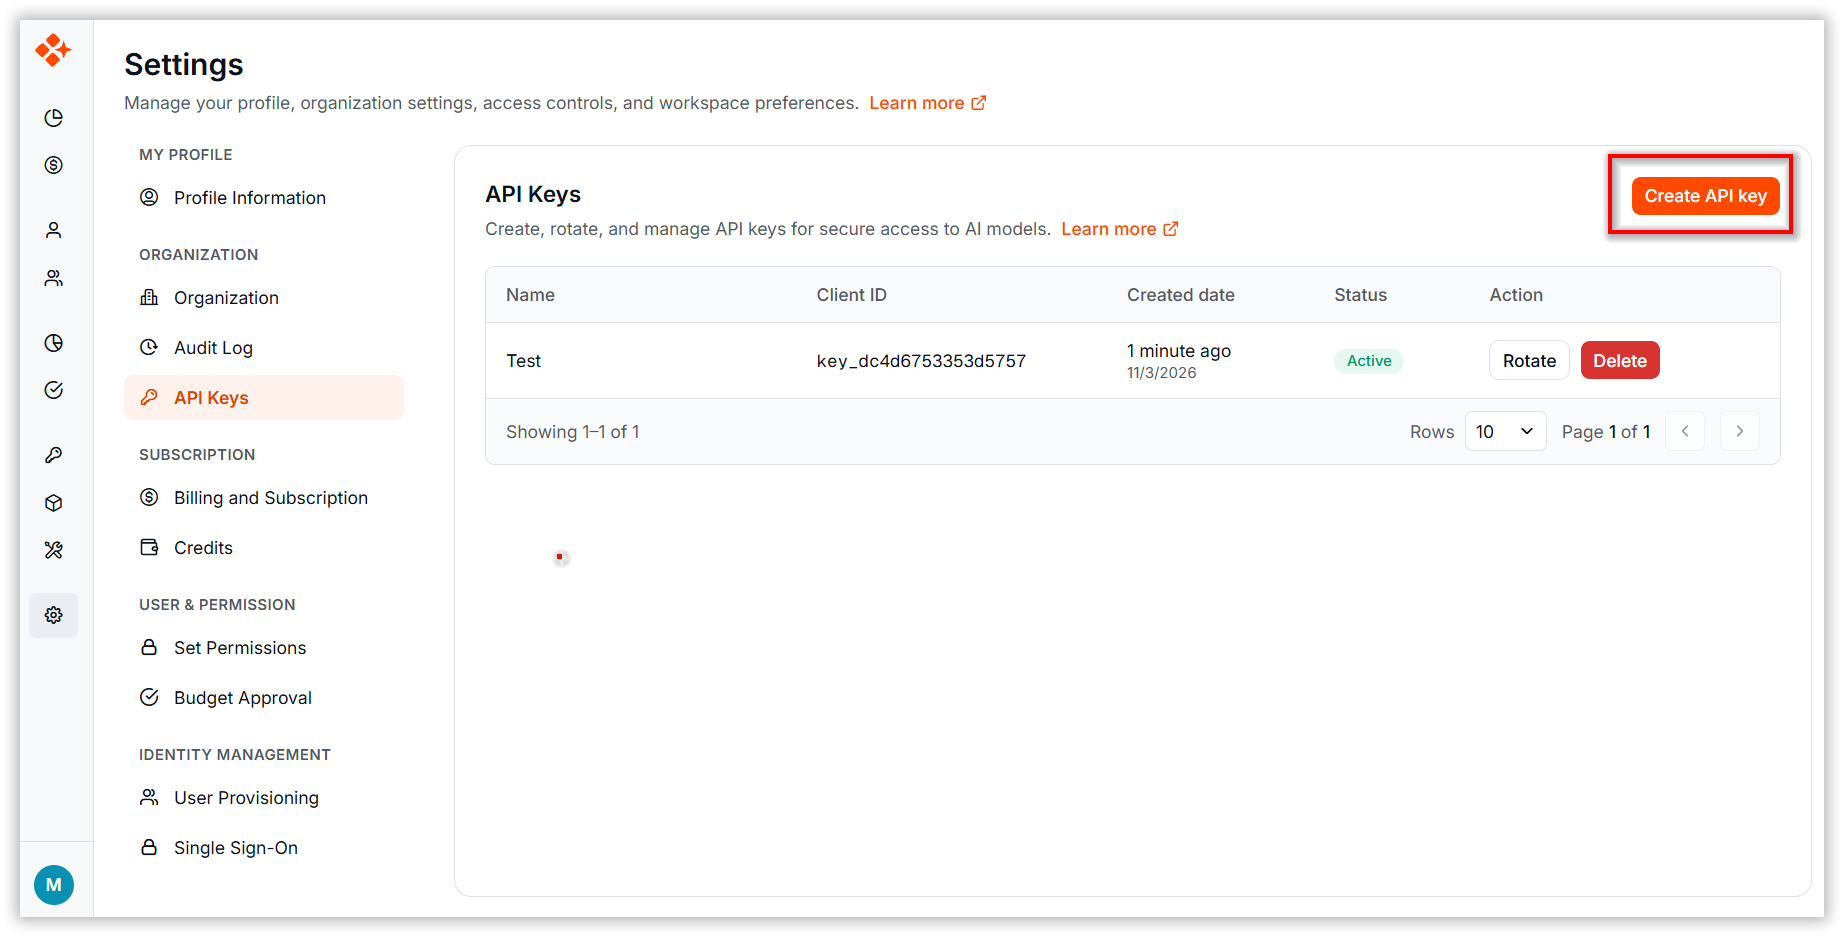
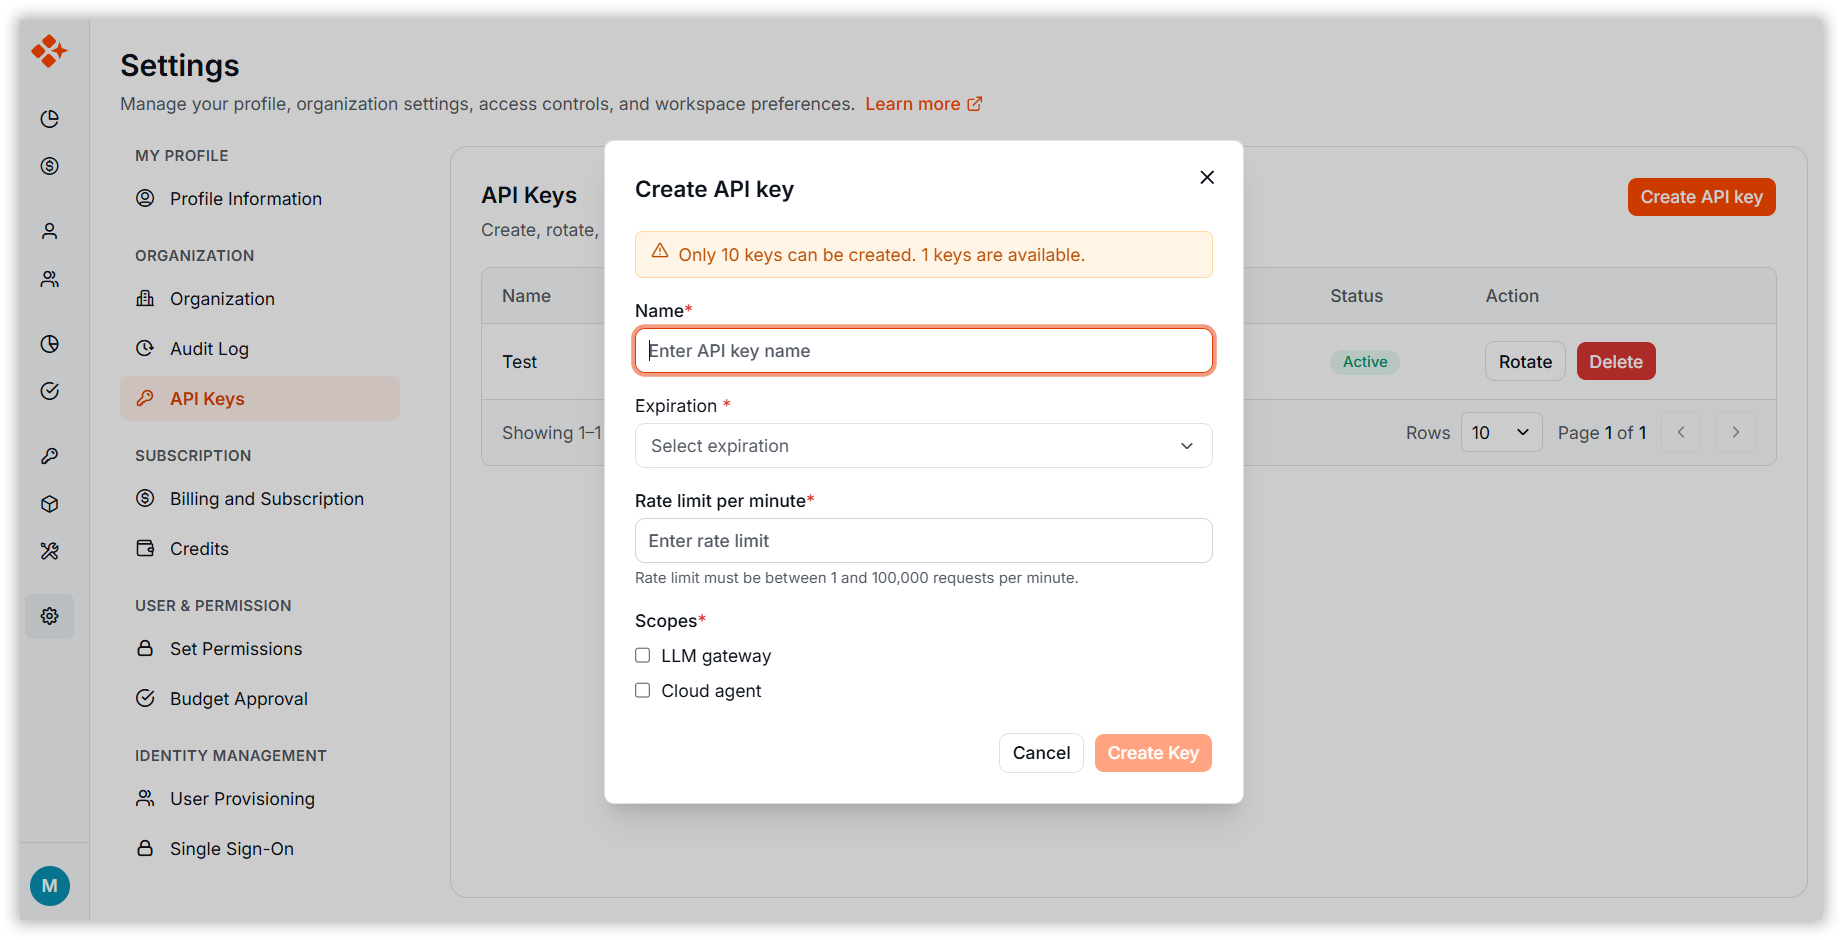
Click Create API Key to open the Create API Key dialog. Configure the following required fields:
- Name: A descriptive name for the key, up to 100 characters.
- Expiration: How long the key remains valid. Choose Never, 30 days, 90 days, or 1 year.
- Rate limit per minute: The maximum number of requests per minute. The value must be between 1 and 100,000.
- Scopes: Select at least one service the key can access:
-
LLM Gateway: Allows the key to invoke AI models.
-
Cloud Agent: Allows the key to use the Cloud Agent service.
-
A banner displays the remaining key quota for the organization, for example: Only 10 keys can be created, already 3 keys are available.
Click Create Key to validate the form and create the key. The button is disabled until all required fields are valid. Click Cancel to close the dialog without creating a key.
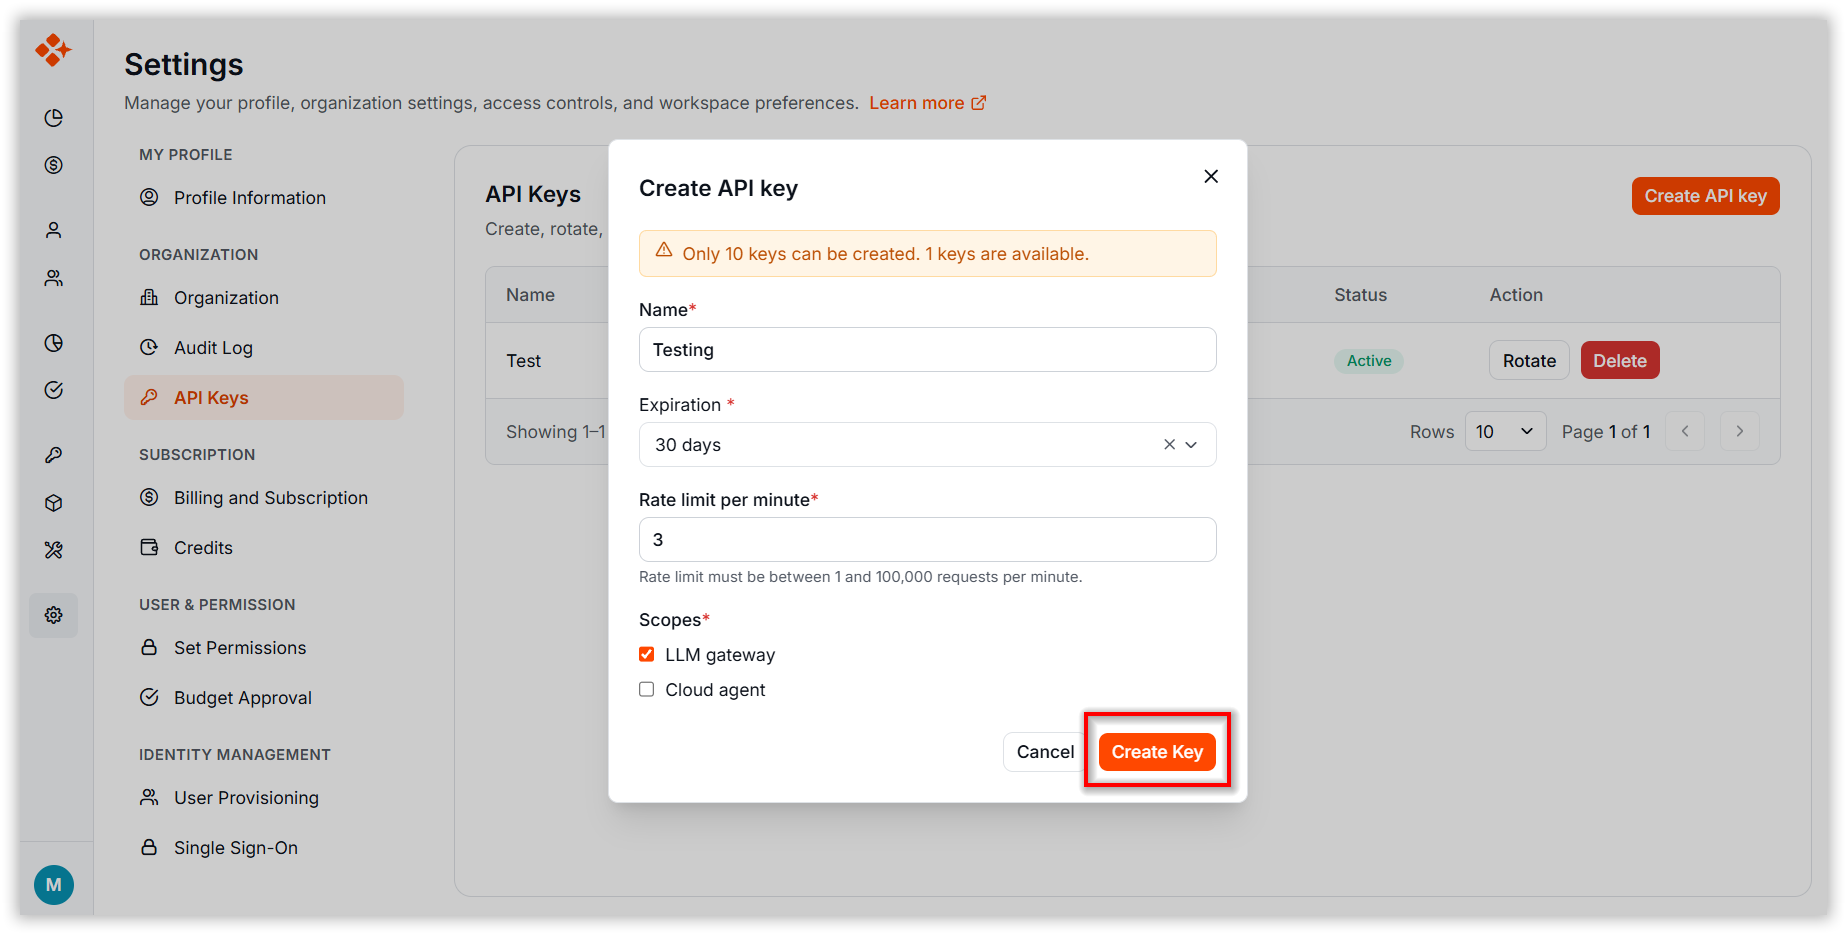
After creation, the Copy Secret Key dialog opens automatically so you can copy the secret.
Copying the Secret Key
When an API key is created or rotated, the Copy Secret Key dialog displays its secret value.
-
The secret appears in a read-only box and can be copied using Copy.
-
The secret is shown only once. After a short time it is automatically hidden and cannot be viewed again. Store it securely in a password manager or secrets vault immediately.
-
Click Cancel to close the dialog.
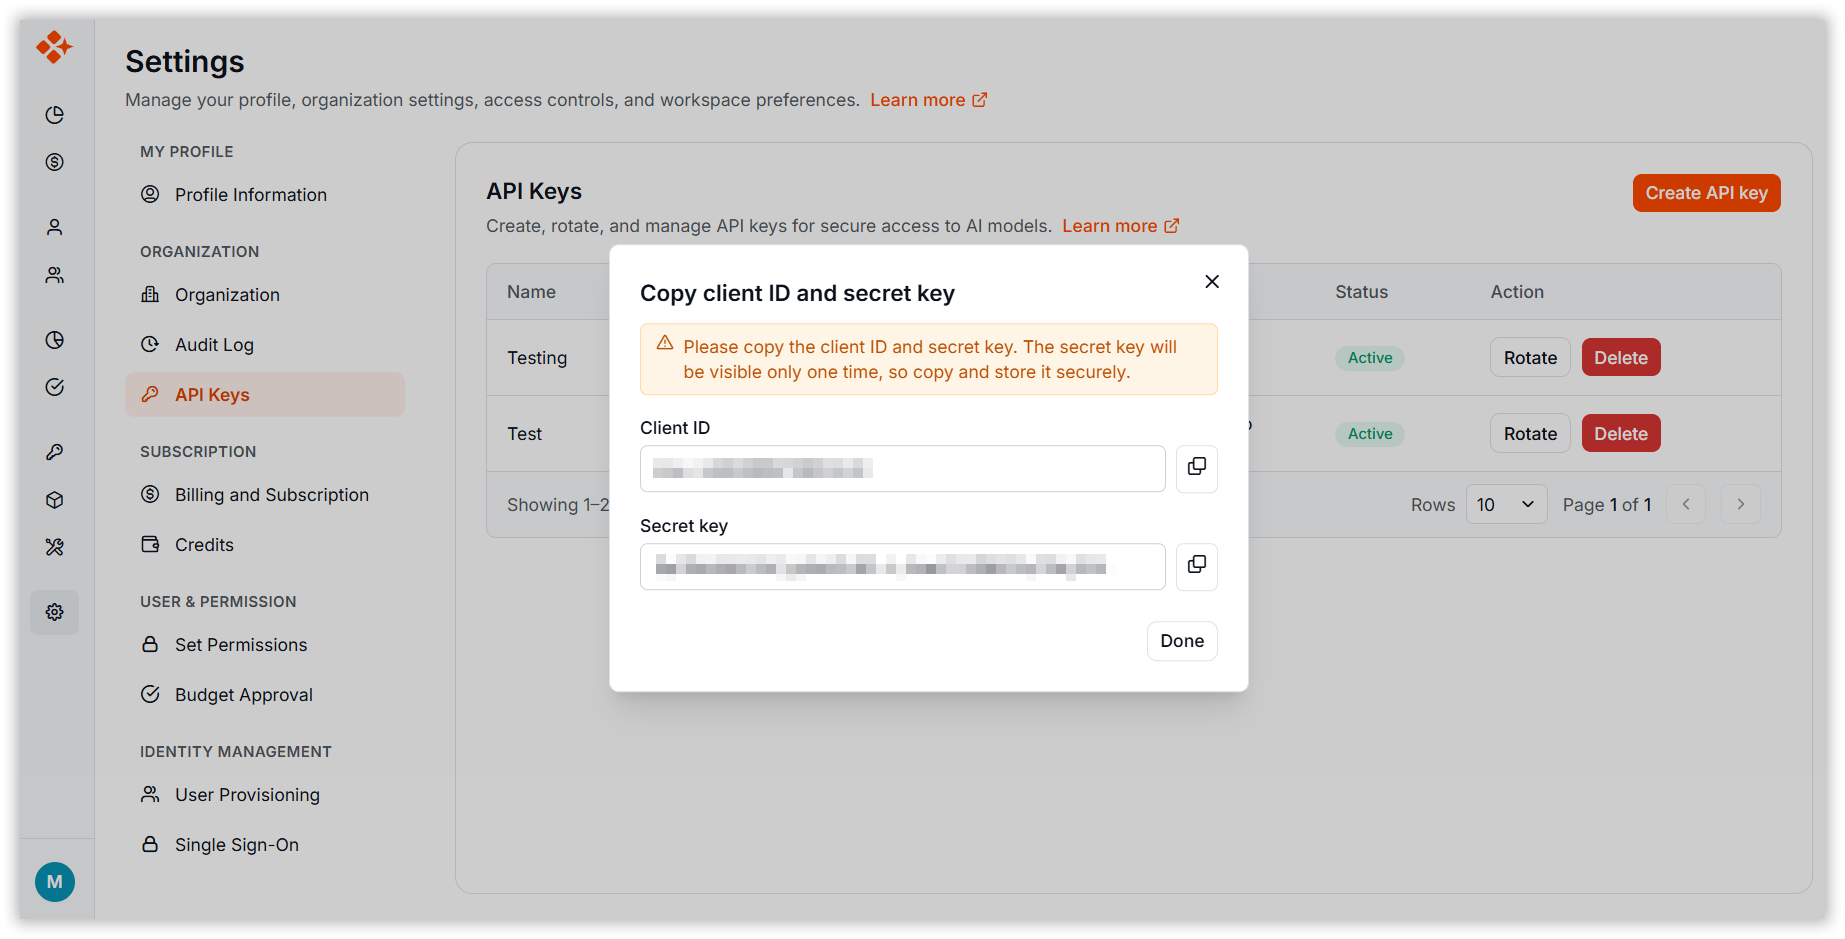
Note: If you close the Copy Secret Key dialog without copying the secret, it cannot be recovered. Rotate the key to generate a new secret.
Rotating an API Key
The Rotate action replaces an existing key’s secret. Use it if a key may have been compromised or as part of a regular security rotation policy.
-
Click Rotate option from the action column to open the Rotate API Key dialog.
In the Rotate API Key dialog, choose the required Overlap period (graceful rotation):
- 2 hours (minimum): The old key continues working for 2 hours after rotation.
- 24 hours: The old key continues working for 24 hours after rotation.
- Immediate: The old key is revoked instantly.
Click Rotate to replace the secret and begin the selected overlap period. The Copy Secret Key dialog then opens with the new secret. Click Cancel to close the dialog without rotating the key.
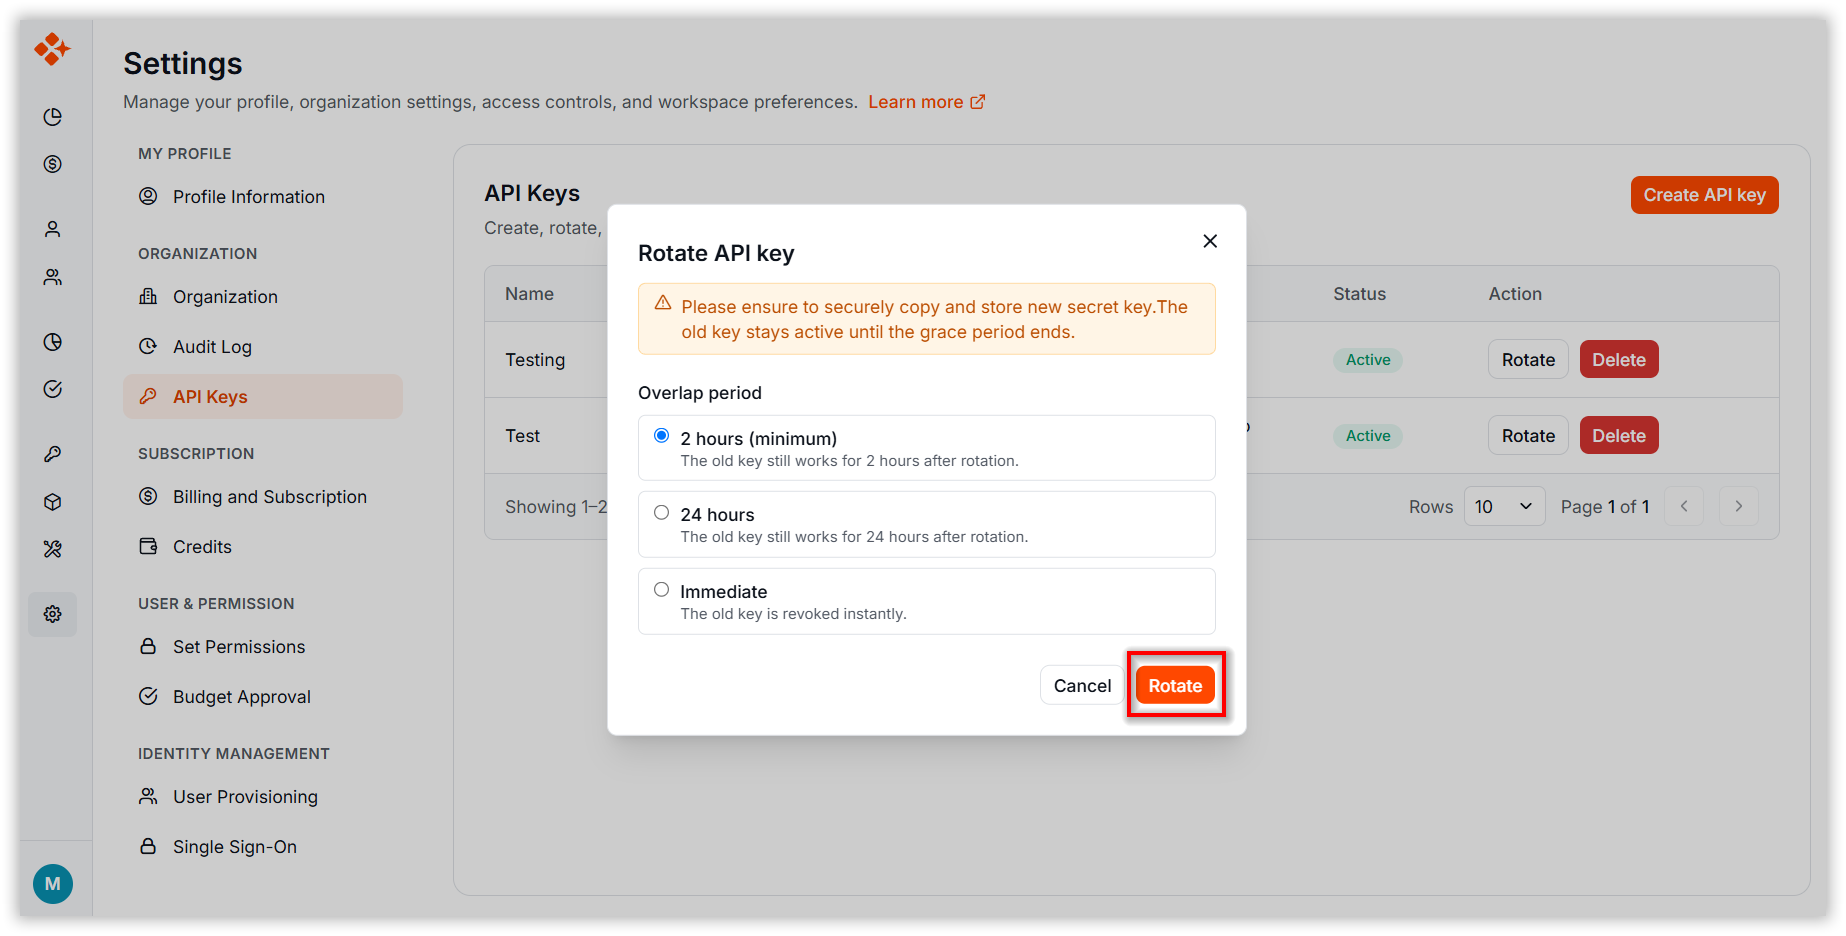
Note: Copy and store the new secret securely immediately after rotation. The old key stops working when the selected grace period ends.
Deleting an API Key
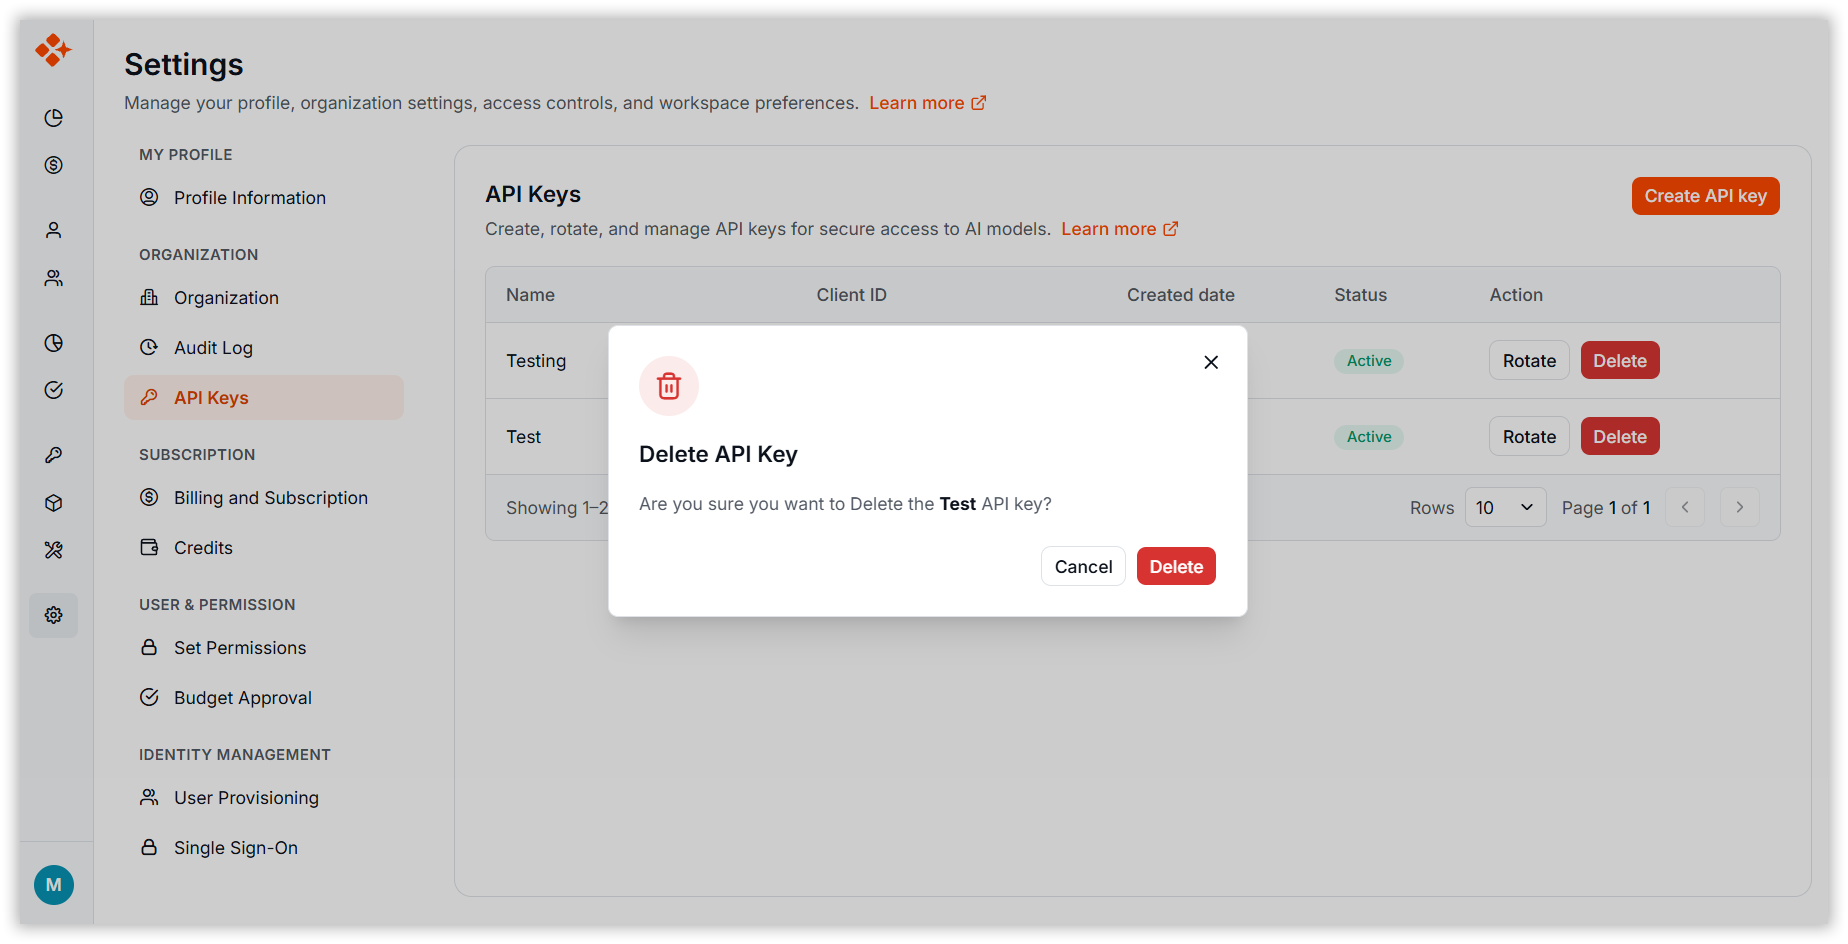
The Delete action permanently removes an API key from the organization. The Delete API Key dialog asks you to confirm the key’s name.
-
Click Delete option from the action column.
-
Click Delete to permanently remove the key. Any service using it immediately loses access.
-
Click Cancel to close the dialog without deleting the key.
Note: Before deleting a key, confirm that no external service still depends on it. If you need to disable a key but may want to issue a new secret, use Rotate with the Immediate overlap period instead.
Best Practices
- Copy and store the secret immediately. The secret is displayed only once; save it in a secure secrets vault or password manager when it appears.
- Give each key a clear, descriptive name. This makes it easier to identify the integration associated with each key.
- Use the narrowest scope that meets the need. Grant only the LLM Gateway or Cloud Agent access the consuming service requires.
- Set a reasonable rate limit. Match the limit to the consuming service’s expected usage.
- Rotate keys regularly. Use the 24-hour or 2-hour overlap period for live services to allow a transition without downtime.
- Use expiration for temporary integrations. Choose 30 days, 90 days, or 1 year for short-lived integrations; reserve Never for long-lived production services.
- Delete unused keys. Remove keys that are no longer needed to reduce the organization’s security exposure.