
BoldCreate empowers administrators and team leads to manage organization members and assign roles such as Admin, Team Lead, or User to match your organizational hierarchy.
Key Benefits
- Role Assignment: Assign roles such as Admin, Team Lead, or User to match your organizational hierarchy.
- Usage Visibility: Monitor usage and spending at the individual level.
- Streamlined Control: Centralized management for onboarding and governance.
Note: Administrators can edit, delete, and invite users by default. Team Leads can manage users based on the permissions assigned to their role through the Set Permissions. Users have view-only access to user settings.
1. Viewing Members
-
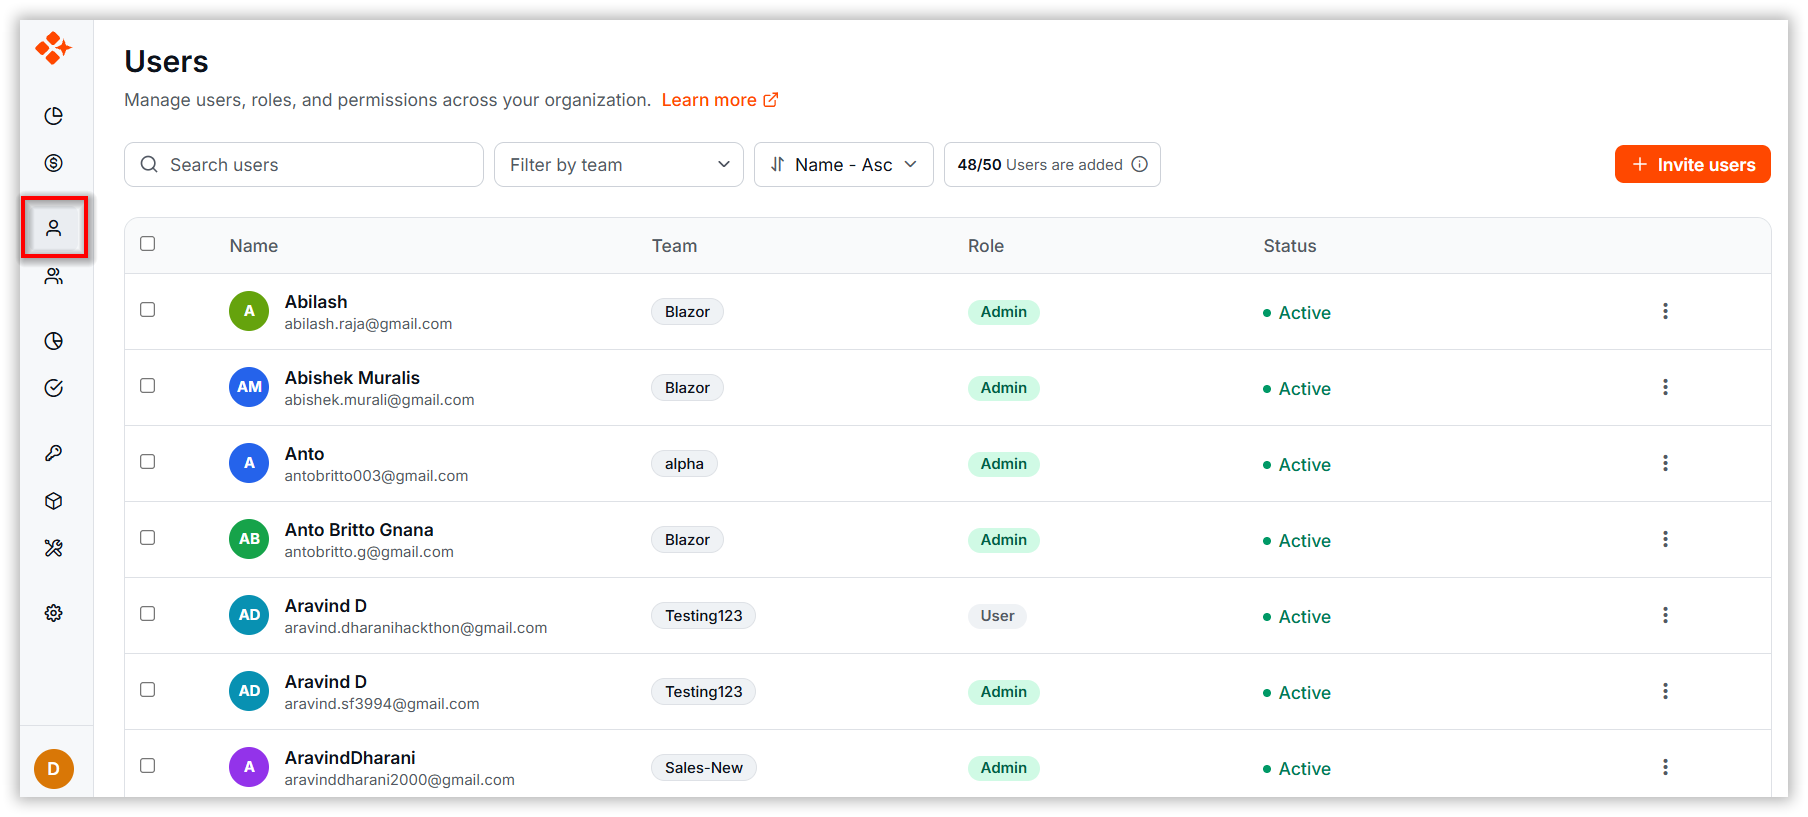
Navigate to the Users page.
-
The grid displays all users in the organization.
-
Use the search bar to look for specific users.
2. Adding Members
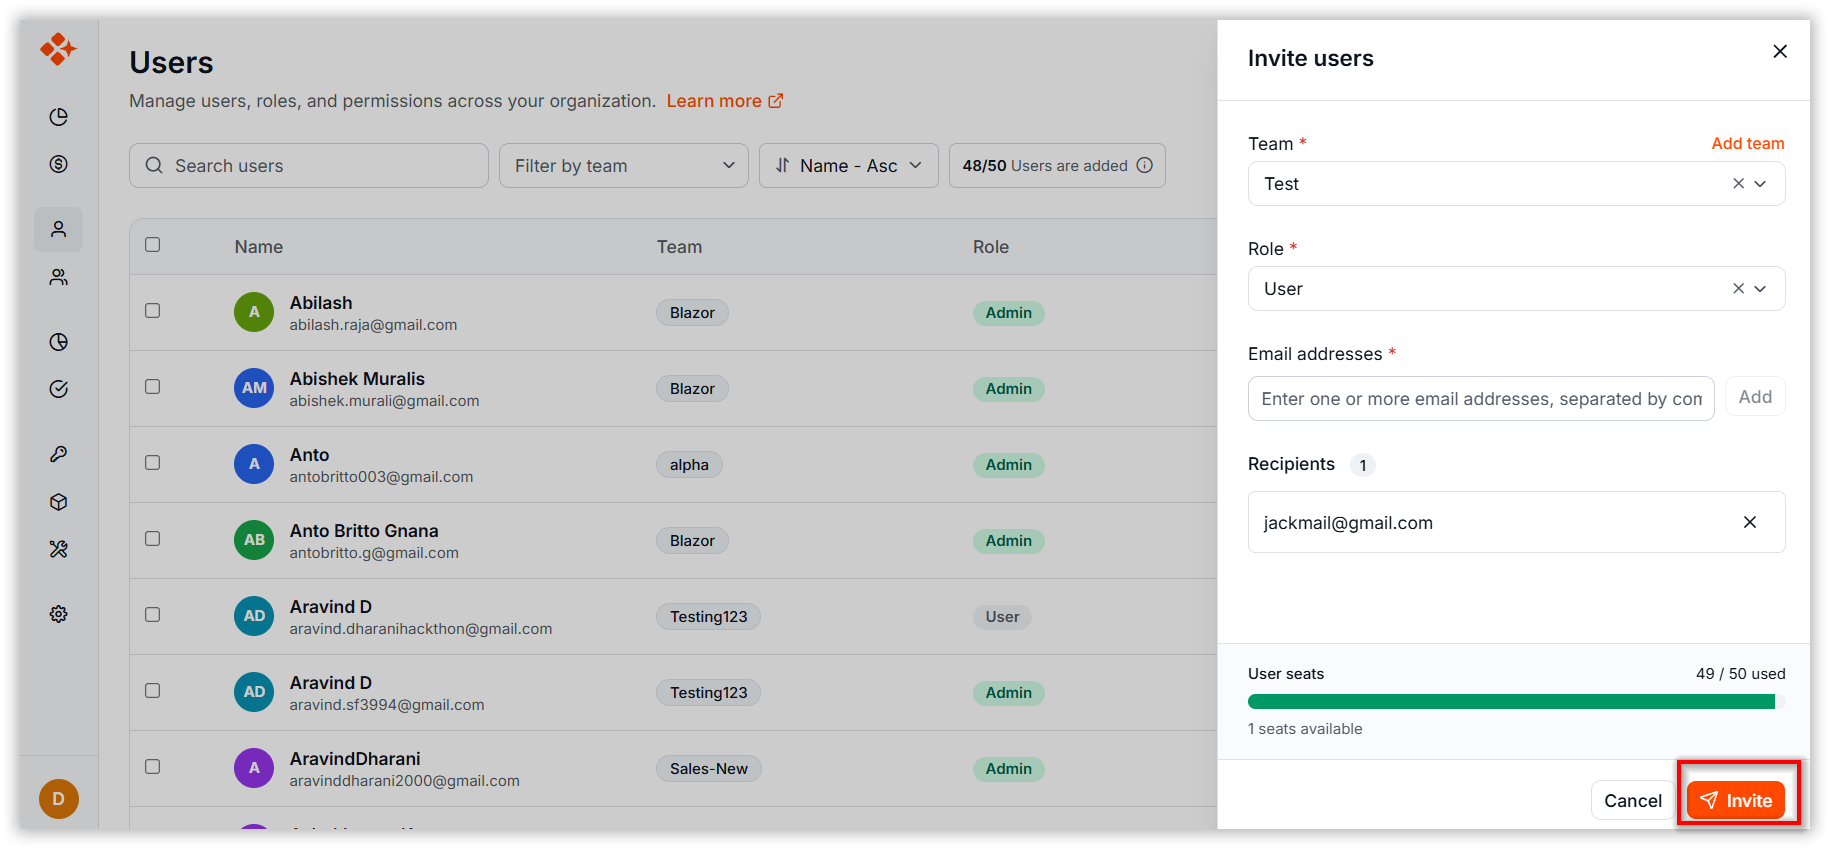
Step 1: Click Invite Users.
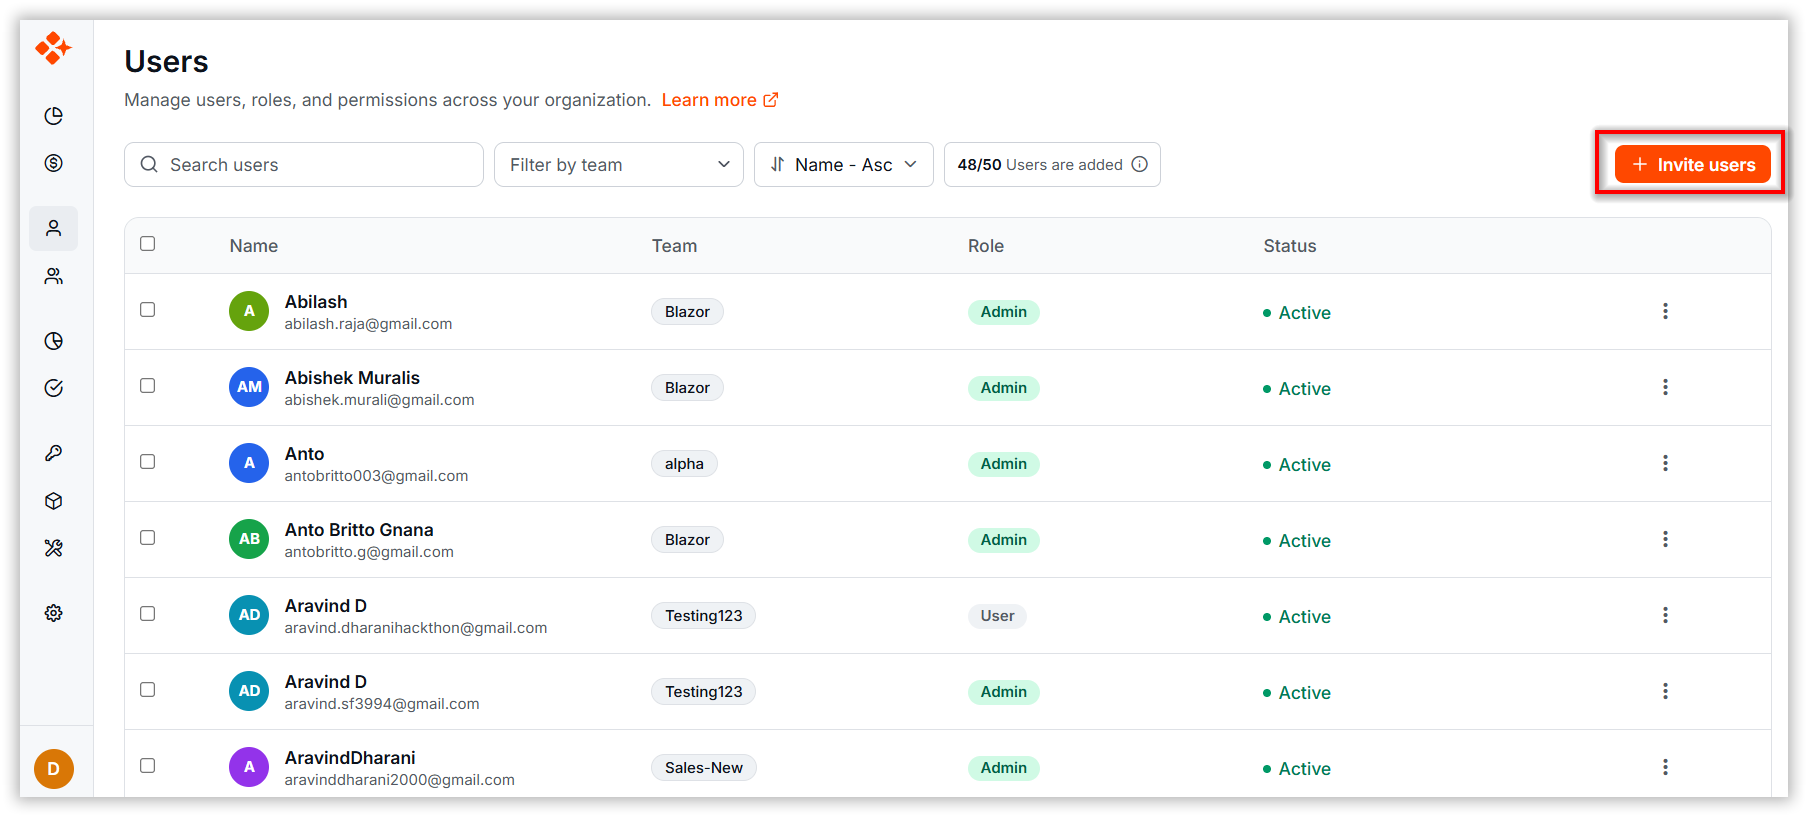
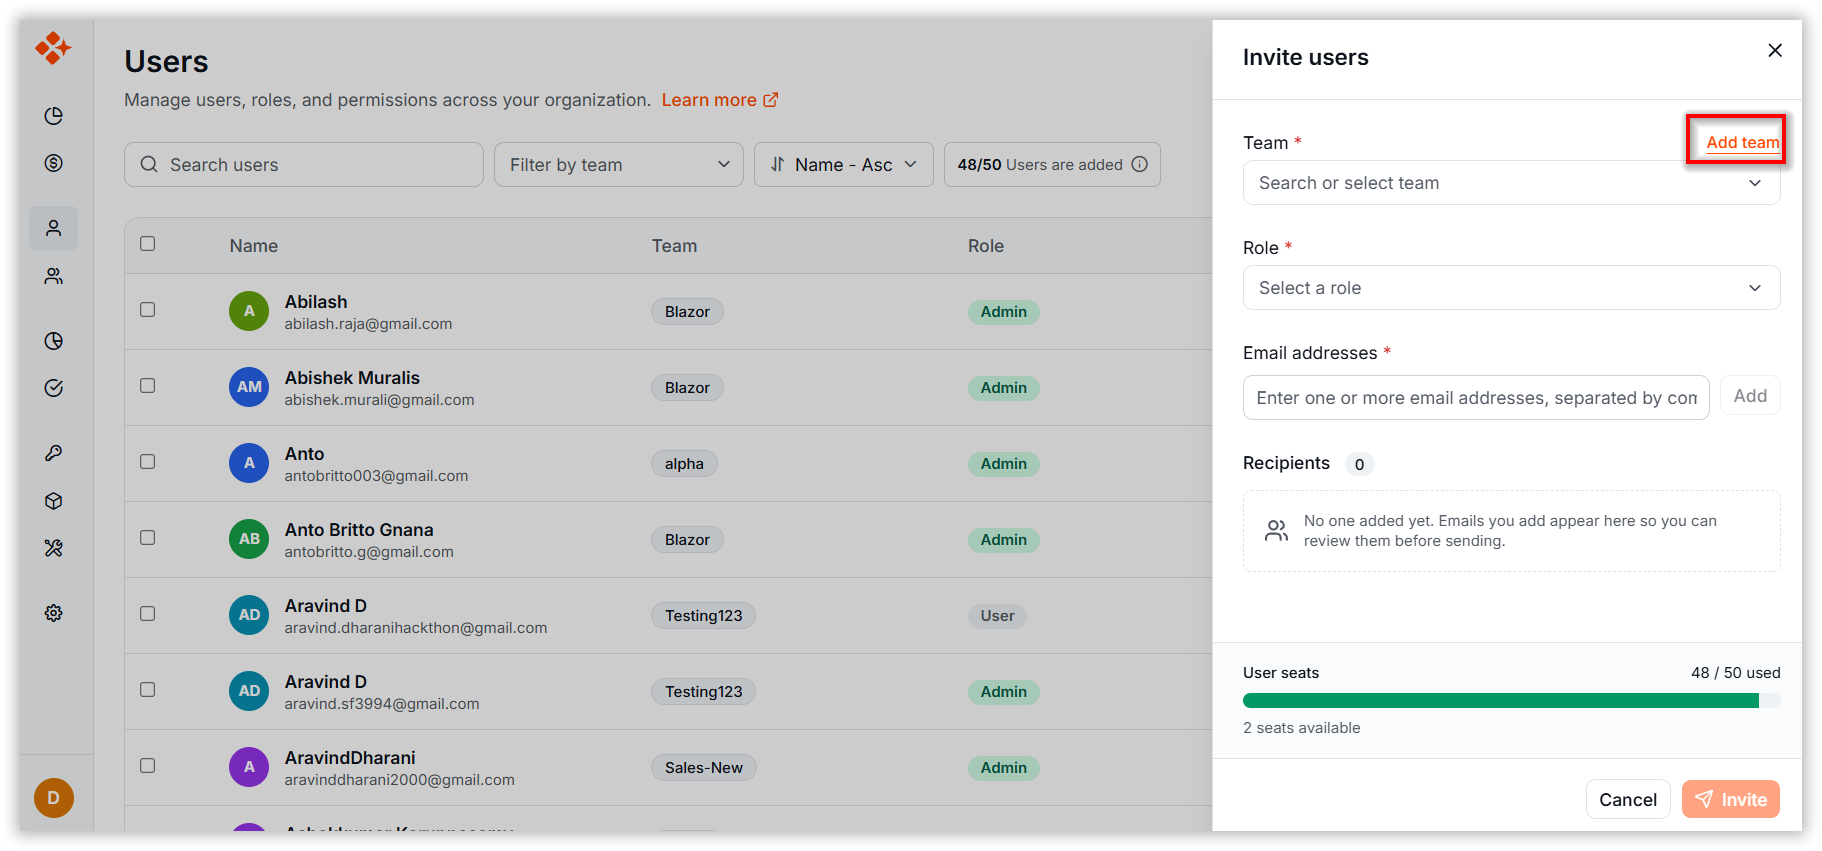
Step 2: Select the team from the dropdown to invite a user to an existing team. To invite a user to a new team, click Add Team.
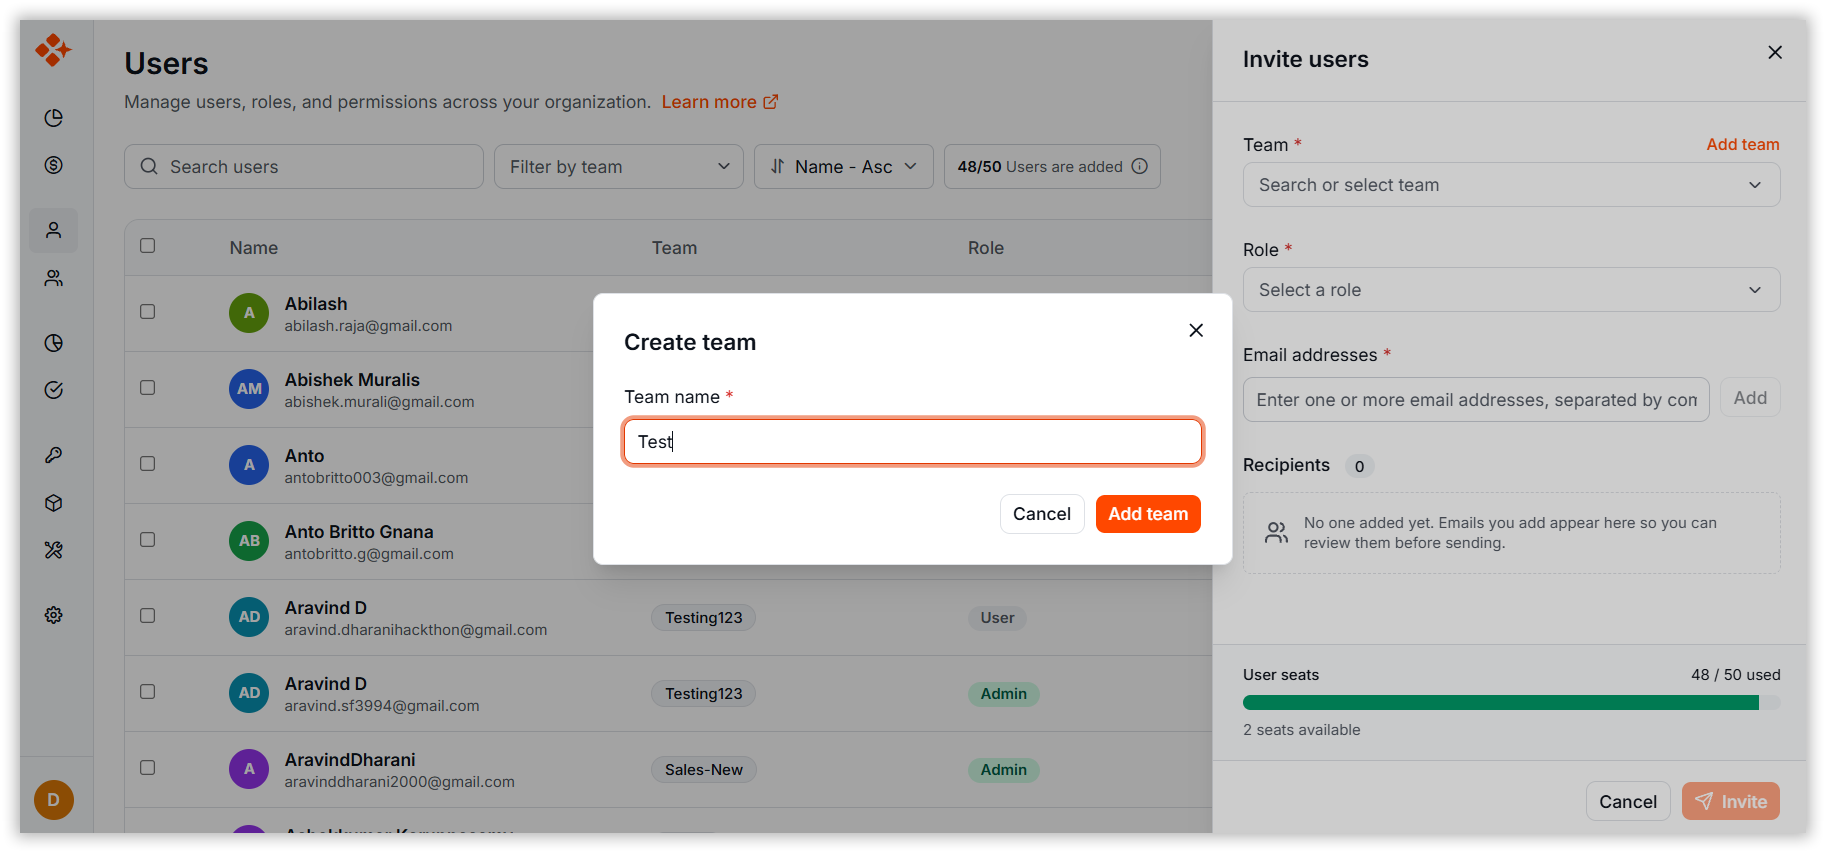
Step 3: In the Add Team dialog, enter the team name and click Add Team.
Step 4: Choose the role: Admin, Team Lead, or User.
Step 5: Enter the user’s email address.
Step 6: Click Invite to send the invitation. The user will be added upon acceptance.
3. User Management Actions
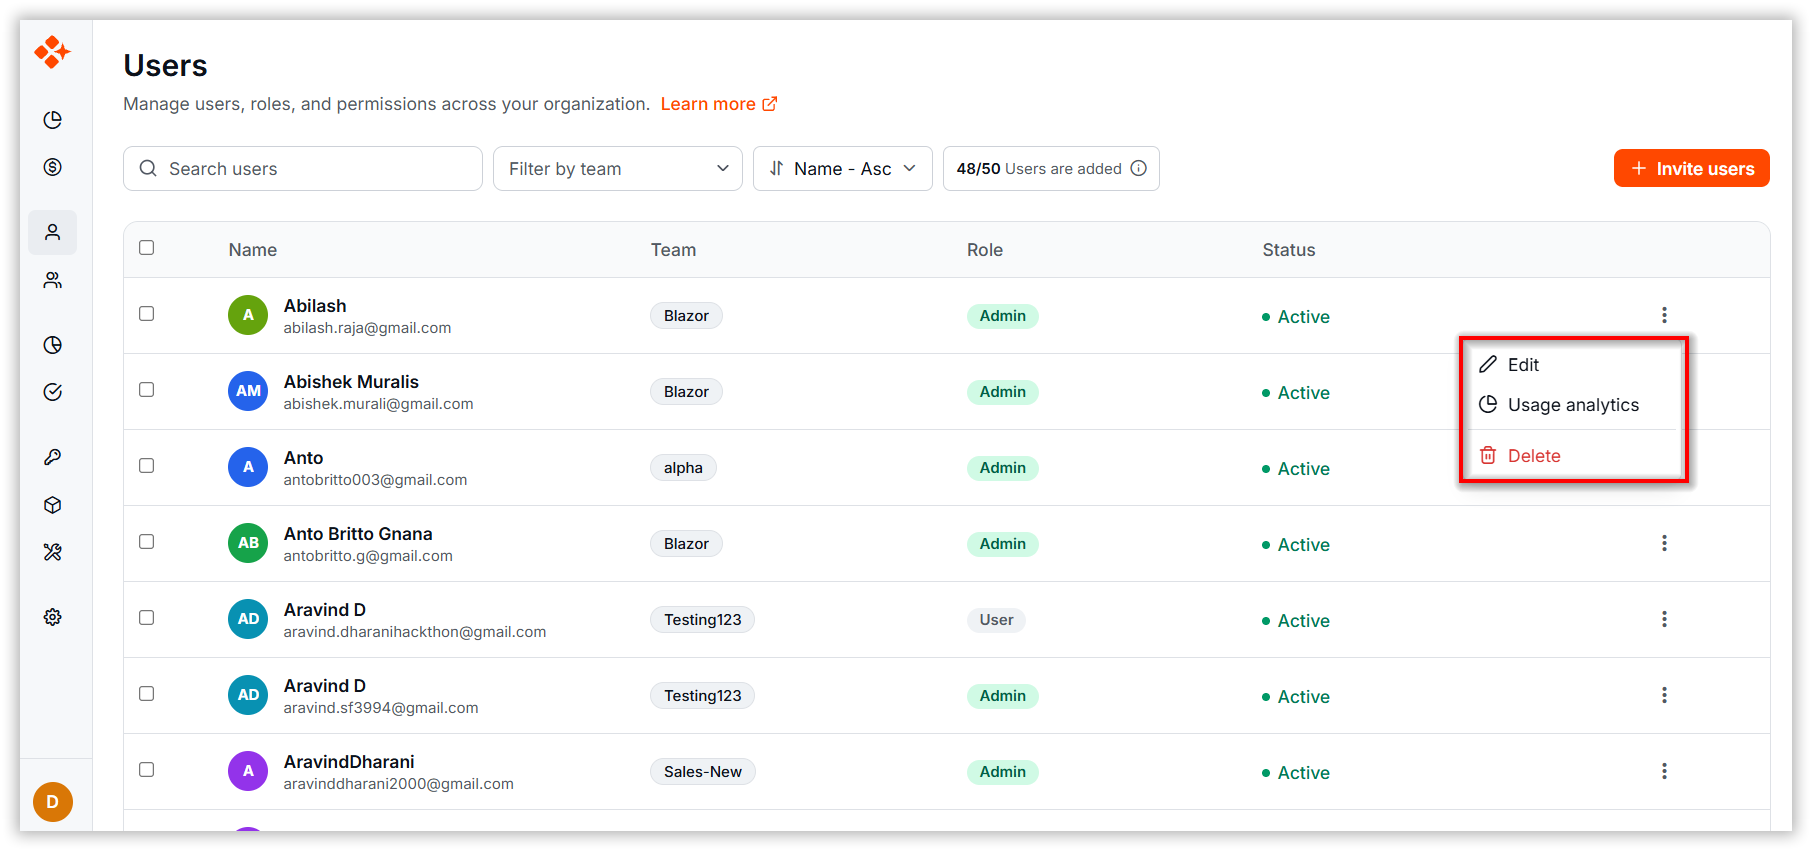
Use the context menu to:
-
Edit: Update a user’s name or role.
-
Delete: Remove a user from the organization.
-
Usage Analytics: Open the Usage Explorer page with the user and their team is automatically selected to review spend, requests, tokens, and active sessions.
-
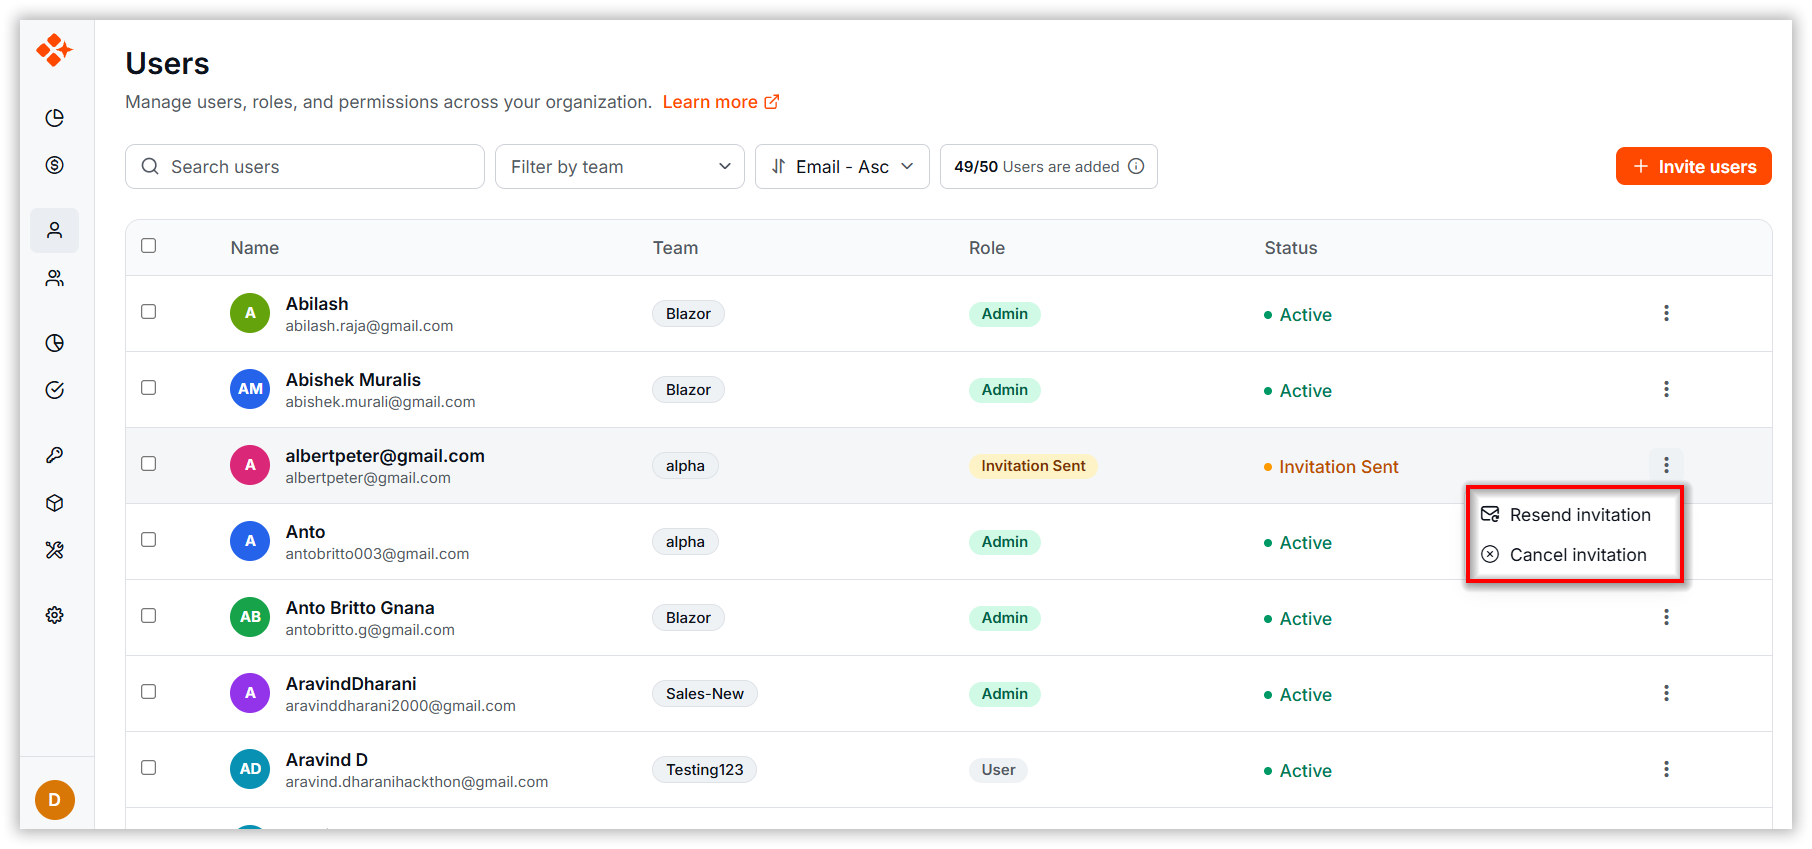
Resend Invitation: Resend an invitation to a user who has not accepted it, for example, if the original email was lost or expired.
-
Cancel Invitation: Cancel an invitation for a user whose status is Invitation Sent. The invited user is removed from the invited users list.
4. Bulk Actions
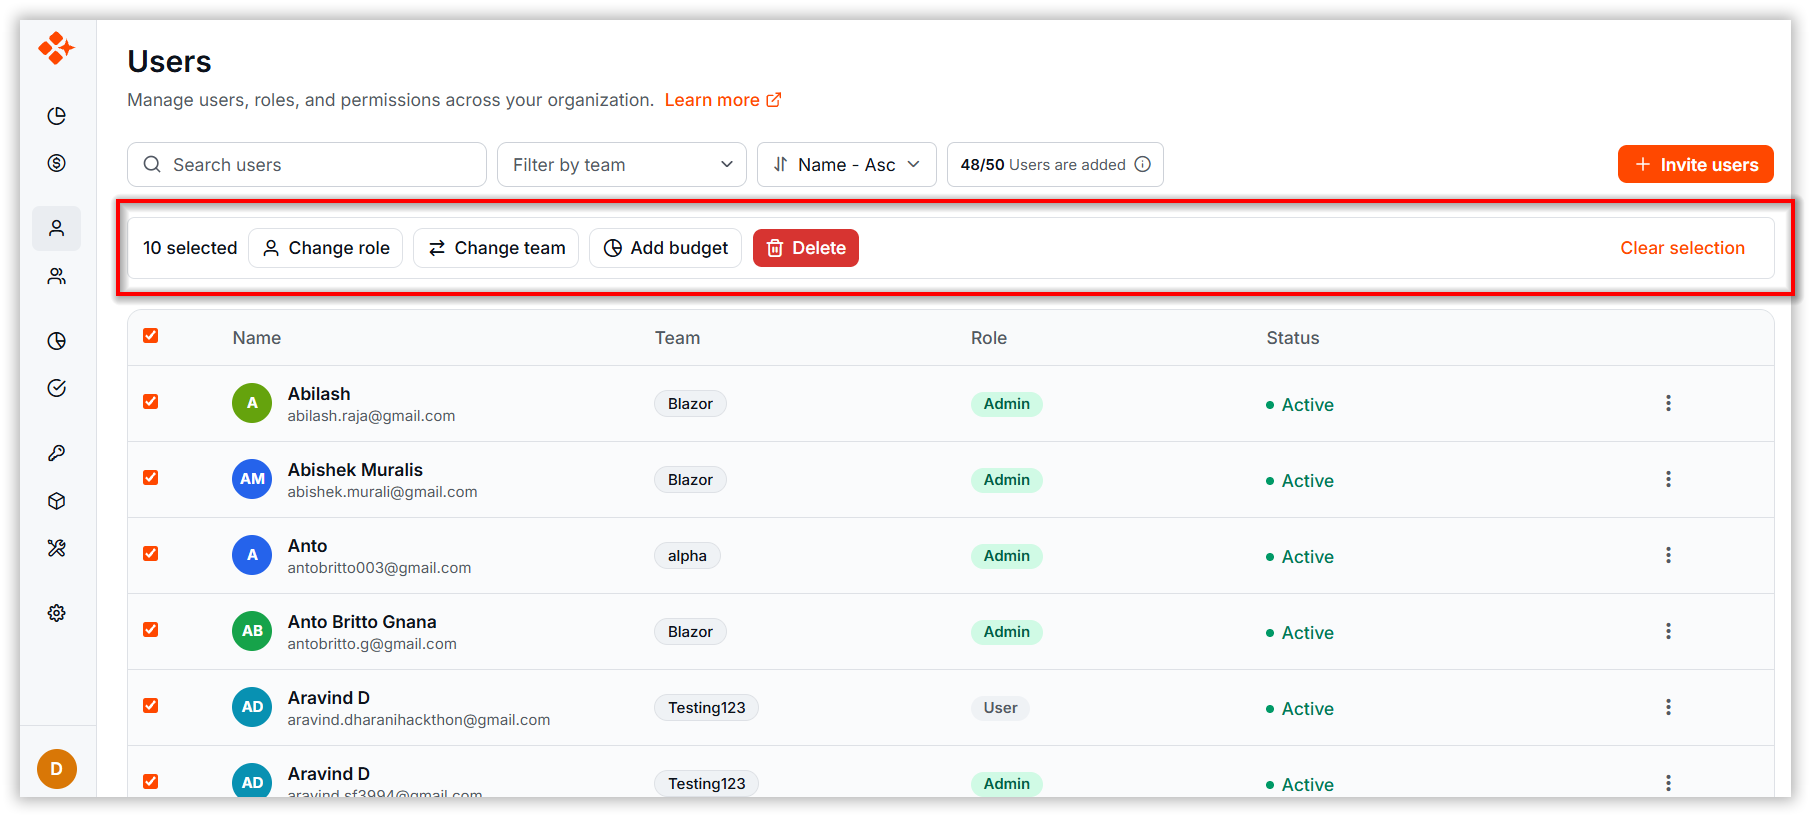
Admins and Team Leads can update multiple users at once using the Bulk Actions bar. Select users using the checkboxes, then choose the required action.
4.1. Access Permissions
- Admins can add budgets, change teams, change roles, and delete users.
- Team Leads can:
- Add budgets only when the Manage Team Budget permission is enabled.
- Change roles only when the Manage Roles permission is enabled.
- Change teams for selected users.
- Users do not have access to bulk actions.
Note: If any selected user has a pending invitation, only the Delete action remains available for Admins. Other bulk actions are disabled.
4.2. Selecting Users
-
Select one or more users using the row checkboxes.
-
Use the header checkbox to select or clear all users on the current page.
-
The number of selected users is displayed in the bulk action bar.
-
Click the Clear Selection icon to clear the selection.
5. Best Practices
- Maintain Clear Roles: Assign roles based on responsibilities.
- Monitor Usage: Use integrated analytics to track individual activity and spending.
- Secure Onboarding: Verify user details before sending invitations.
Related Topics
- Teams Management — Organize users into teams for collaboration.