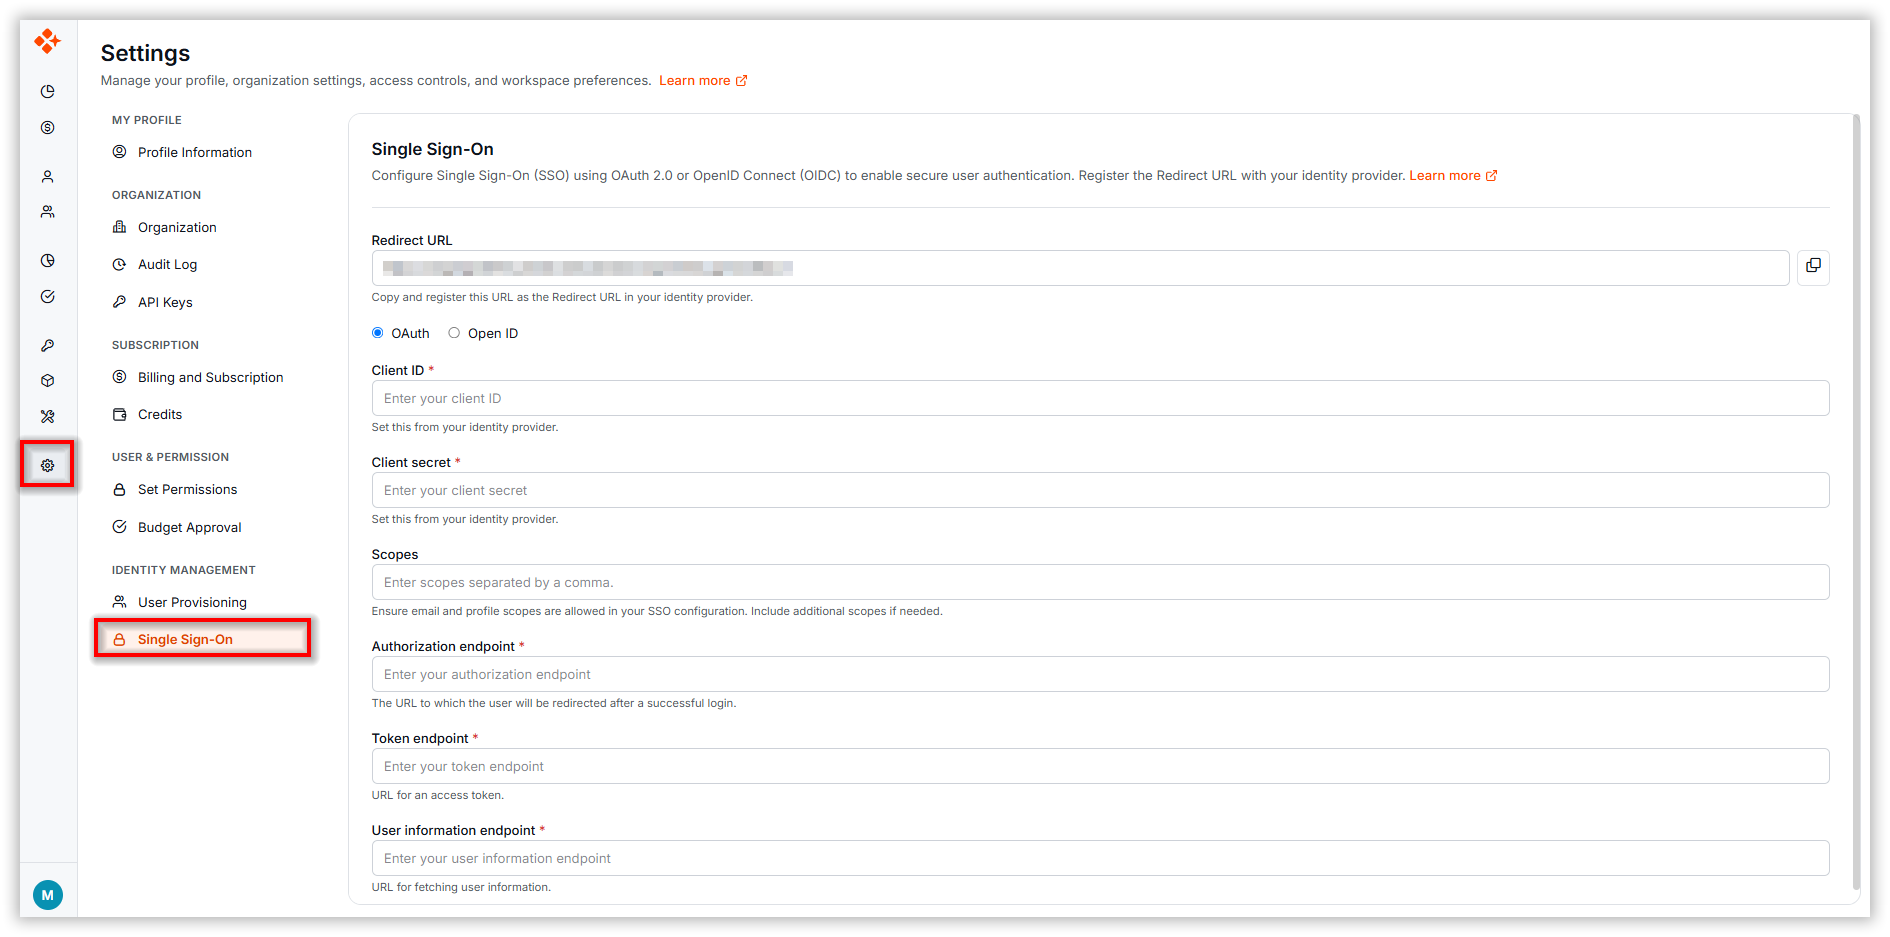
The Settings area centralizes account and organization configuration for BoldCreate Enterprise. Its tabs group profile information, organization tools, billing and subscription, user permissions and budgets, and identity management.
How to Access
- Sign in to BoldCreate, click your name at the bottom of the sidebar, and select Settings. In the Dashboard, you can also select General > Settings in the sidebar.
- Select a tab: My Profile, Organization, Subscription, User & Permission, or Identity Management.
My Profile
Profile information
-
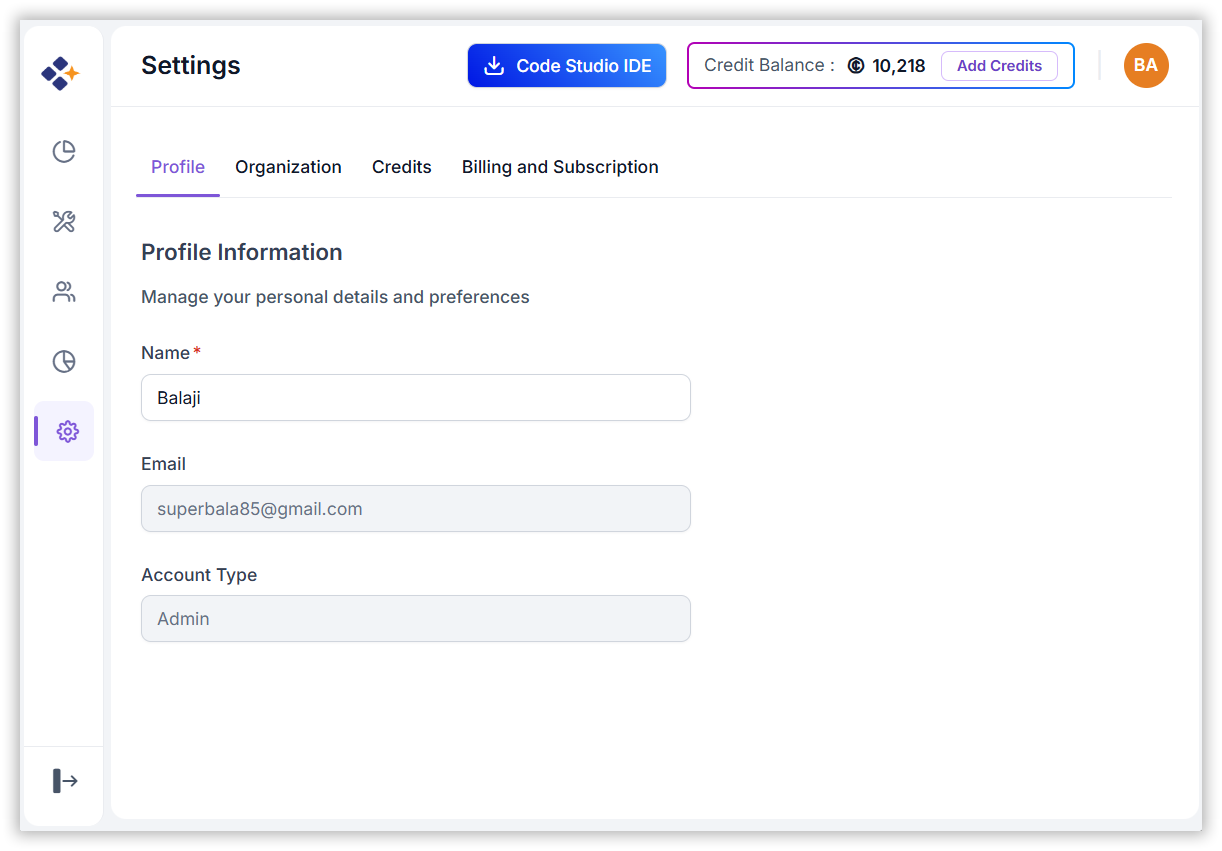
View your user name, email address, and account type.
Organization
Organization
-
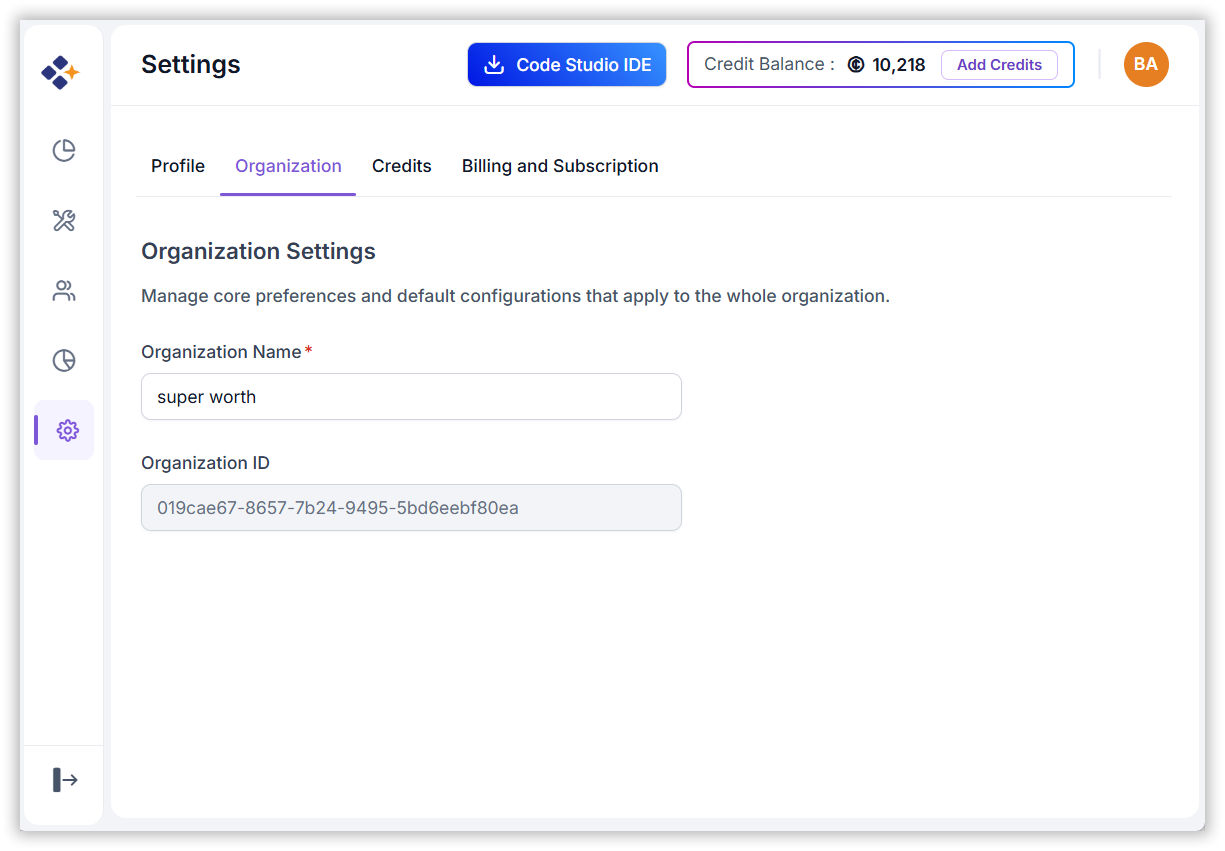
View the organization name and organization ID.
-
Share the organization ID with your admins when requesting access or support.
Audit log
-
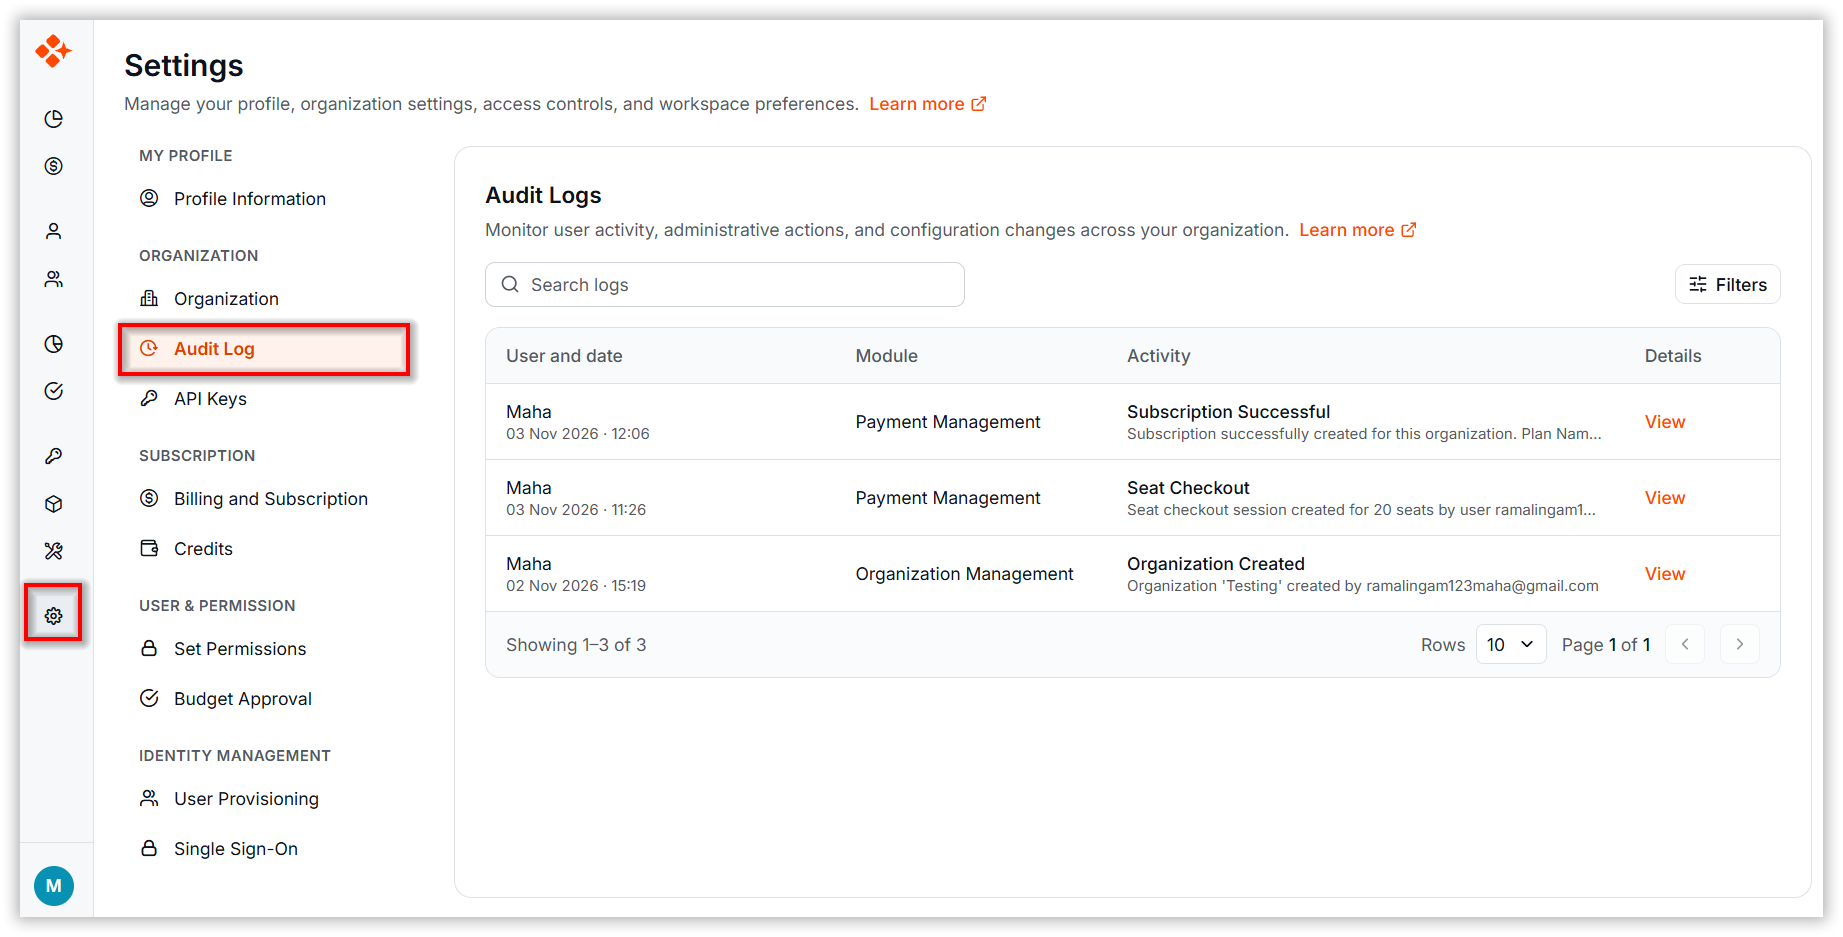
Track and review organization activities, configuration changes, and administrative actions to support security monitoring, troubleshooting, compliance requirements, and operational auditing. For detailed guidance, refer to audit log.
API keys
-
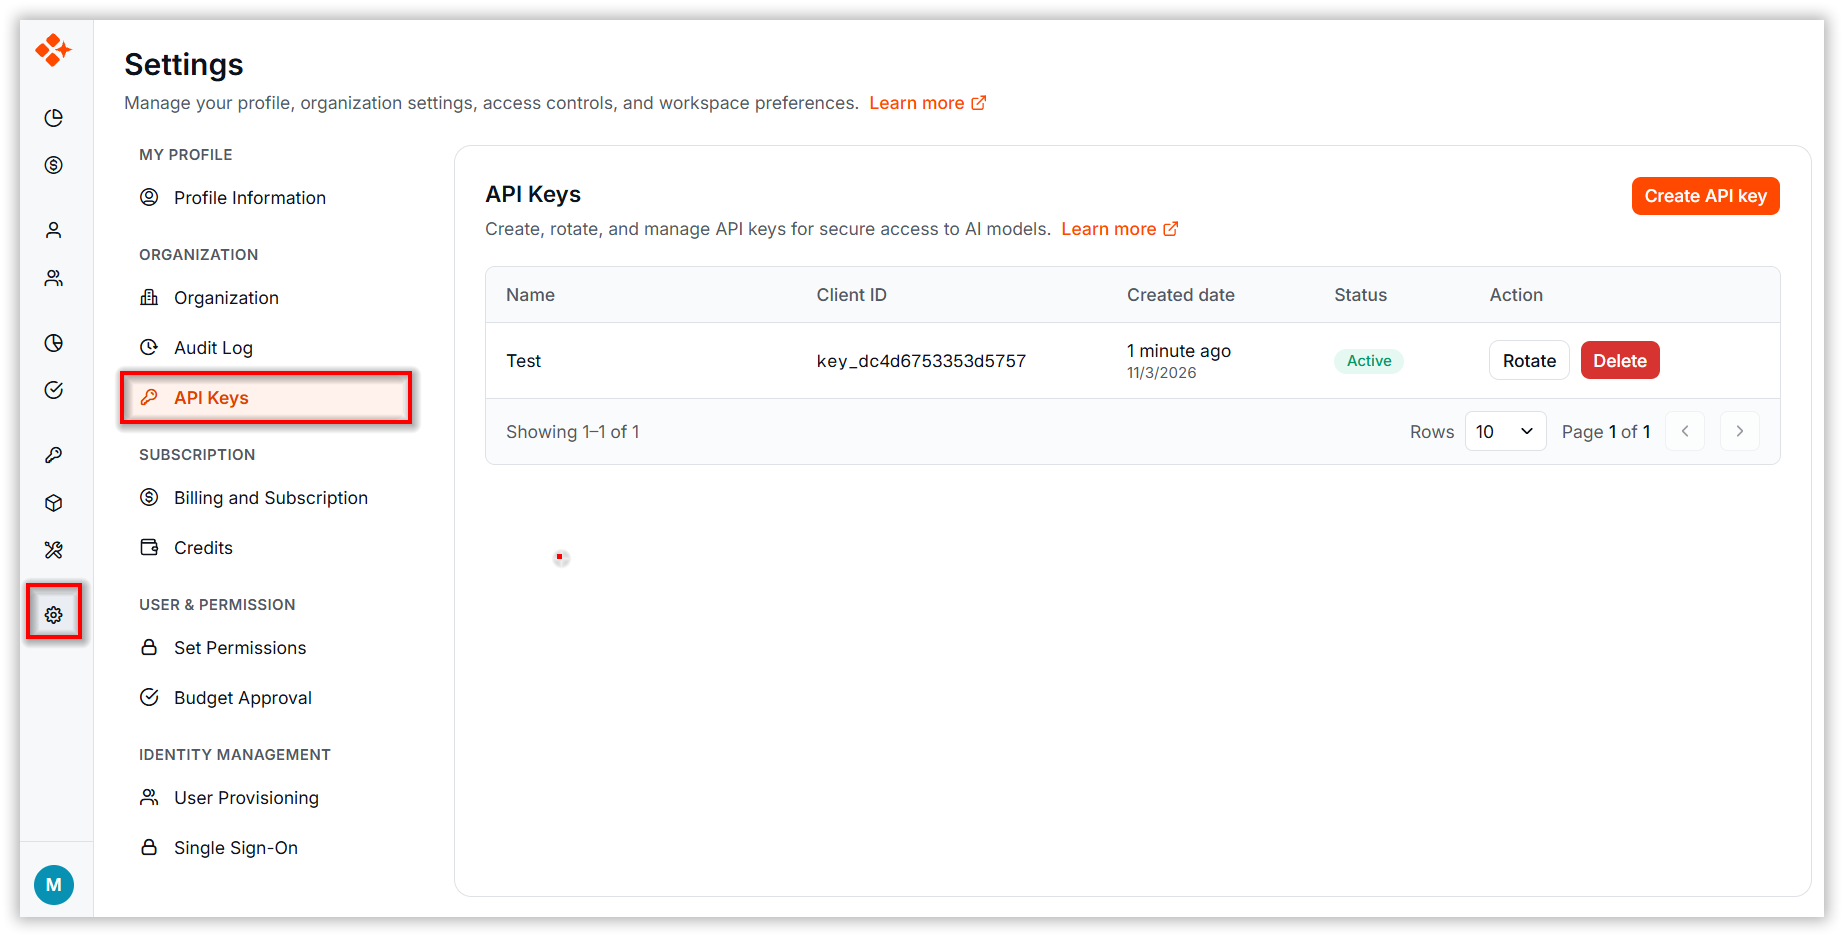
Create, manage, and secure API keys that enable authenticated programmatic access to BoldCreate services. For detailed guidance, refer to configure and manage api keys.
Subscription
Billing and subscription
-
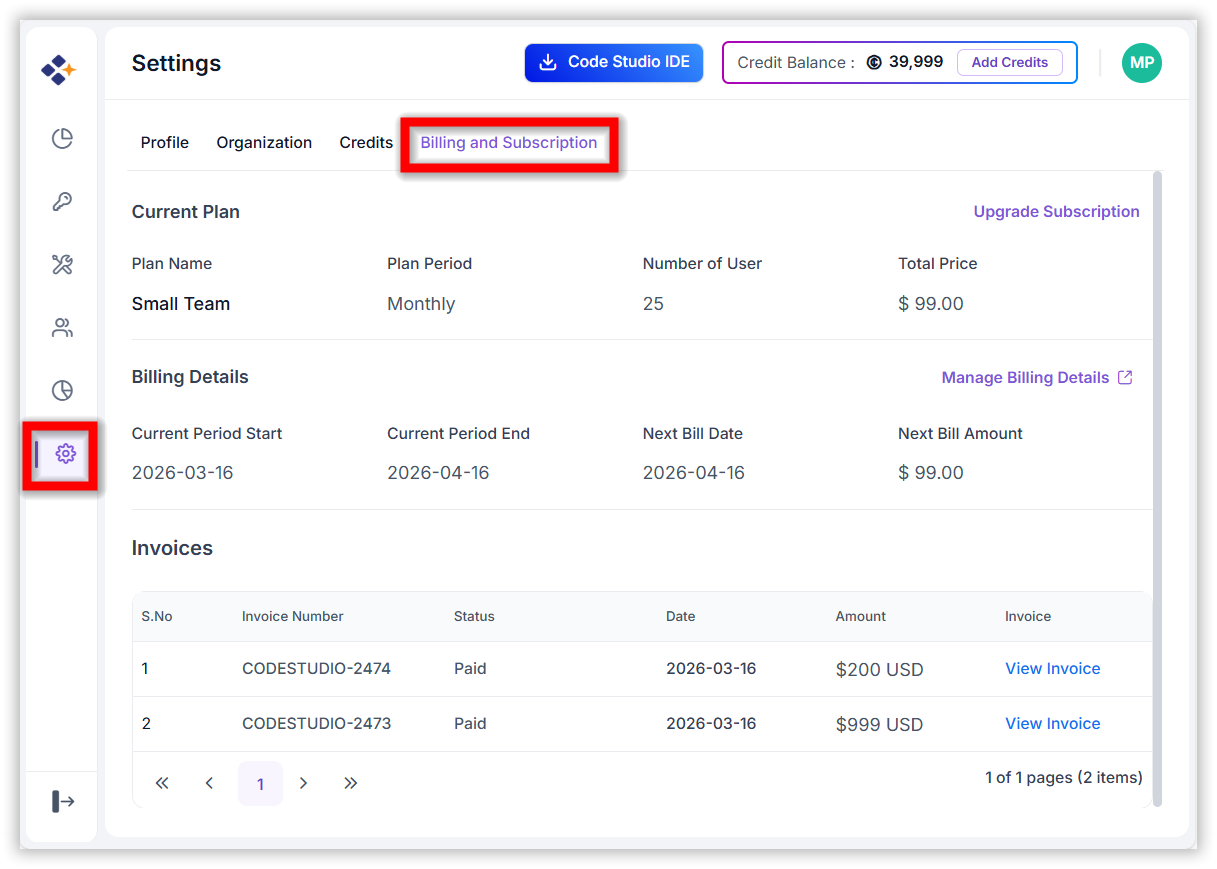
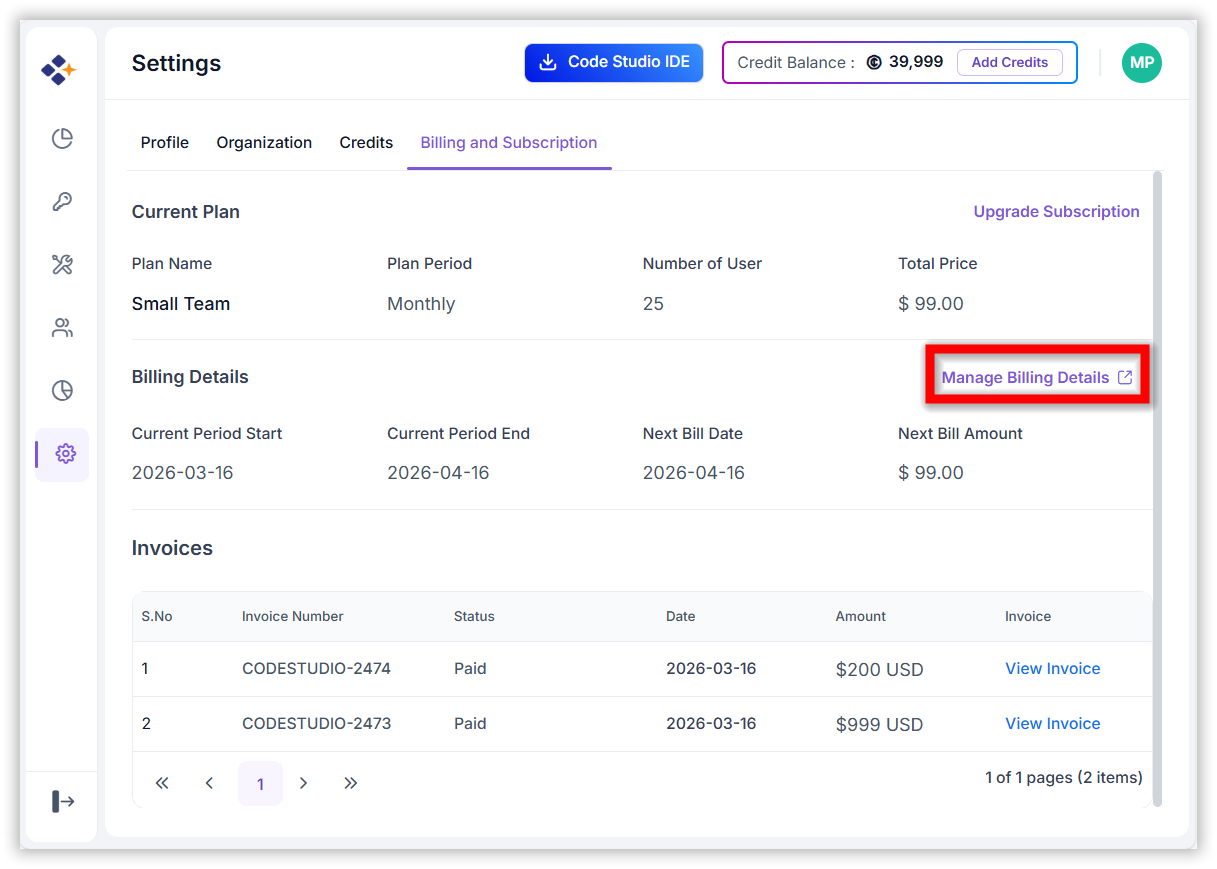
When a user has an active subscription plan, the Billing and subscription tab displays details about their current plan, billing cycle, and past invoices.
Add Seats
Customers can increase the number of seats in their existing subscription without changing their current plan.
How to Add Seats
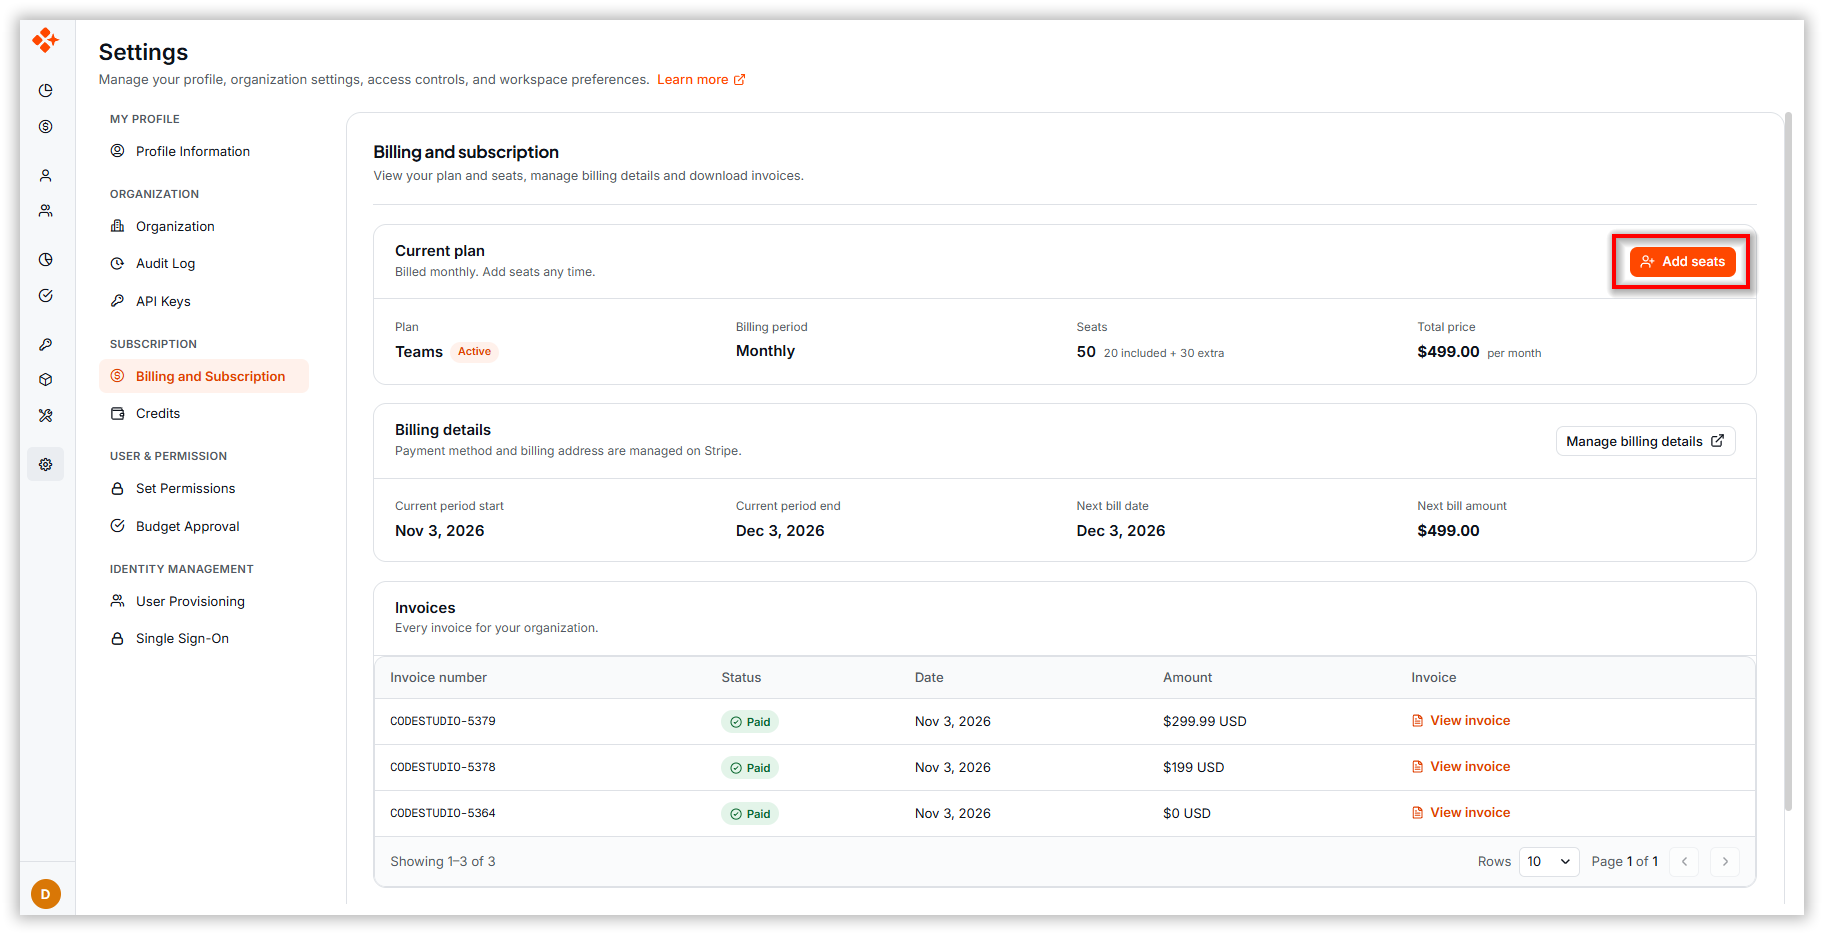
- Navigate to Settings → Billing and Subscription.
- Click Add Seats in the Current Plans section.
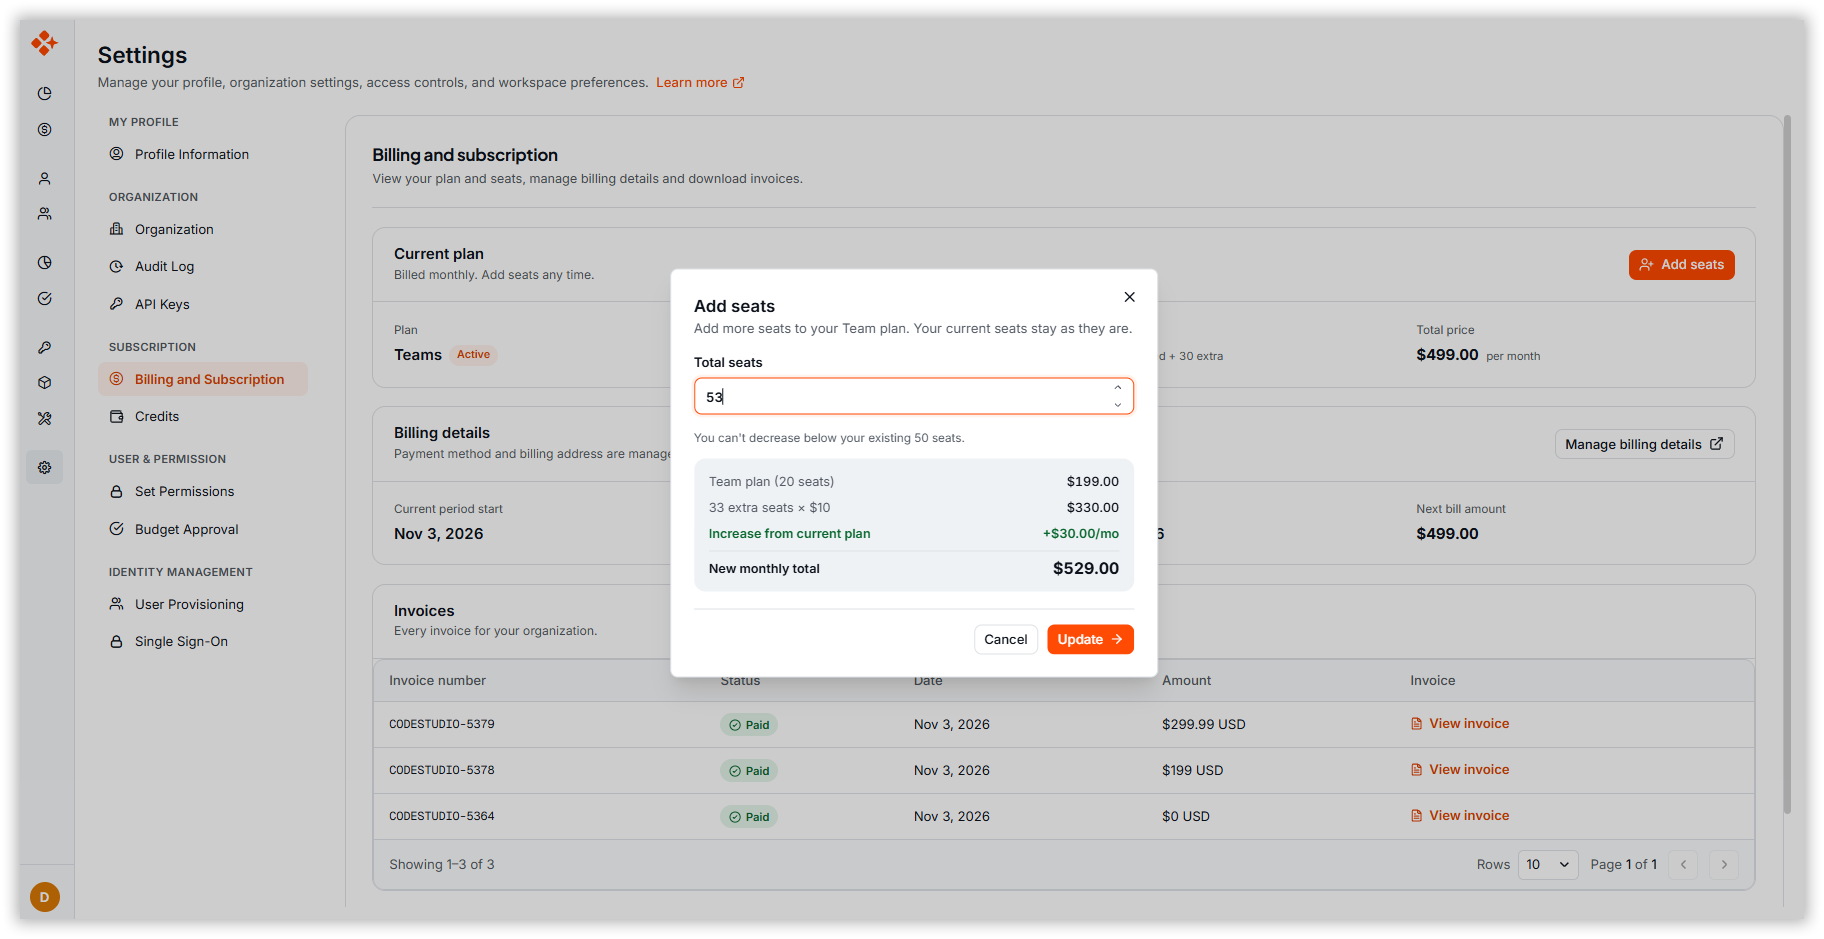
- Enter the desired total number of seats.
- The system displays the updated monthly subscription price based on the selected seat count.
- Click Update to apply the changes.
Add Seats - Pricing Calculation
- Additional seats are charged based on the per-seat pricing.
- The system calculates the new monthly subscription cost based on the selected number of seats.
- The current subscription plan remains unchanged.
Manage Billing Details
-
When users click Manage Billing Details on the Billing and subscription tab, they are redirected to the Stripe Billing Portal. This page contains the following sections to help users manage their payment and subscription settings:
-
Current Subscription
- View plan, pricing, next billing date, and payment method.
-
Billing & Shipping Information
- Allows users to update the details and ensures that billing-related records remain accurate.
-
Cancel Subscription
- When you purchase a subscription, it is set to renew automatically every billing cycle.
- If you choose to cancel your subscription, it will remain active until the end of the current billing period.
- After that, it will not renew, and no further charges will be applied.
- You will continue to have access to all features until the current billing cycle ends.
-
Do Not Cancel Subscription
- If you want to continue using your subscription, simply do not cancel it.
- Your subscription will stay active and will renew automatically at the end of each billing cycle.
- No additional action is needed unless you decide to stop renewal in the future.
-
Plan Overview
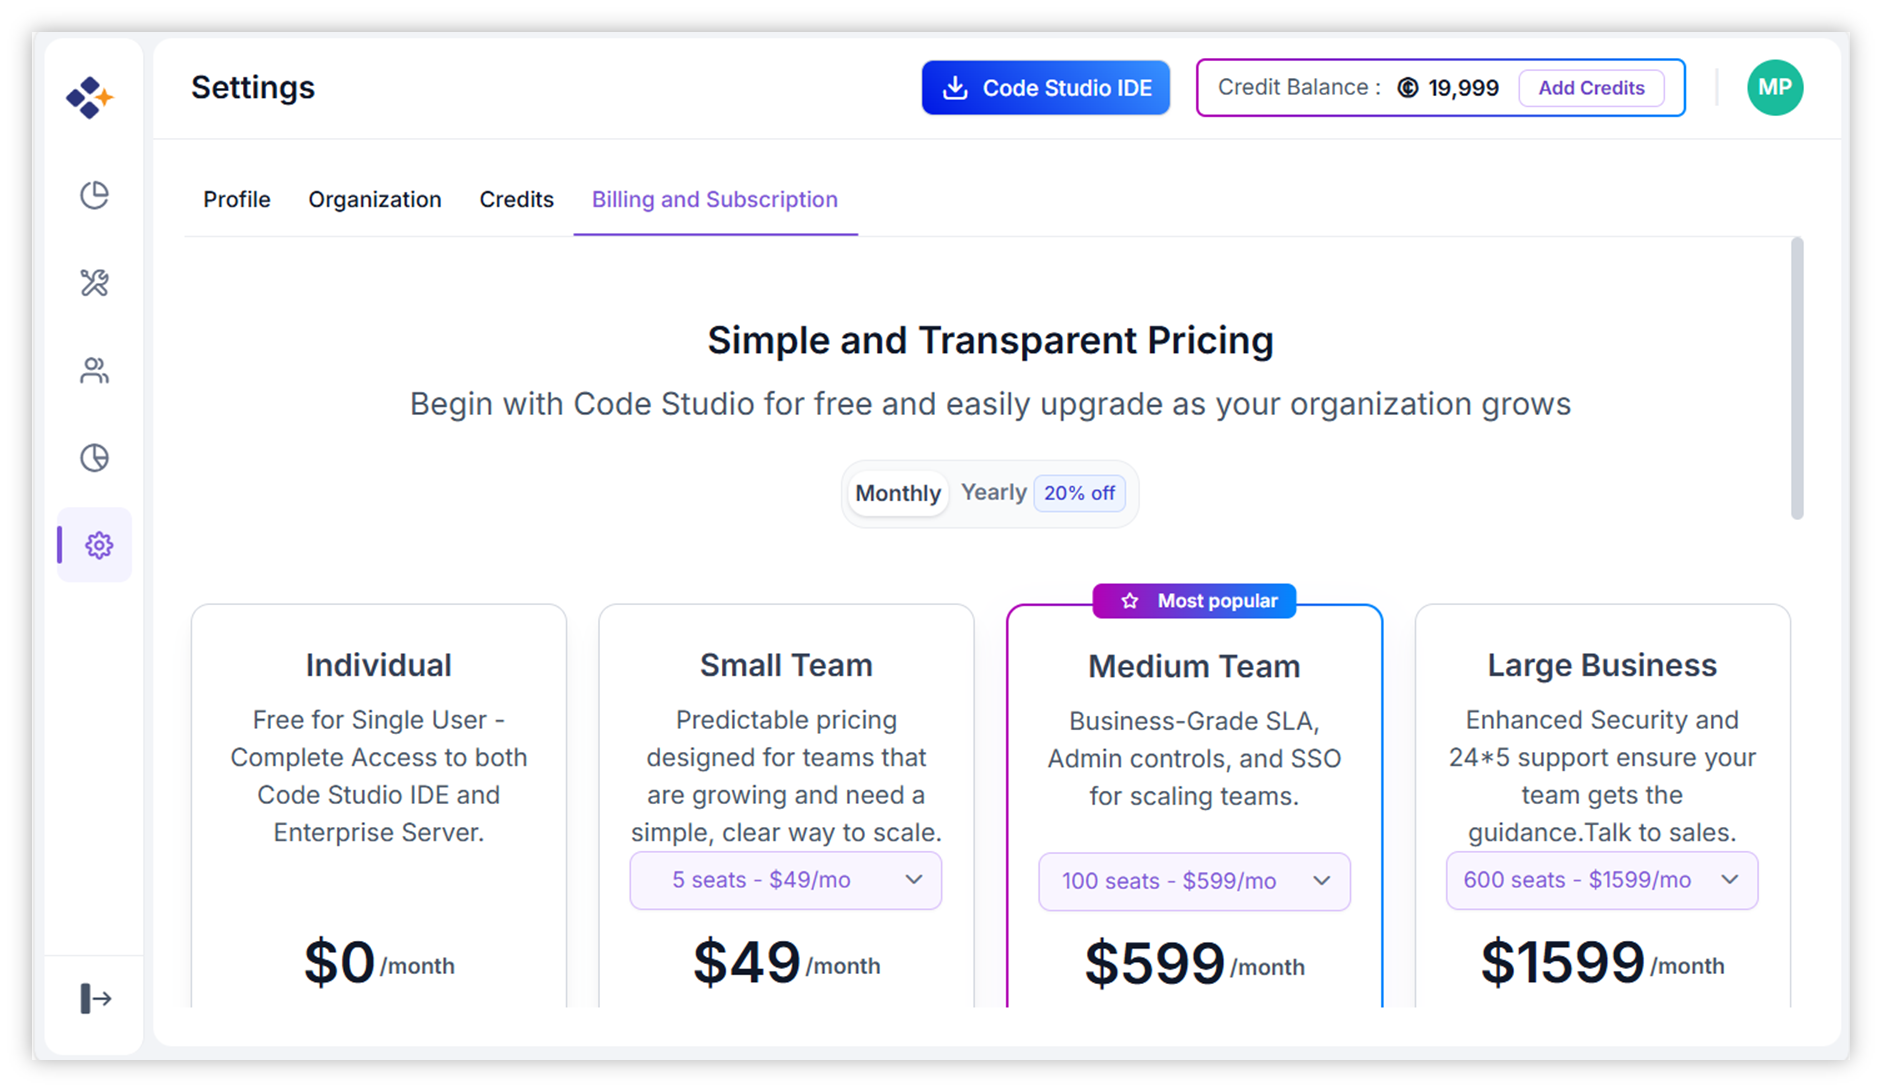
Start with a 30-day free trial of our Team Plan at no upfront cost, and easily add more seats as your team grows.
Key Points & Subscription Lifecycle
- Initial 30-Day Free Trial: New workspaces start on the Team plan with $0.00 due today; the first payment is billed automatically only after the 30-day trial concludes.
- Full Feature Access: Includes Cloud agents, Desktop & CLI, premium AI models, team budgets, usage analytics, and SSO.
- Role-Based Management: Only organization administrators can configure seats and manage billing; team members are directed to contact their admin if a plan is inactive.
- Lifecycle States:
- Trial: 30 days of active access at no charge.
- Trial Ended / Expired: Workspace access pauses until an admin subscribes to the Team plan.
- Trial Cancelled: Easily resume and pick up where your team left off.
- Payment Failed: Workspace access is suspended until the payment method is updated via the secure Stripe billing portal.
Plan Structure and Pricing
Plan Structure & Seat Limits
- Base Team Plan: Includes 20 default seats for $199.00/month.
- Additional Seats: $10.00/month per extra seat beyond the included 20.
- Seat Adjustment Rule:
- You can add additional seats as your team expands.
- Seats cannot be decreased below the plan minimum (20 included seats).
Discounts & Special Offers
- Syncfusion Customer Offer: Eligible accounts receive a 10% recurring discount applied every month to the total subscription subtotal.
Credits
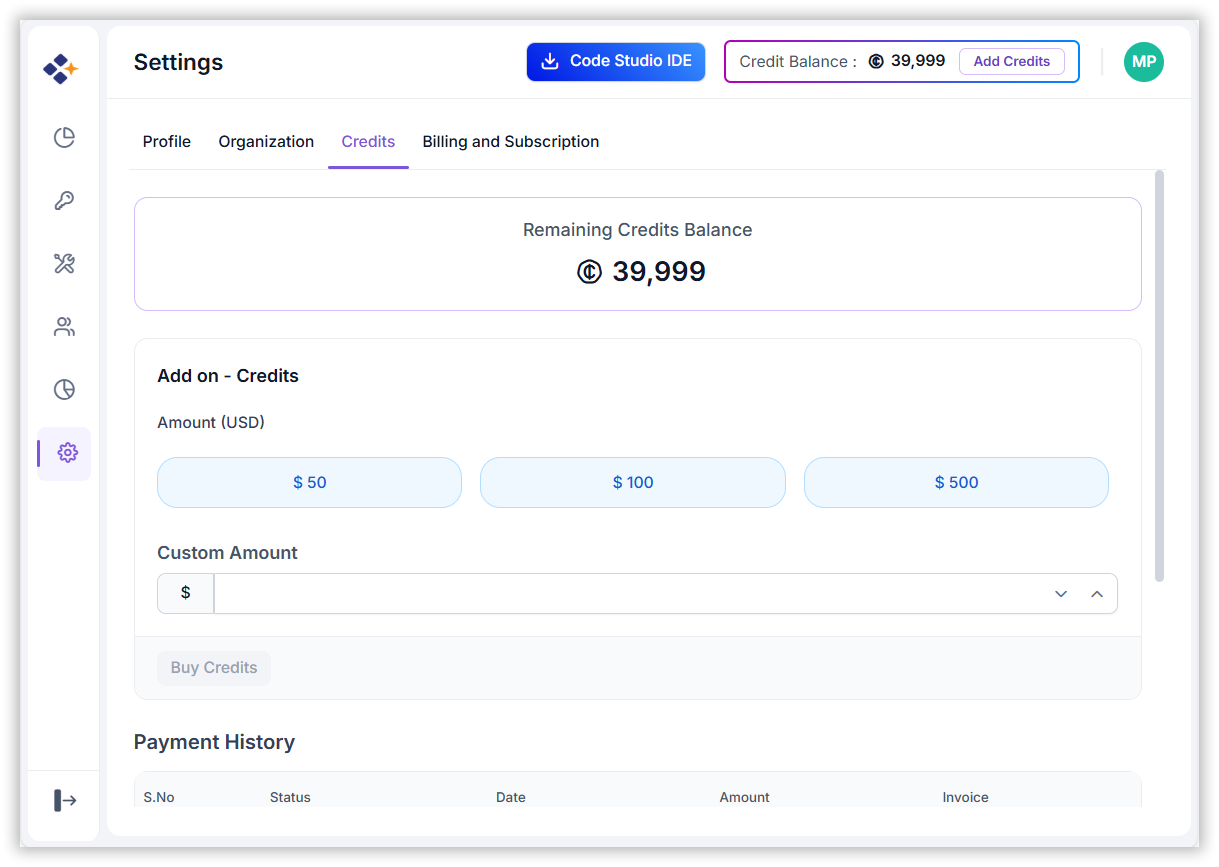
Add funds to support model usage across your organization. Funds are added to your organization’s balance immediately after a successful payment.
Purchase Funds
- Select a preset amount or enter a custom amount, then click Buy Credits to proceed to the payment page and complete the checkout process.
- Credits are applied after successful payment.
For detailed guidance, refer to Buying More Credits.
User & Permission
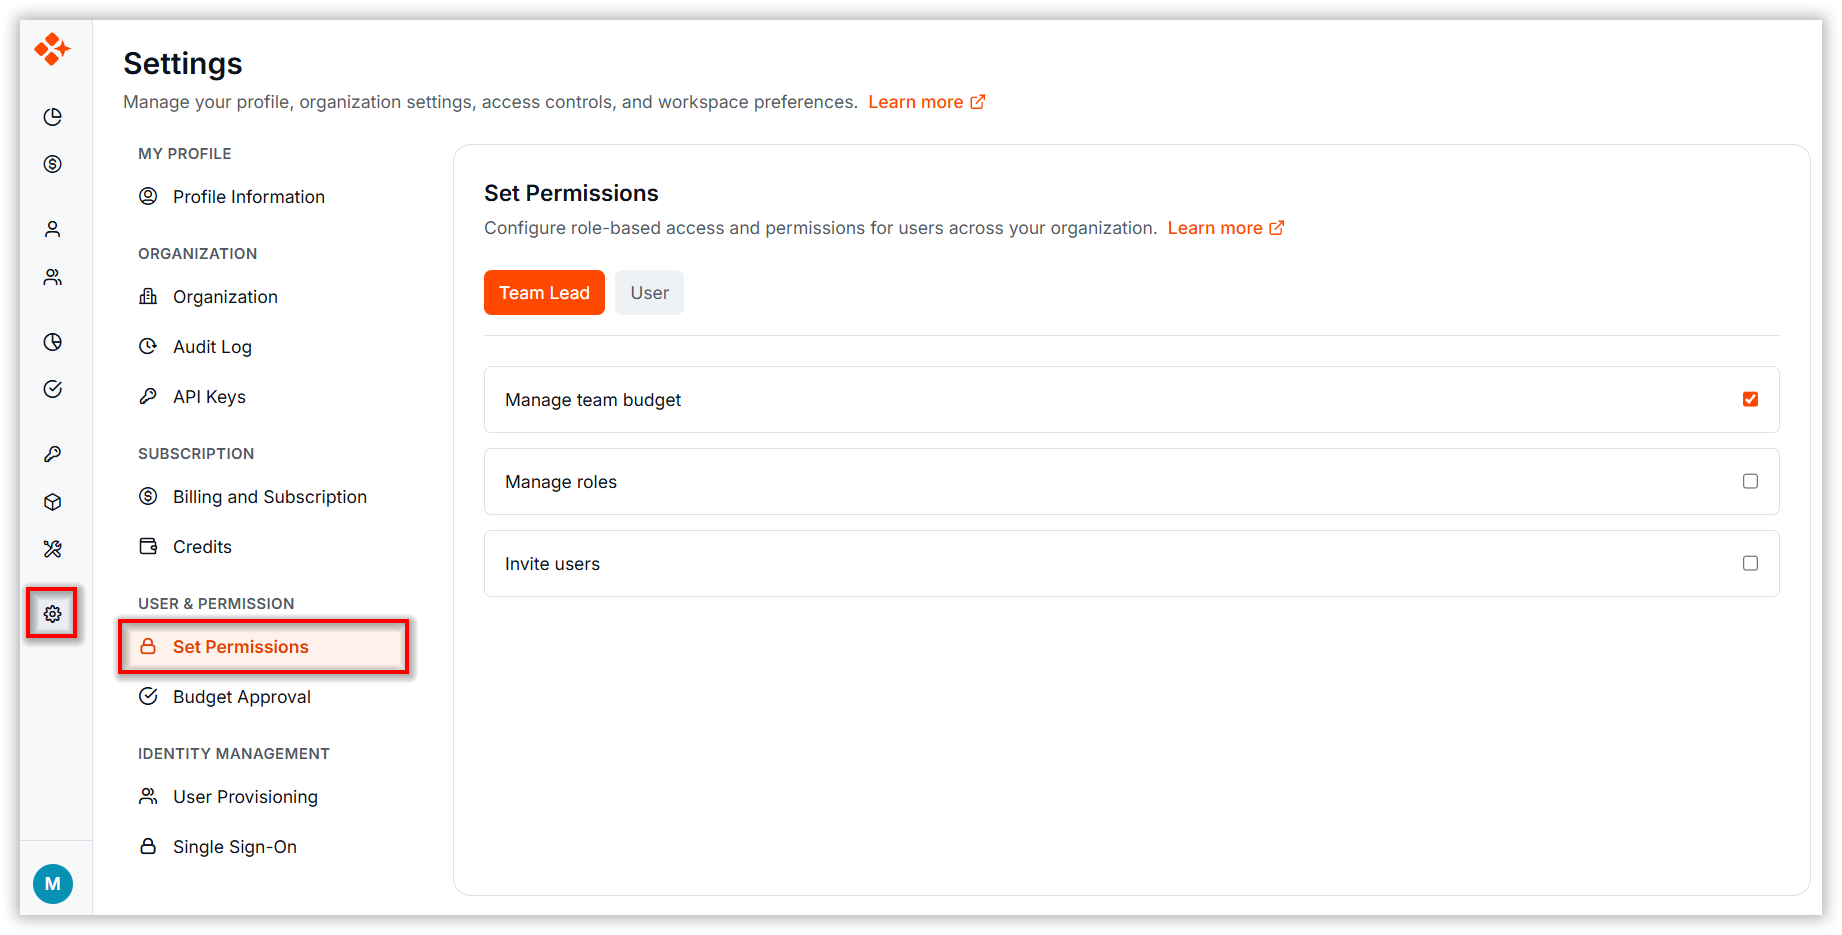
Set permissions
-
Define and manage role-based permissions for Team Leads and Users to Configure which actions Team Leads and Users can perform in the organization. For detailed guidance, refer to set permission.
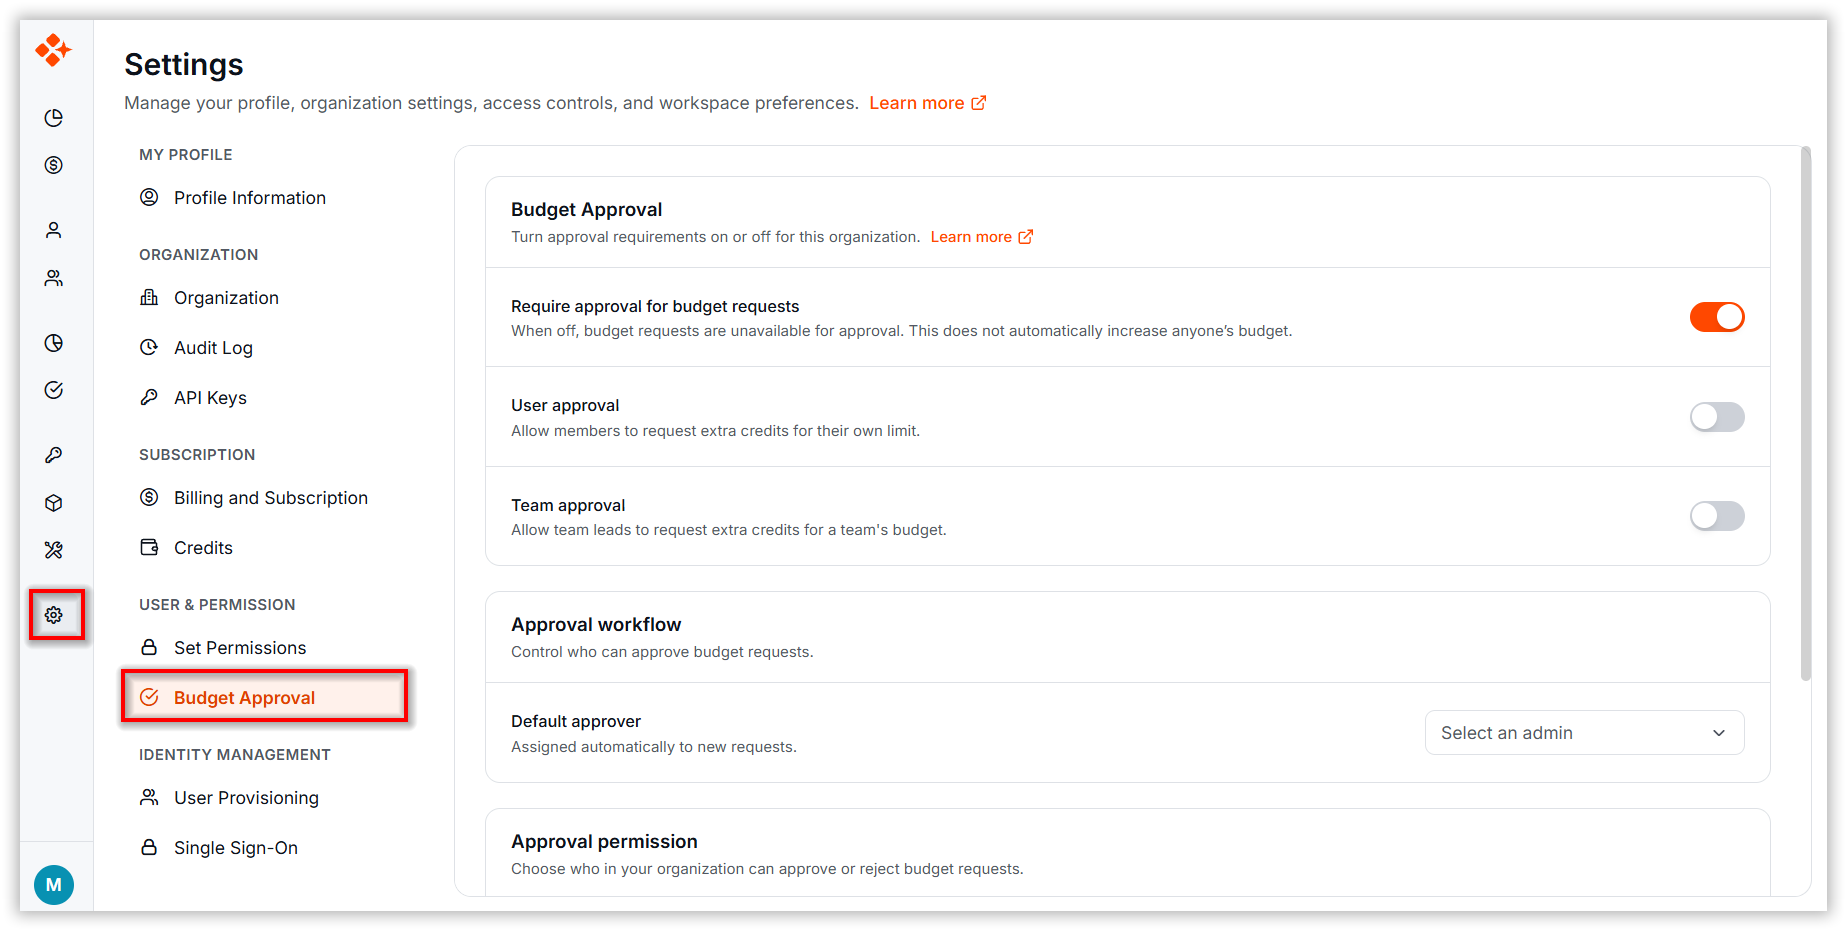
Budget approval
-
Manage team and user budgets, and review budget increase requests.
-
Access to the Approval page and approval actions is determined by your role and the approval settings configured by your organization administrator.
-
For information about configuring approval workflows, approvers, and approval permissions refer Manage Approval Settings
Identity Management
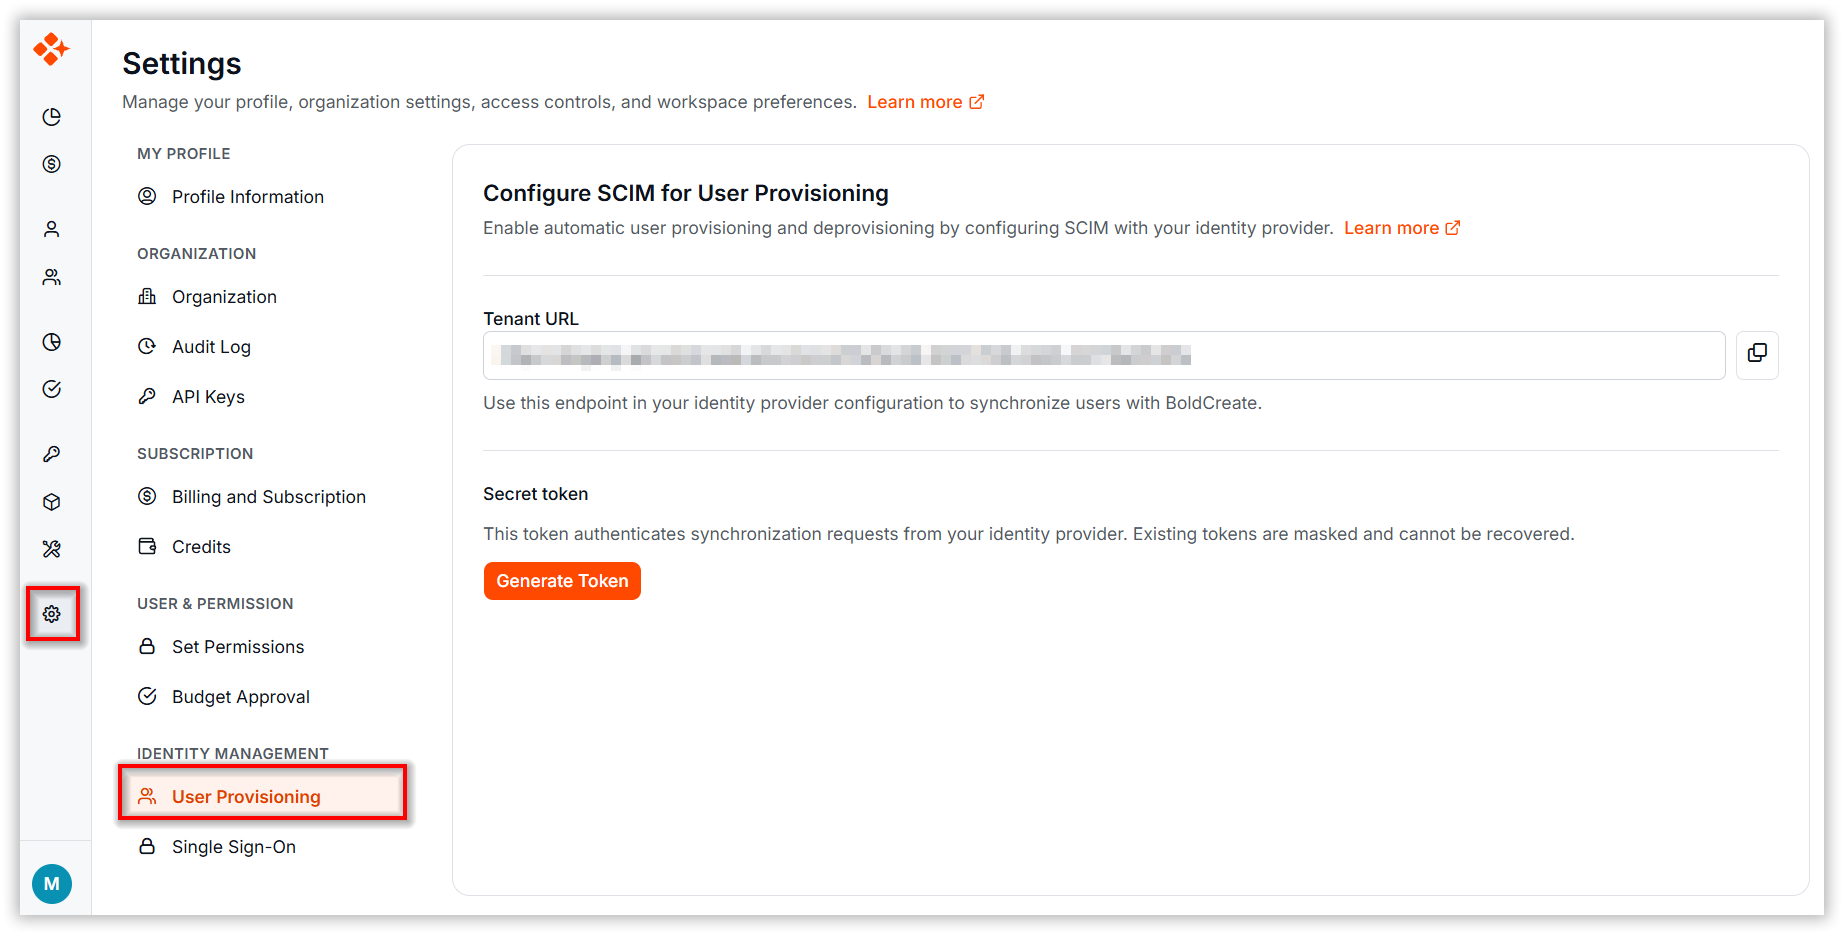
User provisioning
-
In BoldCreate, you can integrate Microsoft Entra ID (formerly Azure Active Directory) to automatically invite users to your BoldCreate organization via email. This integration keeps your user list in sync with your organization’s directory and simplifies user management. For detailed guidance, refer to Set up Microsoft Entra ID in BoldCreate
Single sign-on
-
Single Sign-On (SSO) enables users to access BoldCreate using their organization’s identity provider credentials without requiring a separate password. This integration streamlines authentication, enhances security, and simplifies user management across your organization. For detailed guidance on configuring Single Sign-On (SSO), see How to configure Single Sign-On (SSO)