
Overview
The Approval page allows users to request additional budget for themselves or their team. Authorized approvers can review these requests and either approve, reject, or reassign them.
When creating a request, you can send it to a specific approver or to the organization’s default approver. You can track the status of your requests from the Approval page.
Access to the Approval page and approval actions depends on your role and the approval settings configured by your organization administrator. For information about configuring approval workflows, approvers, and approval permissions, see Configure Approval Settings.
When to use
Use budget approval when members or teams need an increase to their assigned spending limit and the additional budget requires an authorized person’s sign-off before it is granted.
- Individual budget: Use this when you need an increase to your individual spending limit and your organization allows members to request one.
- Team budget: Use this when you are a Team Lead and your team has reached or is approaching its shared budget limit. You can request an additional budget allocation for the team and choose the approver.
- Approving requests: Use this when you are an Admin, Team Lead, or Team Owner and a budget request has been assigned to you for review. You can approve, reject, or reassign requests individually or several at a time.
Prerequisites
- Admin access: Can view all approval requests in the organization, act on requests, and configure the approval settings.
- Team Lead access: Can request budget for themselves or their team, and or approve and reject requests assigned to them, if enabled by the administrator.
- Team Owner access: Can request budget for themselves or their team, and or approve and reject requests assigned to them, if enabled by the administrator.
- User access: Can request budget for themselves, if enabled by the administrator.
- Budget approval must be enabled: The administrator must turn on the approval requirement for the organization in the Settings page. If approval is disabled, the Approval page is not available to anyone.
Status of a Budget Request
Each budget request moves through the following statuses:
| Status | Description |
|---|---|
| Pending | The request is waiting for the assigned approver to act on it. |
| Approved | The approver has approved the request and the additional budget is granted. |
| Rejected | The approver has declined the request. The reason is shown on the request. |
| Forwarded | The request has been passed to a different approver for review. |
| Action required | The request has been returned to you for changes. After you edit it, it goes back to the approver. |
| Closed | The requester has withdrawn the request before a decision was made. |
Steps to Request Budget
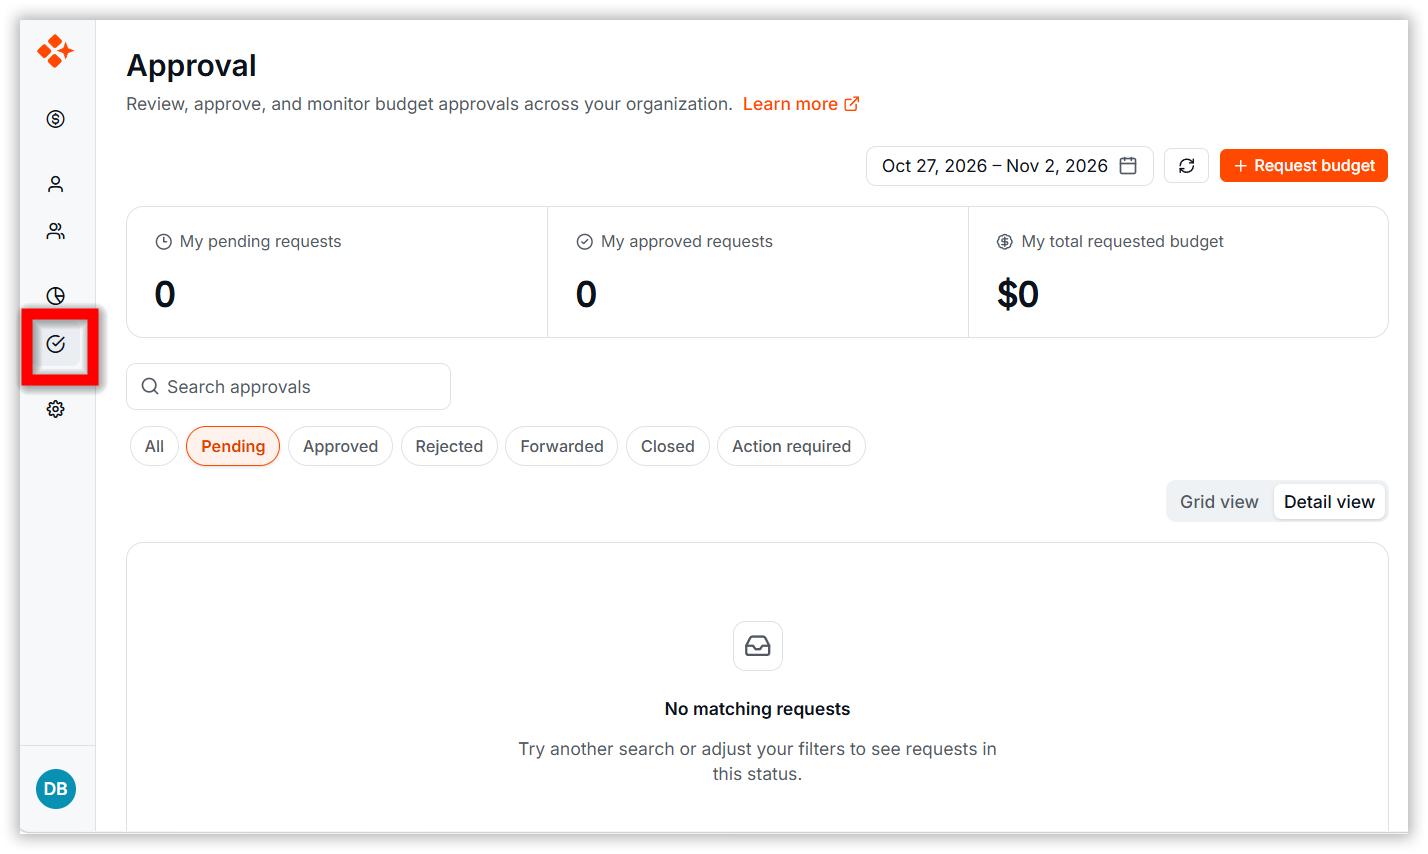
Step 1: Go to the Approval page from the application navigation.
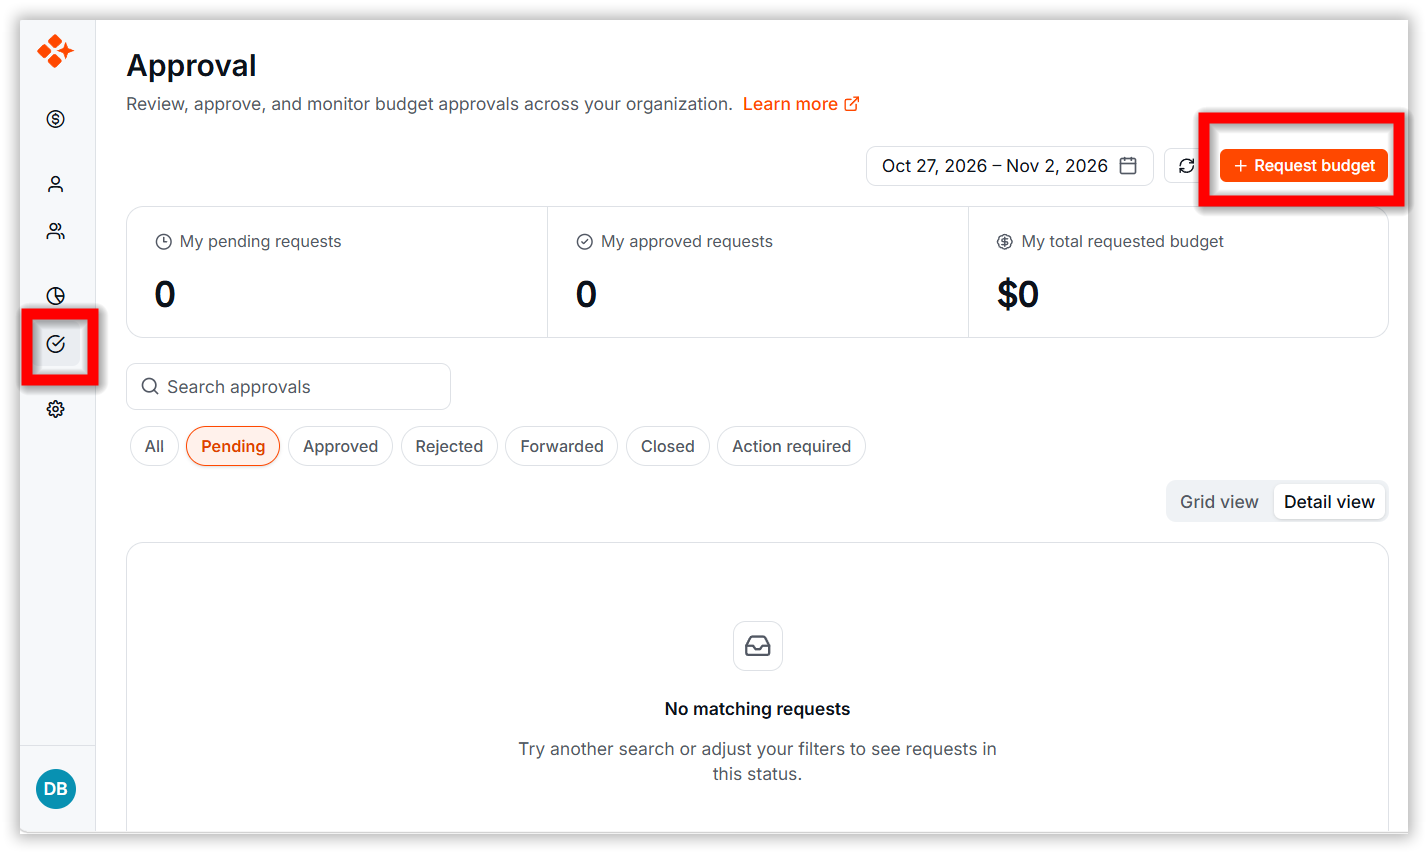
Step 2: Click Request budget. The request form opens.
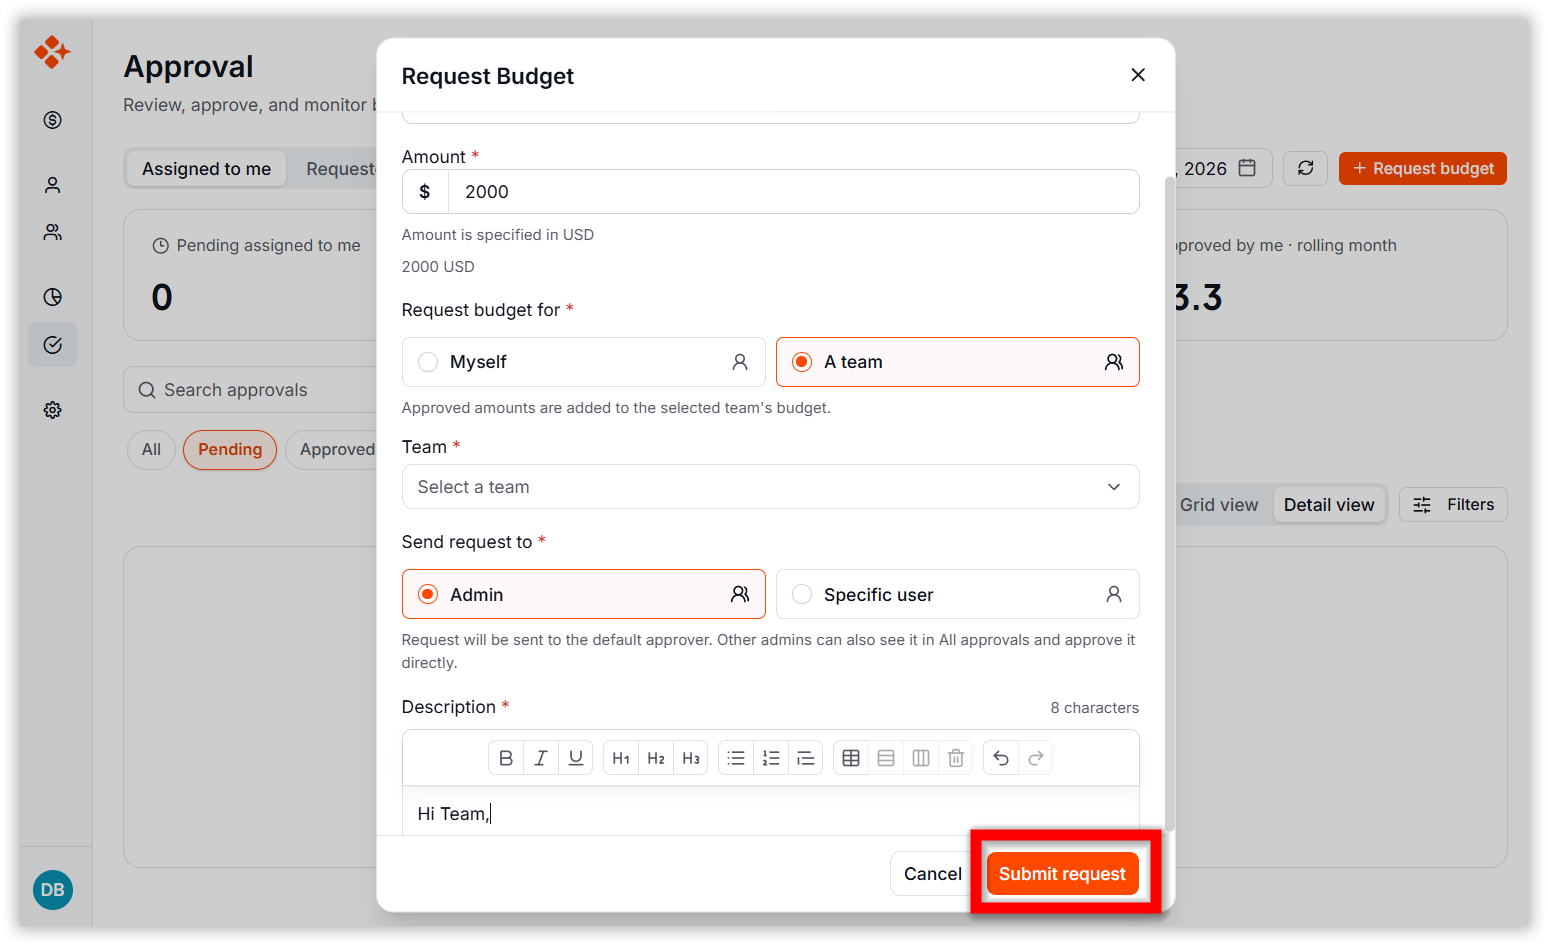
Step 3: Fill in the following details:
- Subject: Enter a short title for the request.
- Amount: Enter the Budget Amount you need. The value must be between 0.01 and 100,000.
- Description: Explain why you need extra Budget Amount. The description must be between 10 and 2,000 characters and supports formatted text such as bold, italic, underline, and lists.
- Send request to: Choose the approver for your request. Select Admin to send it to your organization’s default approver, or select Specific user and pick a person from the list of eligible approvers.
Step 4: If you are a Team Lead, first choose whom the request is for:
-
For myself: Requests extra Budget Amount for your own usage limit.
-
For my team: Requests extra Budget Amount for a team’s shared budget. Select the team from the list.
Step 5: Click Submit. The request is created with the Pending status and appears in your Requested by me list. Your summary cards update to include the new request.
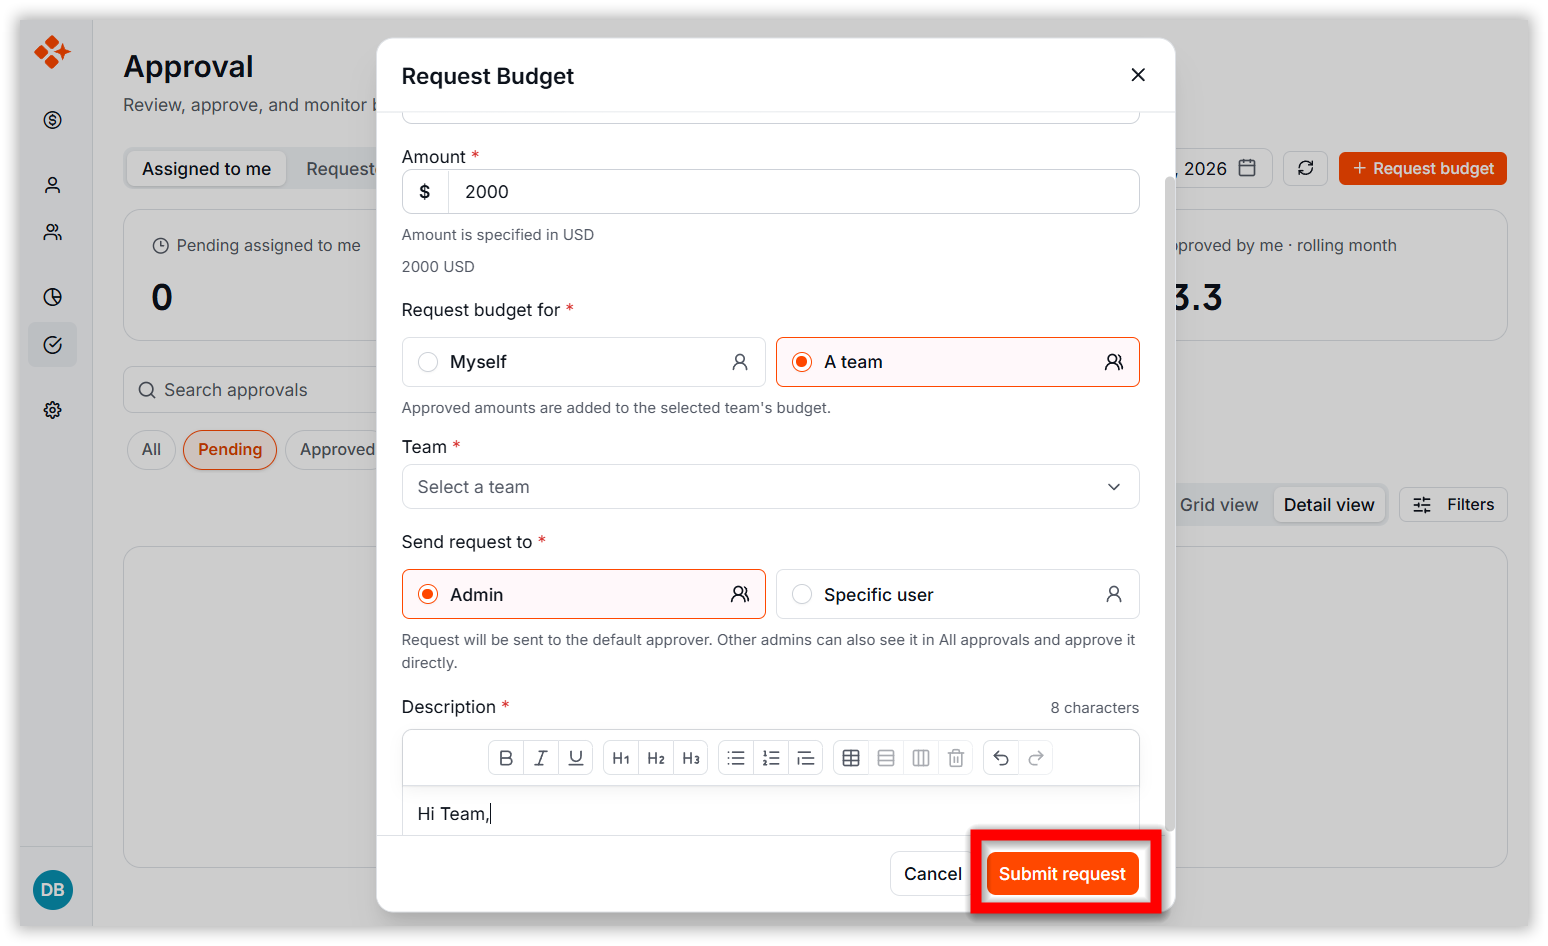
Note: The Submit button is disabled while the request is being saved, so a request cannot be submitted twice by accident. If any field is invalid, an error message appears under the field and the form keeps your input.
Steps to Act on a Request Assigned to You
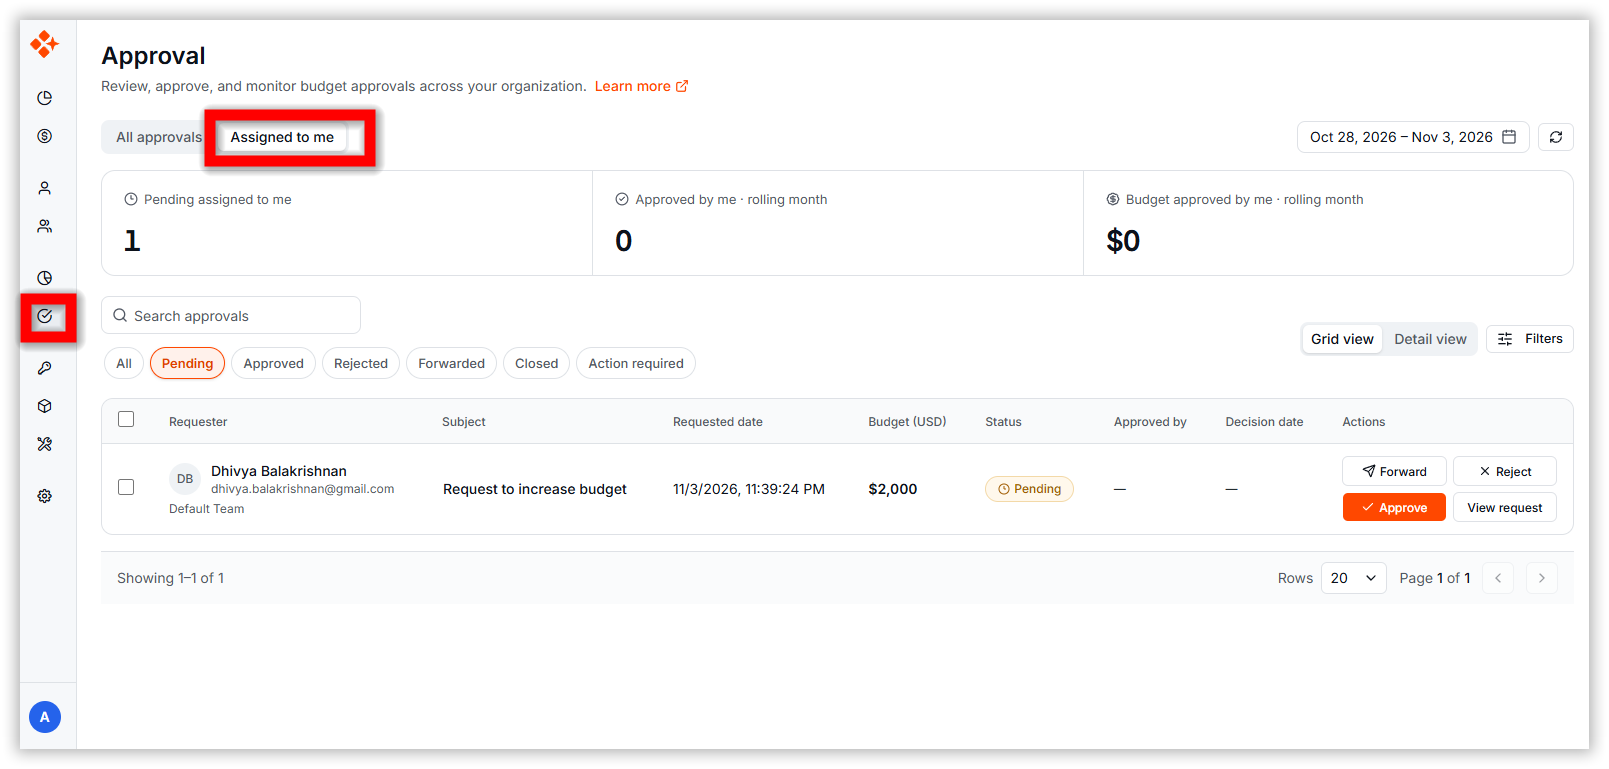
Step 1: Go to the Approval page and open the Assigned to me tab.
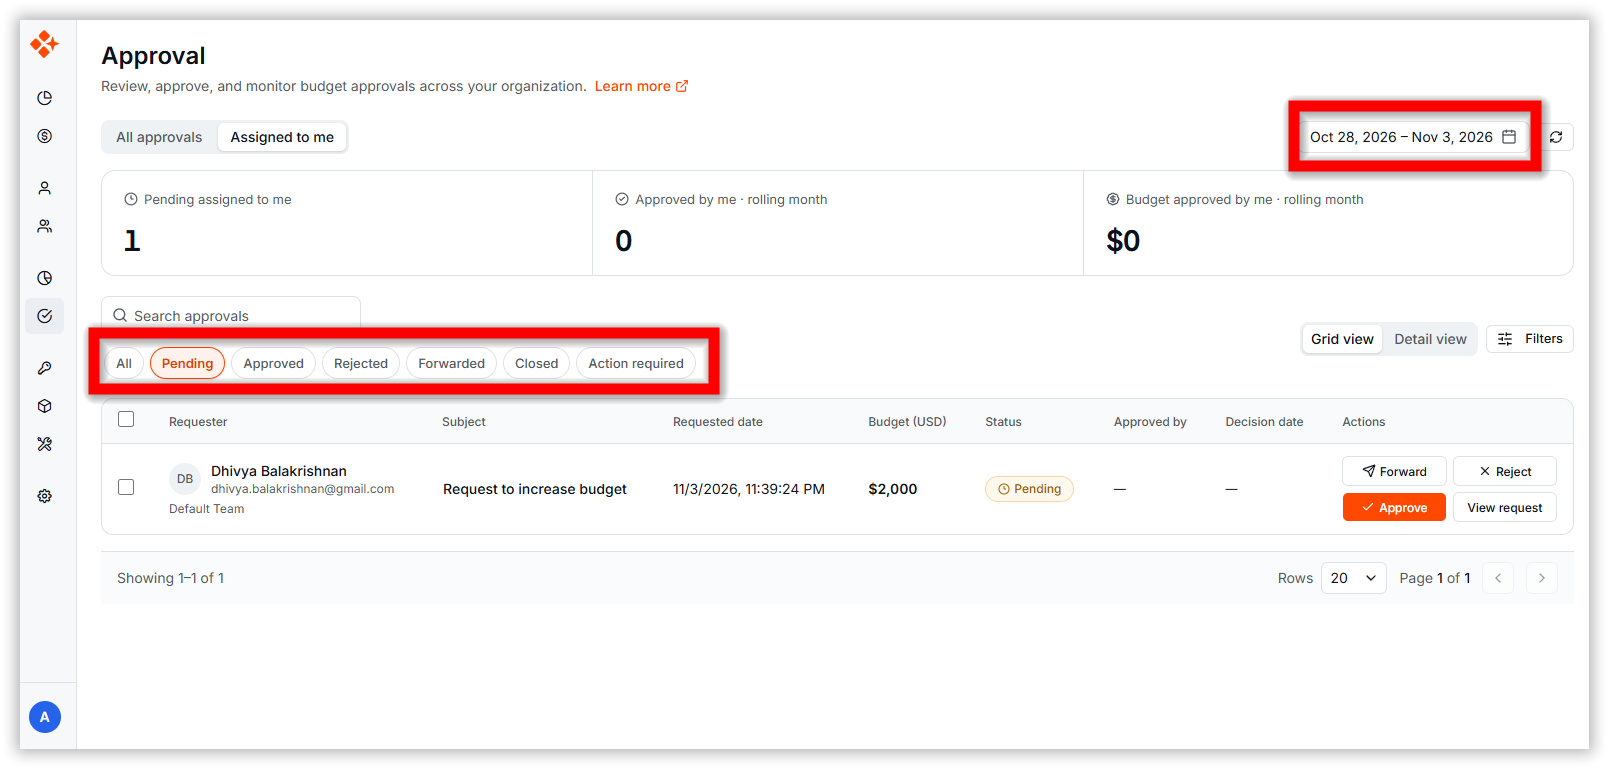
Step 2: Find the request you want to review. Use the search box, the status chips, or the date range to narrow the list.
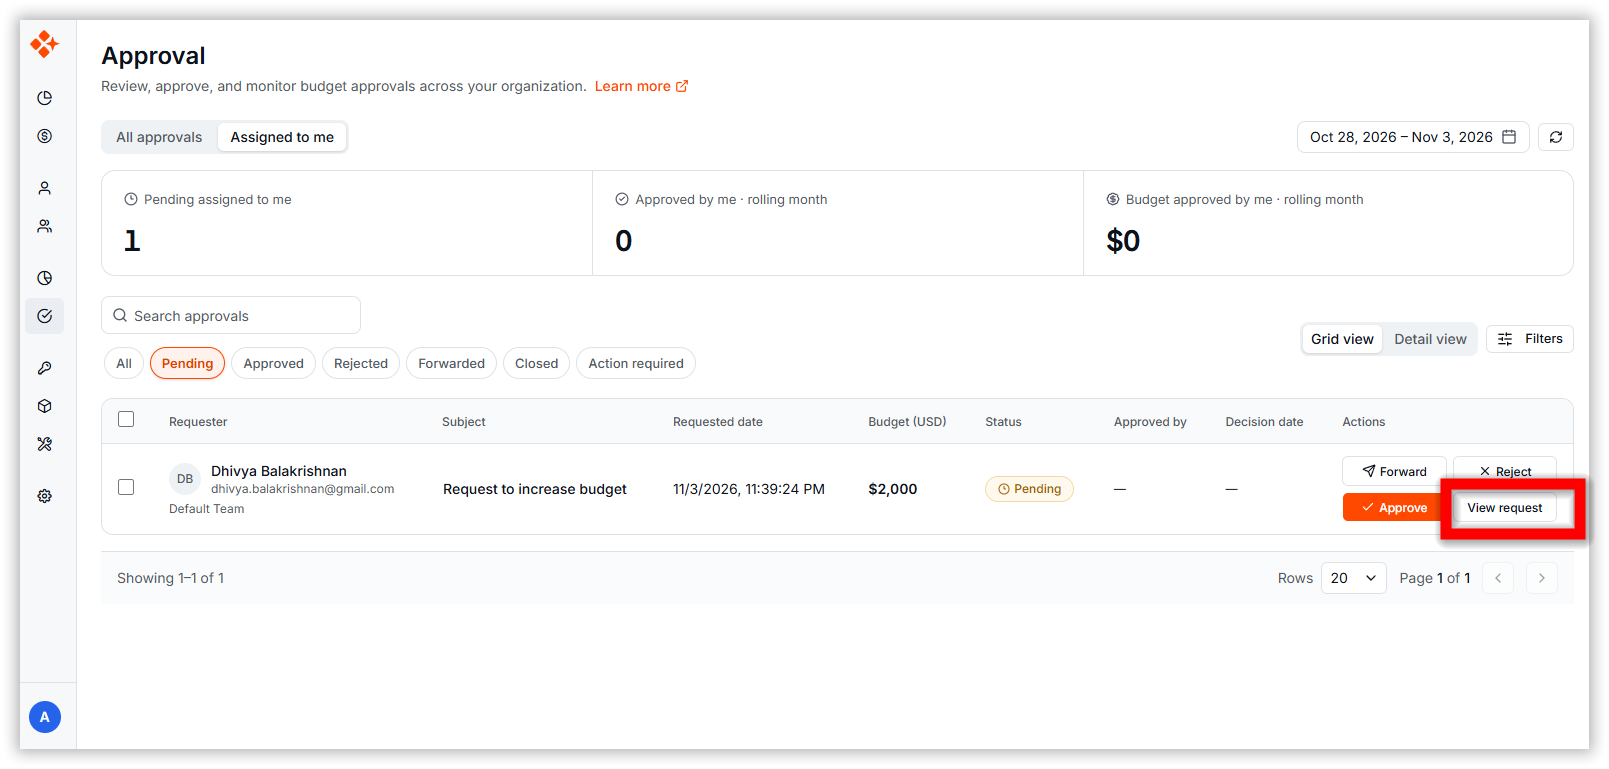
Step 3: Click the request to open its details. You can see the requester, the budget requested, the description, the current approver, and the full history of every action taken on the request.
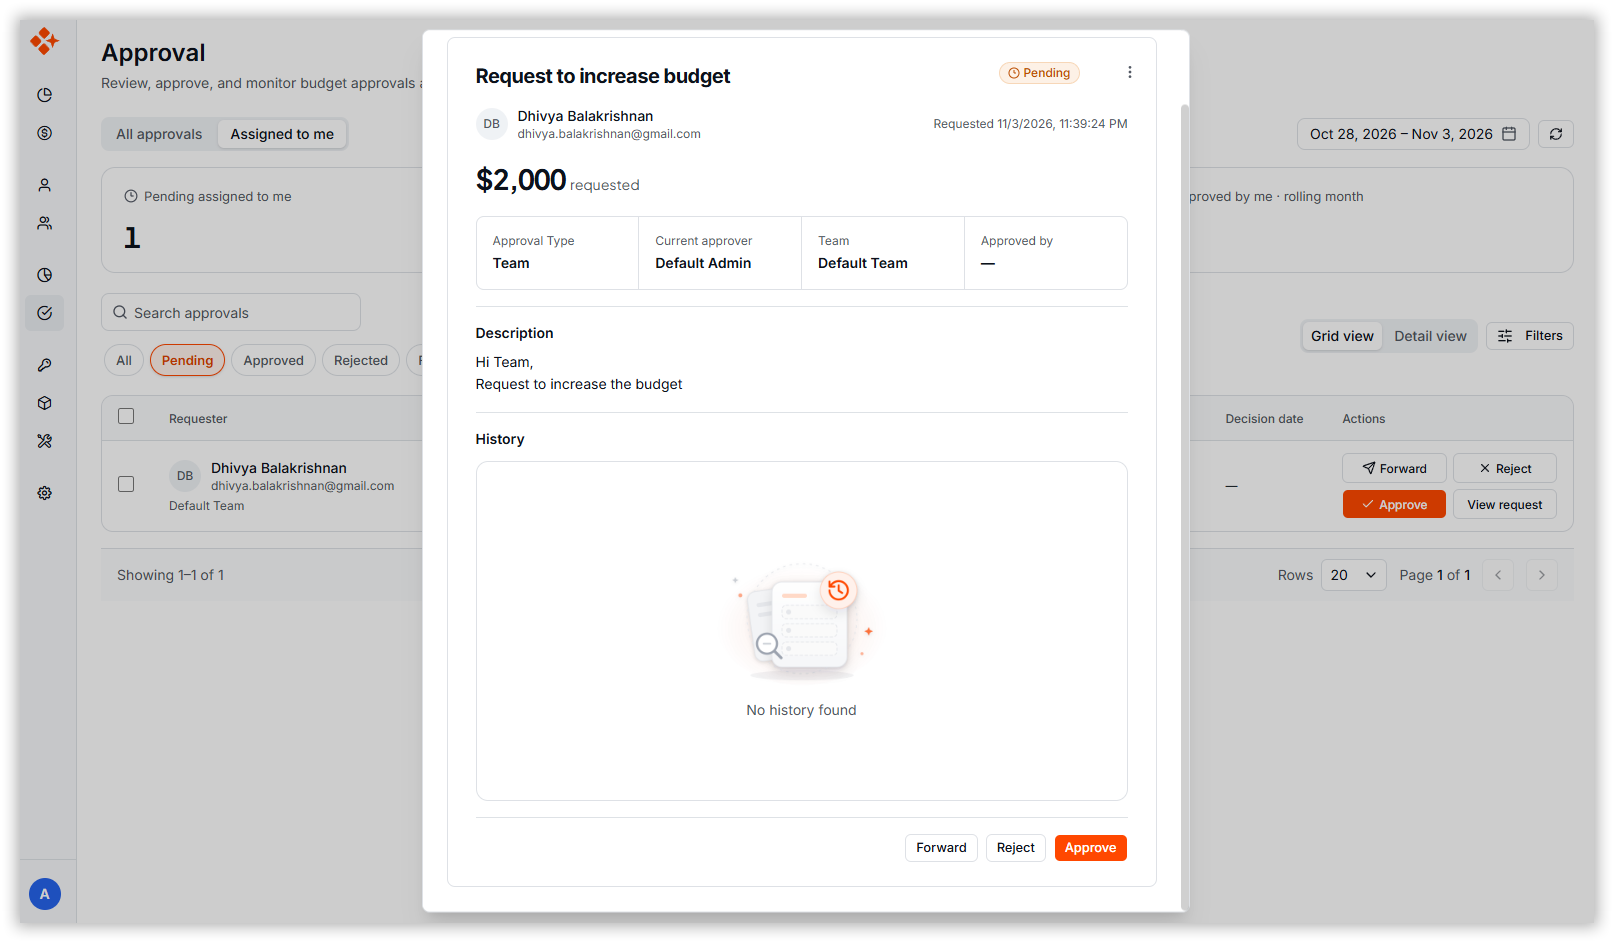
Step 4: Choose one of the available actions:
-
Approve: Grants the requested amount. You can add an optional comment.
-
Reject: Declines the request. A reason of at least 5 characters is required.
-
Reassign: Passes the request to a different approver. You can add an optional note.
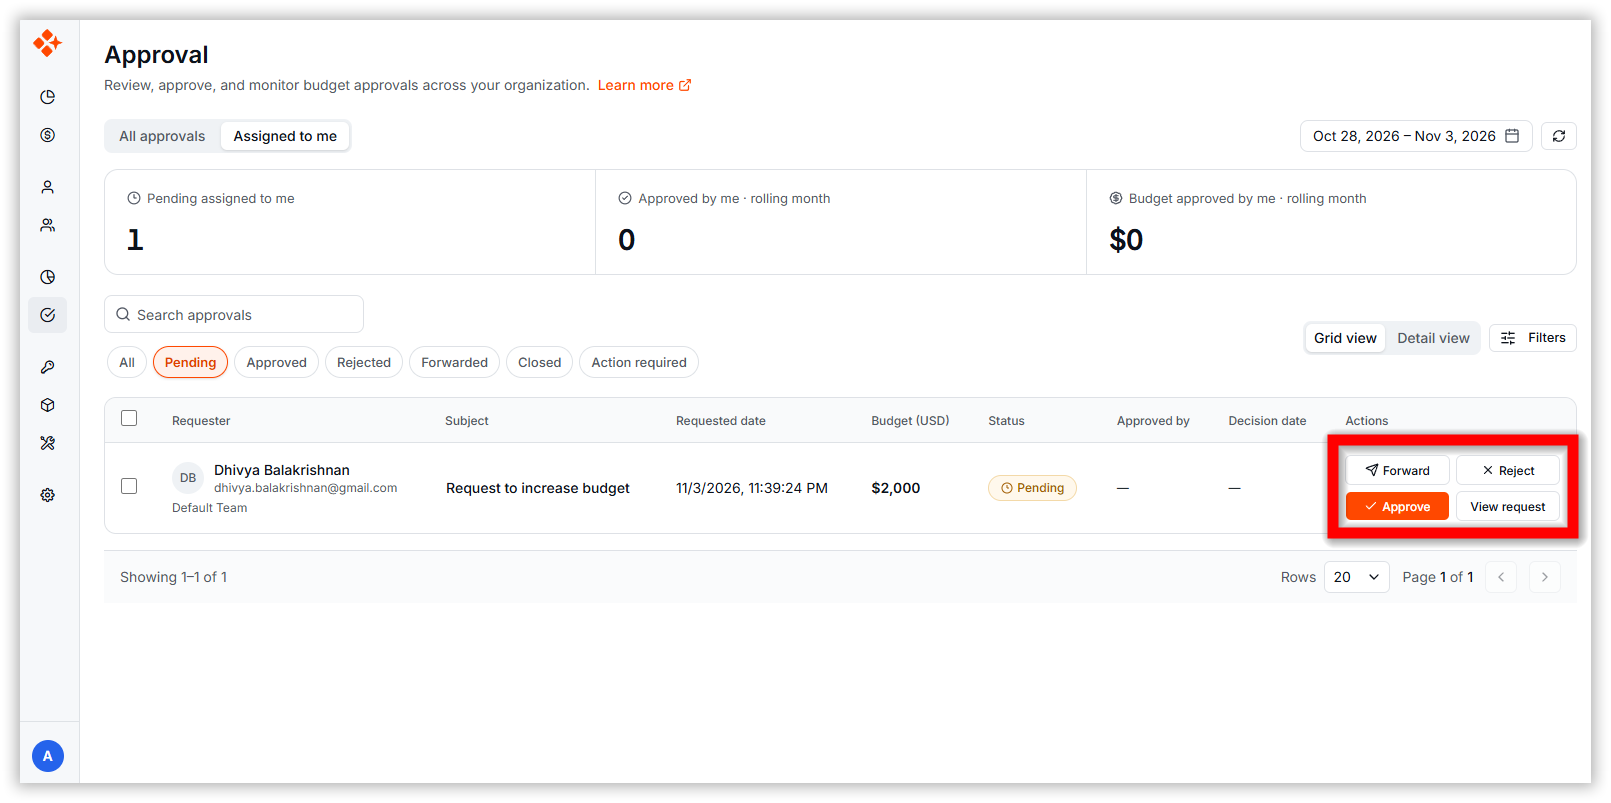
Step 5: Click the action button, enter the required details in the dialog, and confirm. The request status changes and the history is updated.
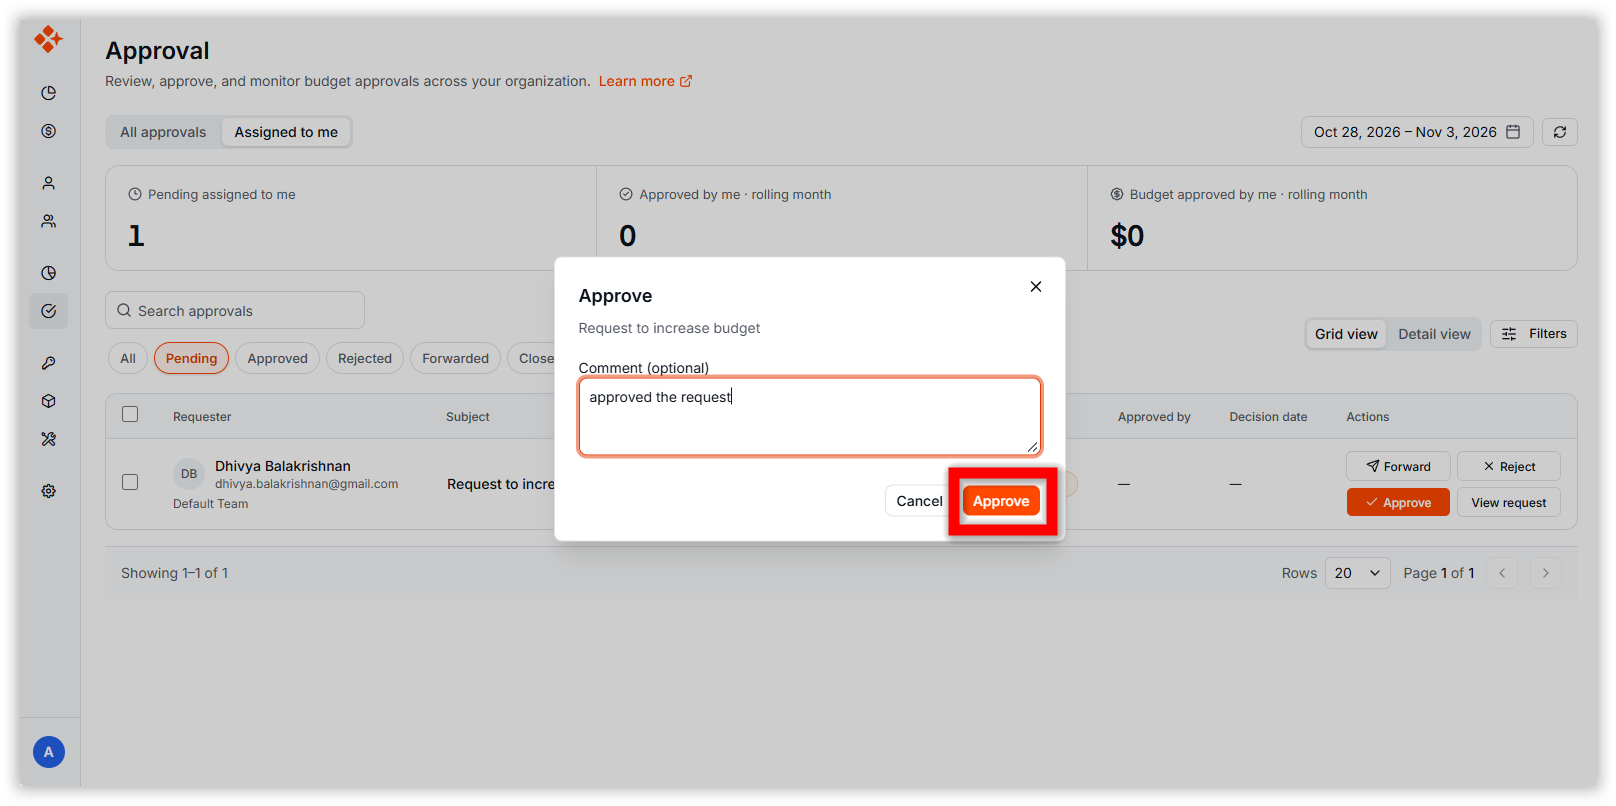
Only the actions you are allowed to take are displayed for each request.
Bulk Actions
Step 1: In the Assigned to me tab (or All approvals for Admins), select the checkboxes next to the requests you want to act on. You can also click Select all, which selects only the requests you are allowed to act on from the current page.
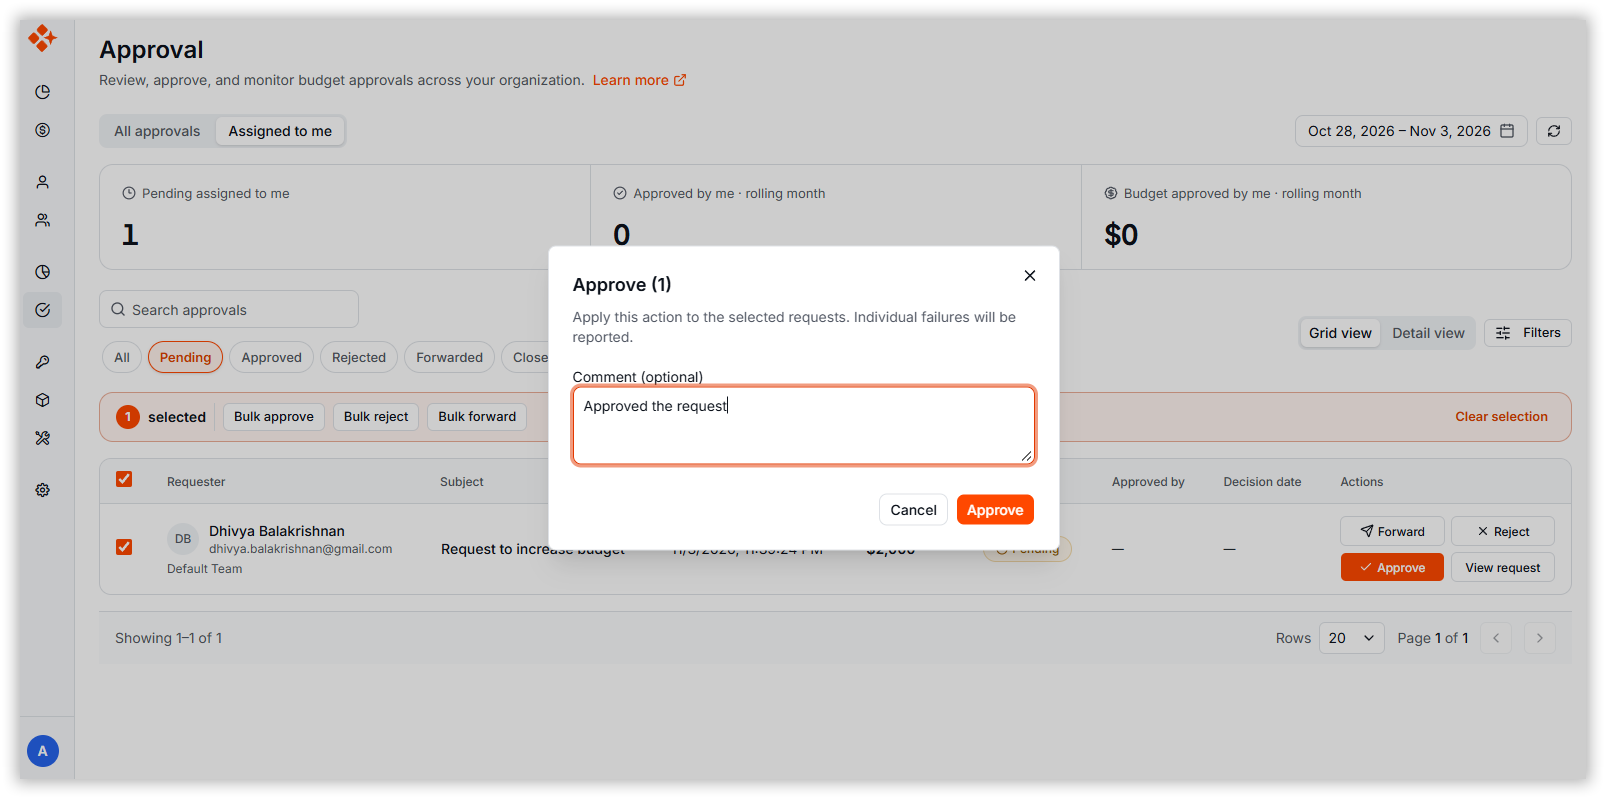
Step 2: Click Bulk approve, Bulk reject, or Bulk forward in the selection bar that appears above the list.
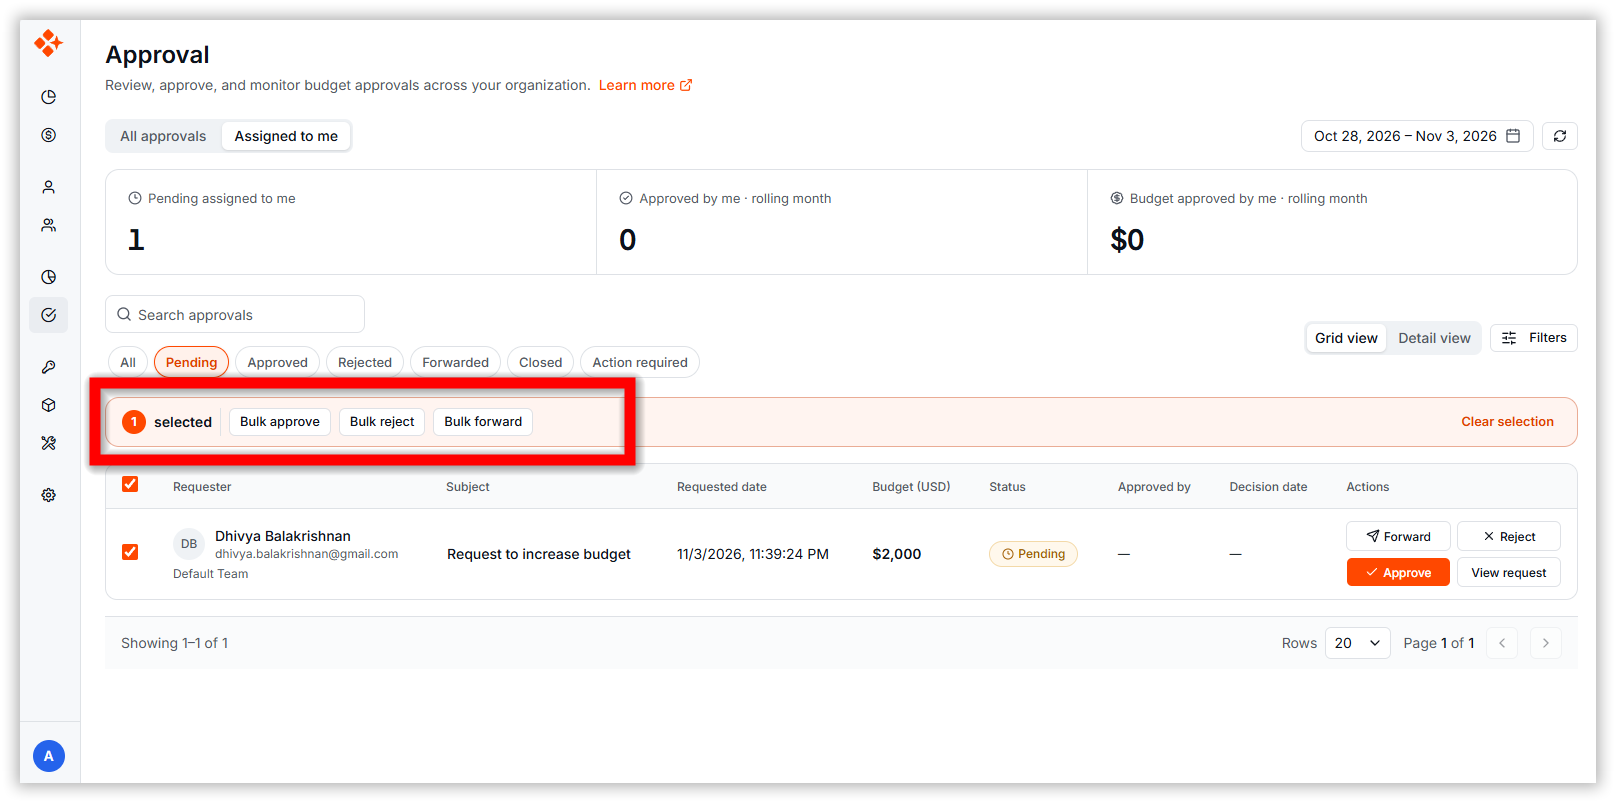
Step 3: Enter the required details and confirm. You can act on a maximum of 10 requests at a time.
Steps to Edit, Change the Approver of, or Close Your Own Request
Step 1: Go to the Approval page and open the Requested by me tab.
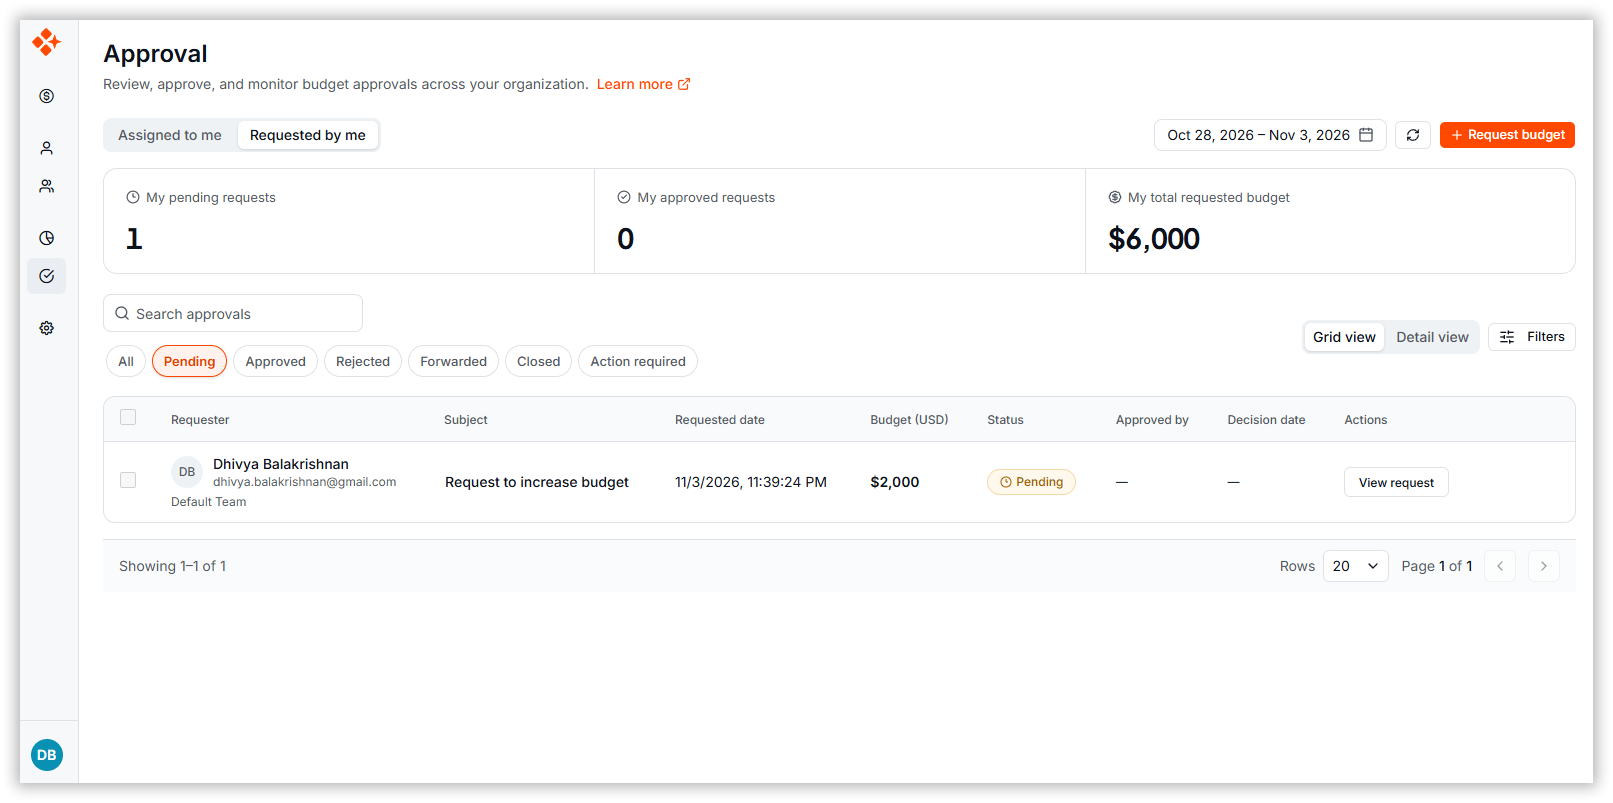
Step 2: Open your request.
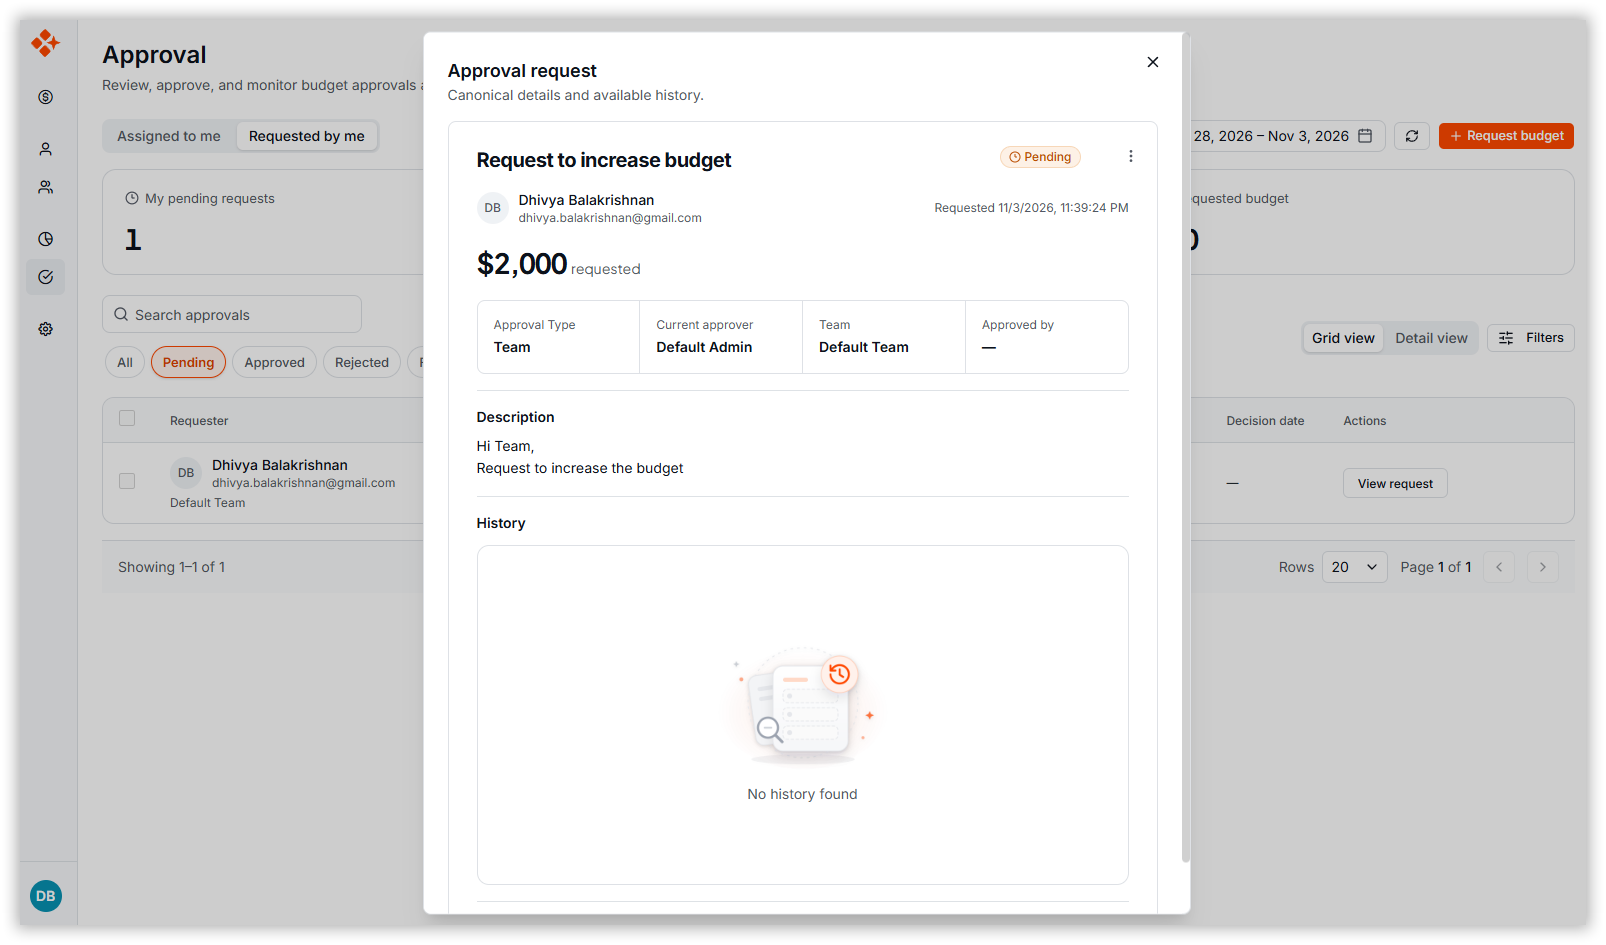
Step 3: Choose the action you need:
-
Edit request: Available while the request is Pending or Action required. Update the subject, amount, description, or approver. Only the changed fields are saved.
-
Change approver: Available while the request is Pending. Select a different approver to review your request.
-
Close request: Withdraws your request while it is still unresolved. You can add an optional reason.
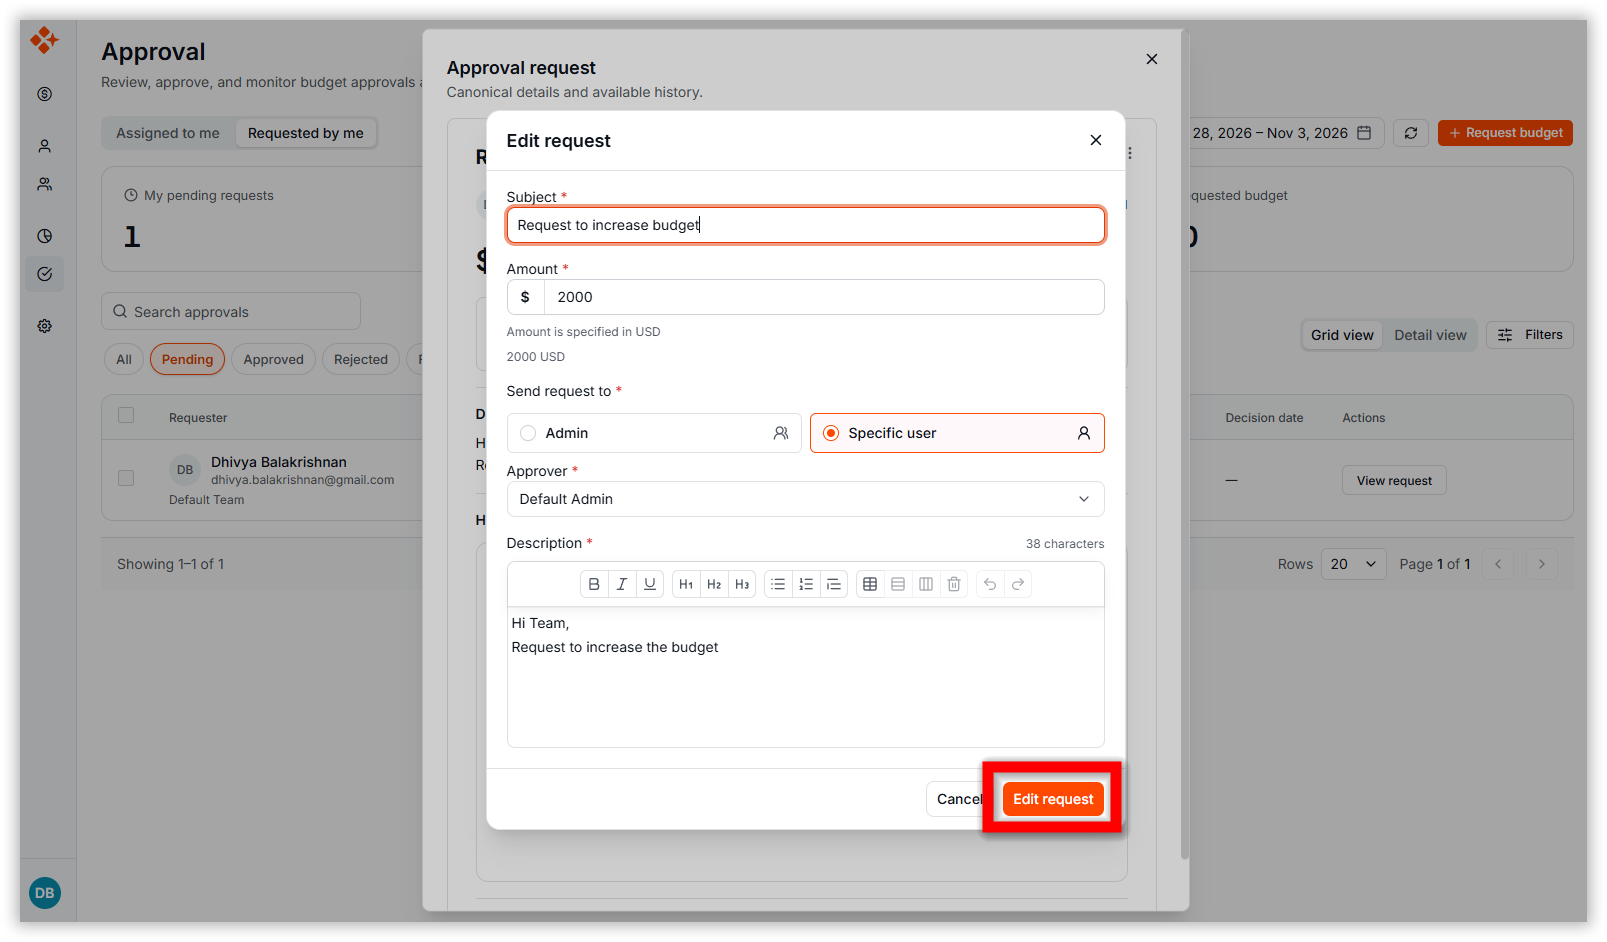
Step 4: Confirm the action in the dialog. The request status and history are updated.
How to Find and Filter Requests
-
Search: Type a term in the search box and press Enter. The search applies to the whole result set, not only the visible page.
-
Status chips: Click a status such as Pending or Approved to show only requests with that status. Your chosen status is remembered for your next visit.
-
Date range: The list shows requests from the last 7 days by default. Change the date range to include other periods.
-
Filters: Click Filters (available to Admins, Team Leads, and Team Owners) to filter by requester, team, approver, and dates. Each active filter appears as a chip above the list; click a chip’s × to remove it.
-
Views: Switch between Grid view (a table of all requests) and Detail view (a list on the left with the selected request’s details on the right).
-
Refresh: Click the refresh icon to reload the latest requests without losing your current view.
Limitations
- A maximum of 10 requests can be acted on in a single bulk action.
- Only requests you are allowed to act on can be selected for a bulk action.
- Bulk selection applies only to the visible page; requests on other pages are never selected automatically.
- A rejection always requires a reason of at least 5 characters.
- Forwarding a request passes it to a different approver; it does not grant the budget.