
Bold Create is a cloud coding agent that works on your repositories for you. In this guide, you connect a Git provider, give the agent a small task, review what it changed, and open a pull request. It takes about ten minutes.
Prerequisites
Before getting started, make sure that:
- You can sign in to Bold Create. If not, see Sign in and access.
- You have a credit balance. Bold Create uses credits from your BoldCreate account. To check your balance, open the Dashboard.
- You have a GitHub, GitLab, or Gitea account with at least one repository.
- You have read and write access to that repository. The agent needs read access to clone and read your code, and write access to push its branch and open pull requests.
- You are comfortable with Git basics such as branches and pull requests.
What you’ll learn
By the end of this quick start, you’ll know how to:
- Connect a Git provider to Bold Create.
- Pick a repository and branch for a task.
- Choose an agent and a model.
- Send a prompt and follow the agent’s progress.
- Review the changes in the Git panel.
- Ask the agent to open a pull request.
Step 1: Connect a Git provider
Bold Create needs access to your Git provider to read your repositories and push changes. This example uses Gitea. GitLab works the same way. For Gitea, see Connect Gitea.
-
In the sidebar, select Integrations.
-
Under Source Control, find Gitea and select Connect.
-
Read the Connect Gitea dialog. It lists what Bold Create will be able to do:
- Select repositories to use with Bold Create.
- Access branches and repository metadata.
- Use agent-powered development workflows.
-
Select Continue.
-
Sign in to Gitea if asked, and approve access for Bold Create.
Result
You return to the Integrations page with the message Gitea connected successfully. The Gitea row shows Connected.
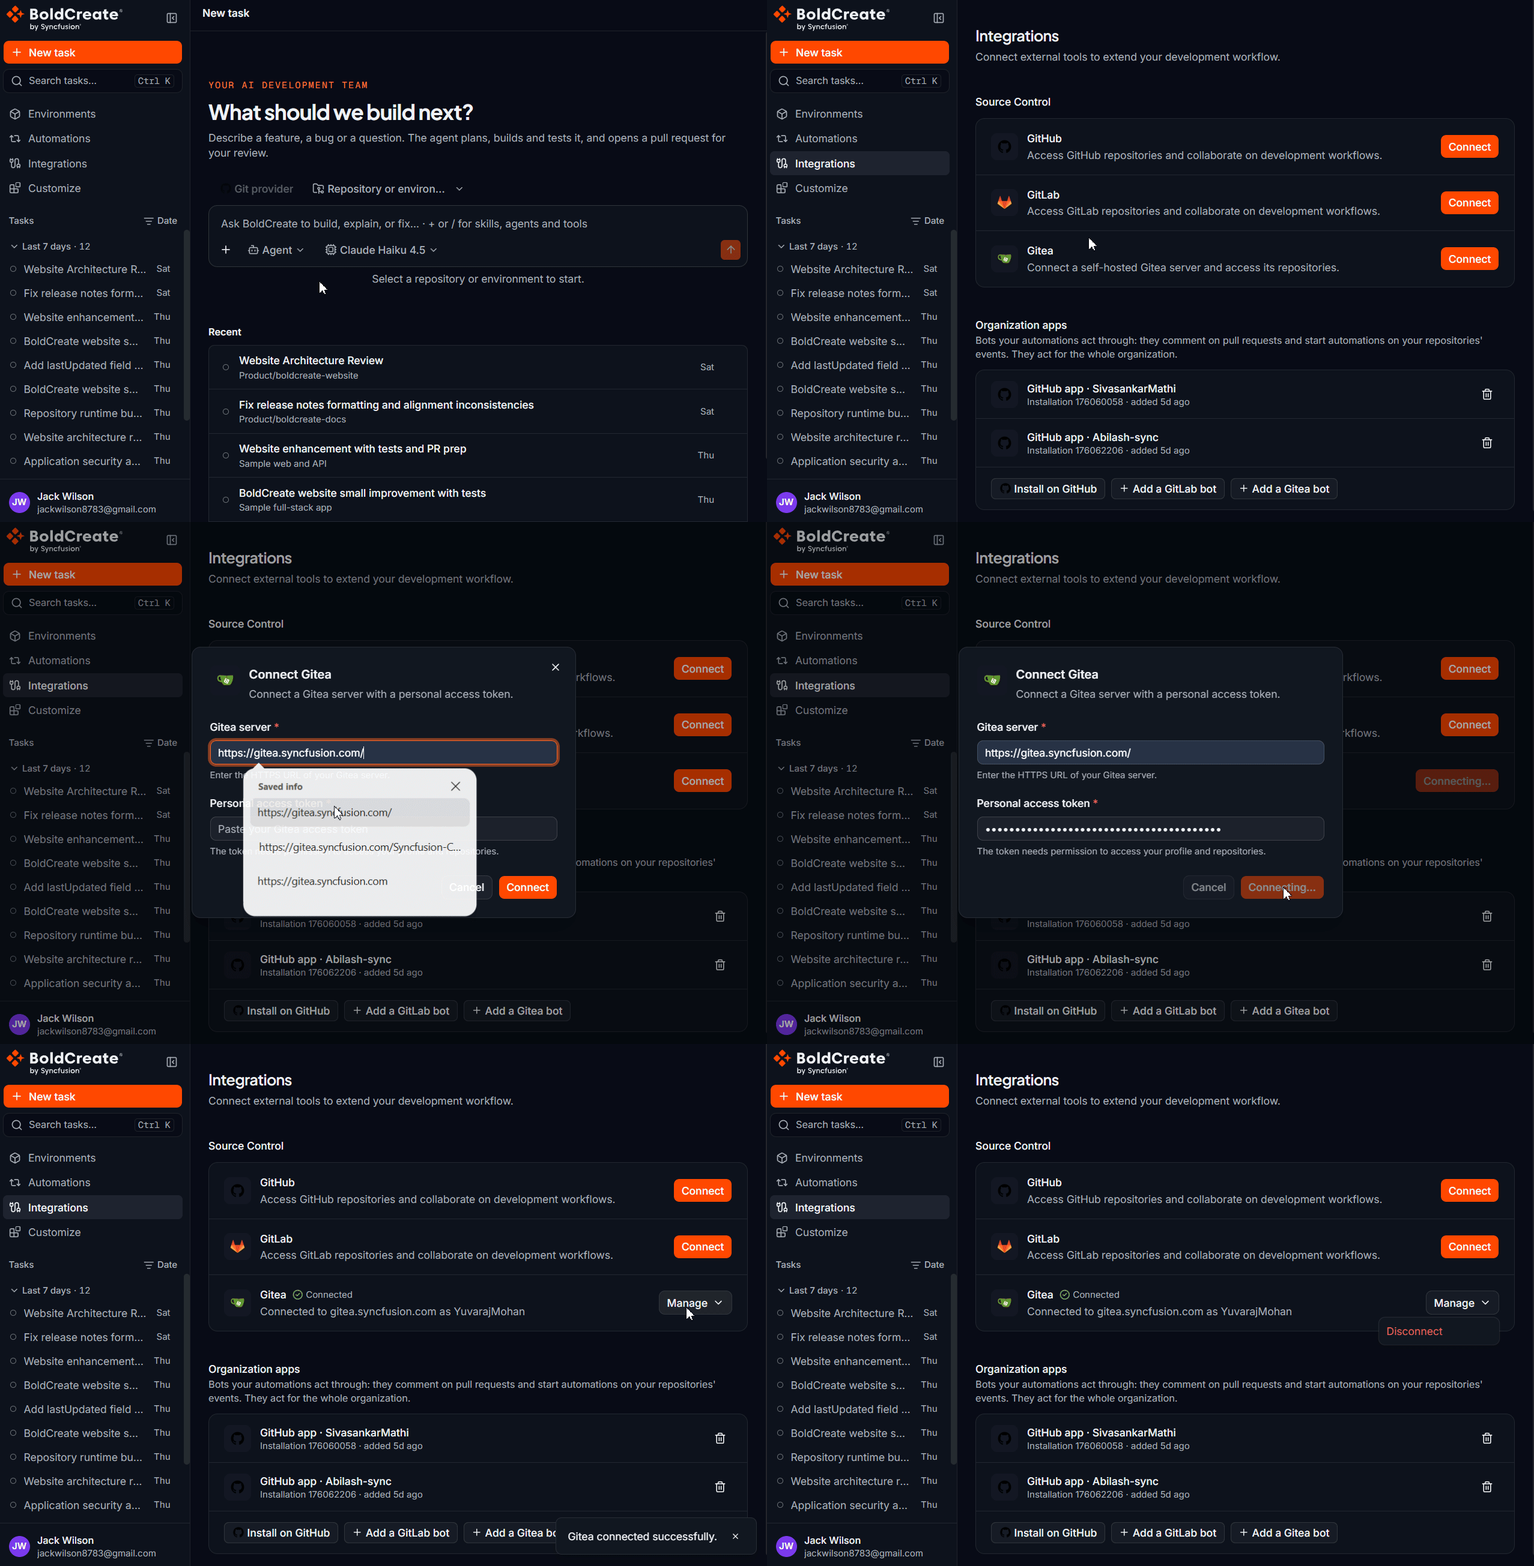
Bold Create can only see the repositories that your Git provider account can access. If a repository is missing later, check its access on the provider side. For Gitea, see Reviewing and modifying installed Gitea Apps and Reviewing your authorized OAuth apps. For GitLab, see Project members and permissions.
Step 2: Start a new task
- In the sidebar, select New Task. The Start a new task page opens.
- Above the prompt box, check that the Git provider button shows Gitea. If you connected more than one provider, select it to switch.
- Select Repository or environment.
- In Search repositories and environments…, type the repository name, then select your repository under Repositories.
- Select the branch button that appears next to the repository, and pick the branch the agent should start from, for example main.
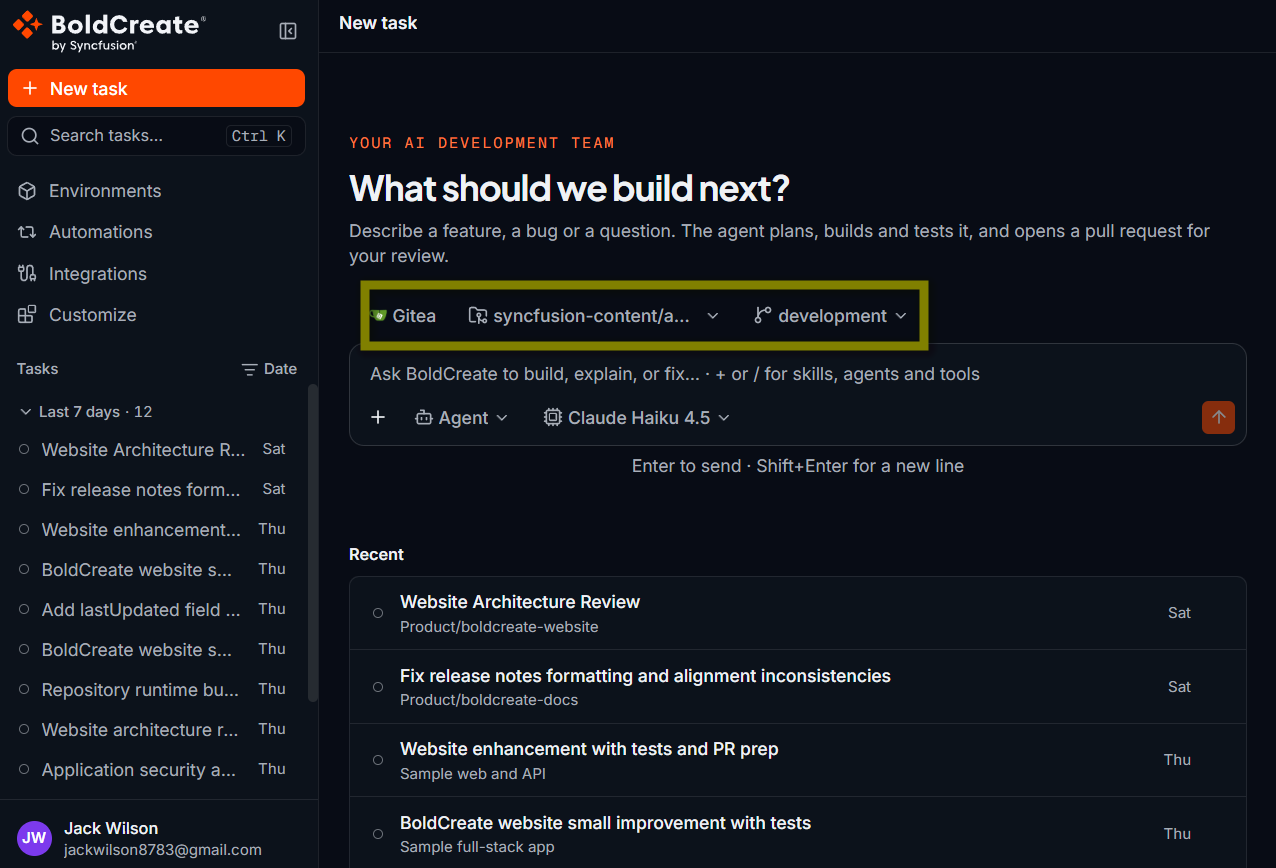
Until you pick a repository and branch, the composer shows a hint such as Select a repository or environment to start or Select a branch to start.
Select a repository where you have write access. Without write access, the agent can read and change the code, but it cannot push its branch or open a pull request.
Step 3: Choose an agent and a model
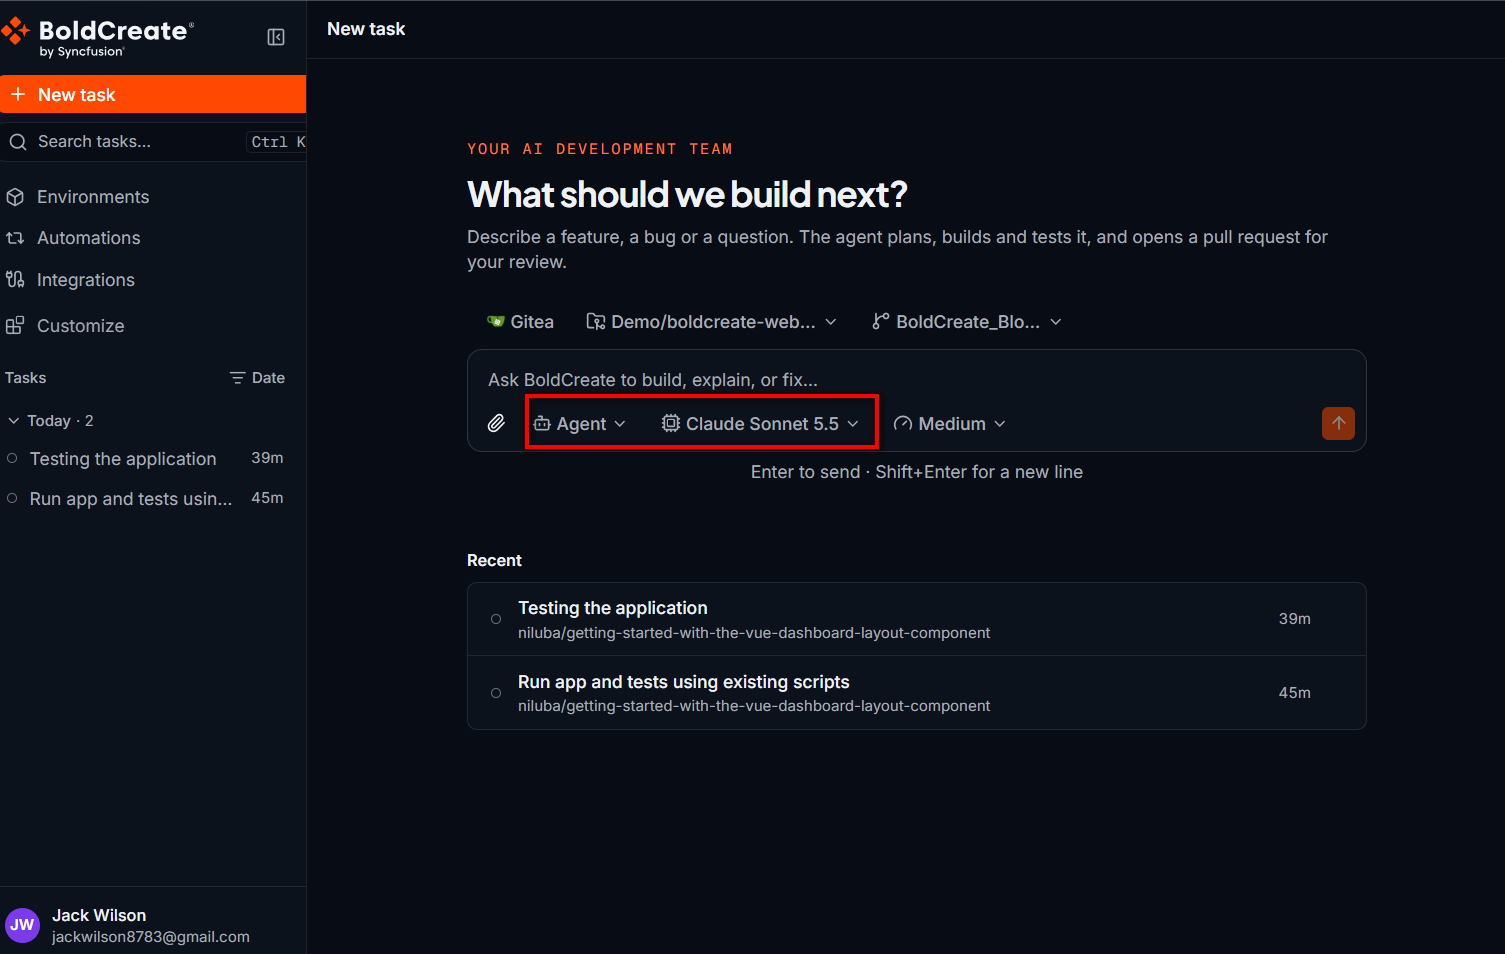
Below the prompt box, you see the agent picker, the model picker, and, for some models, a thinking effort picker.
- Select the agent picker and choose Agent under Built-in. Agent is selected by default.
- Select the model picker and choose a model under Premium Models or BYOK Models.
- Optional: if the model supports it, select the thinking effort picker and choose a level.
| Built-in agent | Use it to |
|---|---|
| Agent | Make changes: edit files, run commands, and open pull requests. |
| Ask | Get answers about your codebase. It does not change any files. |
| Plan | Get an implementation plan. It does not write any code. |
Step 4: Send your first prompt
Describe a coding task and press Enter . Say what to change, where, and how to check it. For example:
The POST /users endpoint accepts any request body. Add input validation:
name is required and must be 2 to 50 characters, and email must be a valid
email address. Return HTTP 400 with {"error": "<message>"} when validation
fails. Add tests for valid input and for each validation error, then run
the test suite. Use the scripts that already exist in this repository.
Do not change any other files.
Result
A new thread opens and appears in the sidebar under Tasks with the Running status. The agent prepares a cloud environment with your repository, then starts working. You see its steps in real time, such as files it reads, files it edits, and commands it runs.
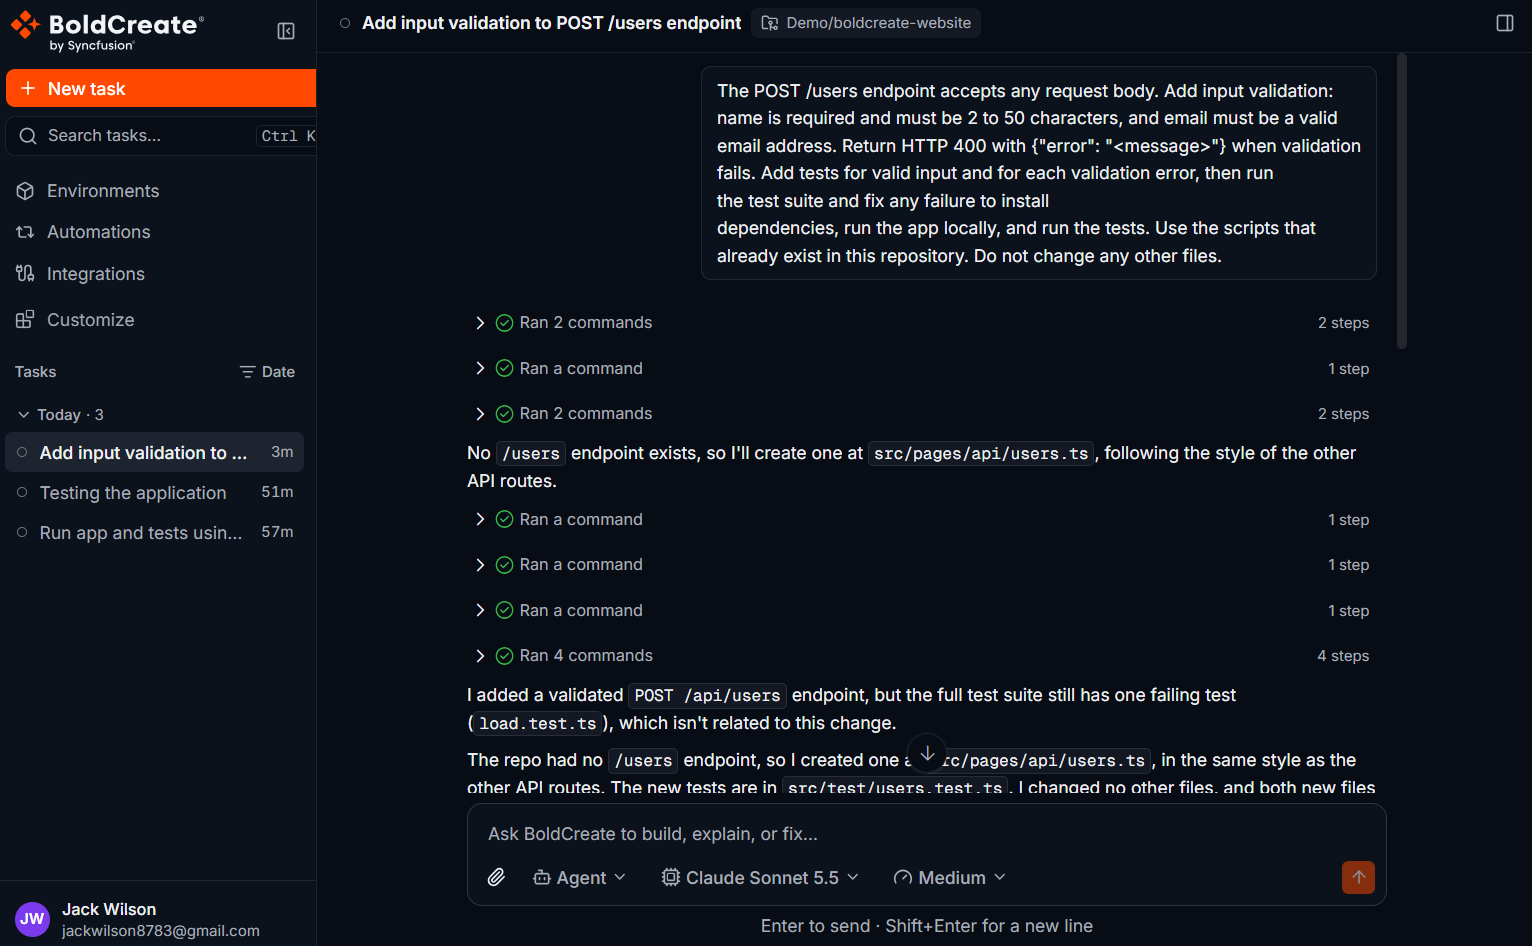
To stop the agent while it is working, select Stop response (the stop button that replaces Send message).
Step 5: Review the changes
When the agent finishes, the thread shows the Completed status in the sidebar.
- In the top-right corner of the thread, select Open workspace panel. The Git panel opens. A badge shows the number of changed files you have not viewed yet.
- Check the summary for your repository: lines added, lines removed, and the number of files changed.
- Select a file in the file list to see its diff.
Select Maximize panel to give the diff more room. Select Restore panel size to go back.
Step 6: Open a pull request
The agent works on its own branch, not on the branch you picked. Its branch name starts with bc/, for example bc/3a05461a-users-validation. After you review and approve the changes, ask the agent to open a pull request.
-
In the prompt box of the same thread, type:
Commit these changes and open a pull request against main. -
Press Enter.
Result
The agent commits and pushes its branch, then opens a pull request in your Git provider. It writes the pull request title and description for you. A pull request card appears in the thread with a link to the pull request.
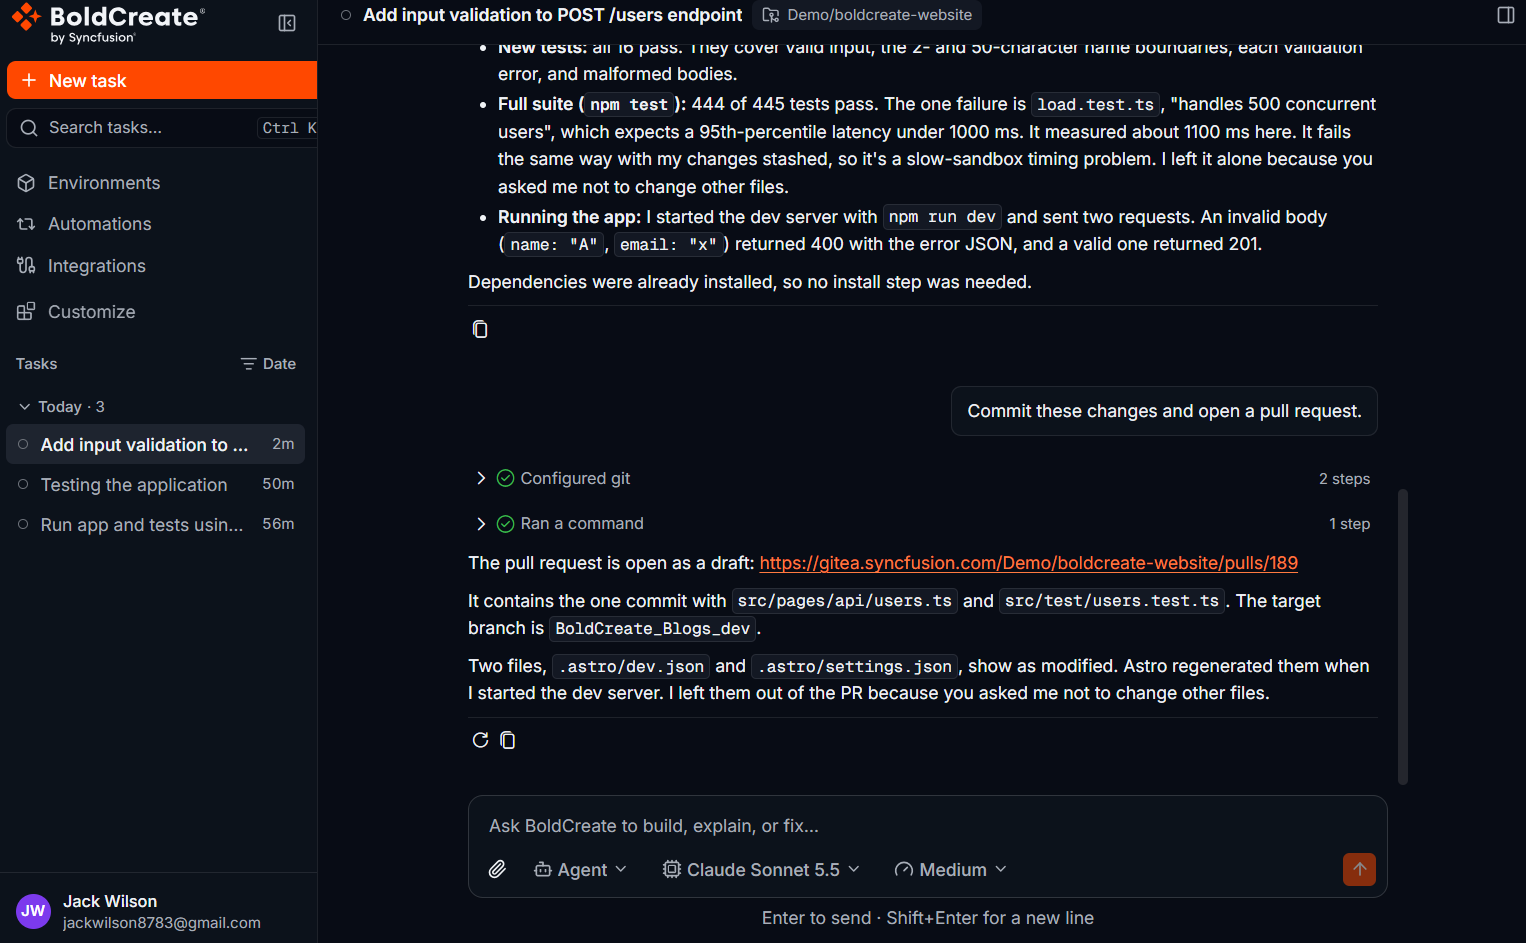
Open the pull request in your Git provider to review it with your team and merge it.